• Hi all and welcome to TheWoodHaven2 brought into the 21st Century, kicking and screaming! We all have Alasdair to thank for the vast bulk of the heavy lifting to get us here, no more so than me because he's taken away a huge burden of responsibility from my shoulders and brought us to this new shiny home, with all your previous content (hopefully) still intact! Please peruse and feed back. There is still plenty to do, like changing the colour scheme, adding the banner graphic, tweaking the odd setting here and there so I have added a new thread in the 'Technical Issues, Bugs and Feature Requests' forum for you to add any issues you find, any missing settings or just anything you'd like to see added/removed from the feature set that Xenforo offers. We will get to everything over the coming weeks so please be patient, but add anything at all to the thread I mention above and we promise to get to them over the next few days/weeks/months. In the meantime, please enjoy!

2 measuring questions .

SteveMP

Sapling
Joined
Jun 18, 2026
Messages
354
Reaction score
317
Name
Steve
LOCATION
San Diego
A couple things i sometimes struggle with in regards to measuring, and best practices.

1. When you want to setup a combi square to a specific line on the rule, how do you do this when you can’t really “see” the line. Like for example in the pic below, its hard to tell if i am seeing the line or the reflection of the line in the stock, then the stock gets in the way. How do you do this accurately?

2. When setting a wheel marking gauge using a square blade, how do you set it when its hard to see? I suppose its not good to let the wheel fall into the groove? I sometimes have to hold it up to the light just right with some backlighting to see when the edge if the wheel is right on the line. Its clear in the pic I take as the iphone camera focuses in and adjusts light and is held close but my eyes from arms length its nowhere near this clear to see.
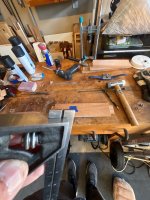


image.jpg

image.jpg
 
Last edited:
Hand tool work very seldom works to measurements. It's extremely rarely that I ever find myself trying to set a marking gauge (or a combination square) to a ruler or tape. I generally find myself working with trial and error on a piece of scrap stock to set up either of them properly. The only advantage I can think of of those wheel gauges is that they mark at the absolute outside end of the shaft, so can be used to set a gauge to the exact thickness of something simply by sitting the tool on the edge of the wood and then dropping the shaft and wheel down to whatever your piece of wood is resting on. Same with a combination square. Honestly, my best advice is to try to avoid ever having to set out anything to measurements.
 
I probably measure a lot more than Mike does (I like to design stuff up front and then I'll use measurements for the early stuff before referencing off whatever I've already done). When I want to measure a distance in from an edge, I find combination squares a pain to use for the same reasons you've mentioned (but also because of the groove for the locking thing being awkward sometimes depending on which way up you want to hold the square).

These are far, far better: https://www.axminstertools.com/axminster-steel-layout-square-900043 / https://amzn.to/3s2VkAk

I use mine so much that I've got two of them now. Anytime I'm working to a measurement from an edge I'll reach for one of them.

As for setting a marking gauge (wheel or otherwise) I rarely need to do it especially accurately (except for the case Mike mentioned of plonking it on top of a board and letting the wheel drop to the bench) so I just eyeball it against a 1 mm scale on a rule and don't worry unduly about how accurate it is. If it needs to be really accurate to a dimension, I'll use the layout square linked above with a knife to mark a line on the edge of a bit of scrap and then drop the wheel into the knife line, push the body up to the edge and lock it down.
 
Yes I’m with Mike, once overall parameters of the thing to be made is set, everything is marked from previously made parts, very rare that I measure after starting out.
There are lots of ways to very accurately transfer sizes from one part to another - usually by touch and a sharp knife. Also apart from where a gap would show a bad fit I don’t think in woodwork that anything has to be exact, just as well Im not making jet engines lol.
 
. The only advantage I can think of of those wheel gauges is that they mark at the absolute outside end of the shaft, so can be used to set a gauge to the exact thickness of something simply by sitting the tool on the edge of the wood and then dropping the shaft and wheel down to whatever your piece of wood is resting on.
They are also really handy when marking out in rebates, I use mine a lot for this.
 
They are also really handy when marking out in rebates, I use mine a lot for this.
Yeah for mortise and tenons the knife wall they make is nice, and for ease of setting for dovetails, lap joints etc.
 
Hand tool work very seldom works to measurements. It's extremely rarely that I ever find myself trying to set a marking gauge (or a combination square) to a ruler or tape. I generally find myself working with trial and error on a piece of scrap stock to set up either of them properly. The only advantage I can think of of those wheel gauges is that they mark at the absolute outside end of the shaft, so can be used to set a gauge to the exact thickness of something simply by sitting the tool on the edge of the wood and then dropping the shaft and wheel down to whatever your piece of wood is resting on. Same with a combination square. Honestly, my best advice is to try to avoid ever having to set out anything to measurements.
While I understand the concept, oftentimes I am following a plan someone made, so its nice to follow along as accurately as possible avoid issues down the road. Also, for repeatability in setting for similar parts later on. Like if i setup some parts where a joint is 1/4” from an edge on 3/4” material, and i need to make another one or replace a part that gets messed up, i’d like to be able to repeat the same setting so they look right.
 
I probably measure a lot more than Mike does (I like to design stuff up front and then I'll use measurements for the early stuff before referencing off whatever I've already done). When I want to measure a distance in from an edge, I find combination squares a pain to use for the same reasons you've mentioned (but also because of the groove for the locking thing being awkward sometimes depending on which way up you want to hold the square).

These are far, far better: https://www.axminstertools.com/axminster-steel-layout-square-900043 / https://amzn.to/3s2VkAk

I use mine so much that I've got two of them now. Anytime I'm working to a measurement from an edge I'll reach for one of them.

As for setting a marking gauge (wheel or otherwise) I rarely need to do it especially accurately (except for the case Mike mentioned of plonking it on top of a board and letting the wheel drop to the bench) so I just eyeball it against a 1 mm scale on a rule and don't worry unduly about how accurate it is. If it needs to be really accurate to a dimension, I'll use the layout square linked above with a knife to mark a line on the edge of a bit of scrap and then drop the wheel into the knife line, push the body up to the edge and lock it down.
Absolutely…I have at least 3. Really useful having one set for this part of a joint, another set for a different setting, rebate whatever. Especially useful when doing repetitive stuff.
 
I probably measure a lot more than Mike does (I like to design stuff up front and then I'll use measurements for the early stuff before referencing off whatever I've already done). When I want to measure a distance in from an edge, I find combination squares a pain to use for the same reasons you've mentioned (but also because of the groove for the locking thing being awkward sometimes depending on which way up you want to hold the square).

These are far, far better: https://www.axminstertools.com/axminster-steel-layout-square-900043 / https://amzn.to/3s2VkAk

I use mine so much that I've got two of them now. Anytime I'm working to a measurement from an edge I'll reach for one of them.

As for setting a marking gauge (wheel or otherwise) I rarely need to do it especially accurately (except for the case Mike mentioned of plonking it on top of a board and letting the wheel drop to the bench) so I just eyeball it against a 1 mm scale on a rule and don't worry unduly about how accurate it is. If it needs to be really accurate to a dimension, I'll use the layout square linked above with a knife to mark a line on the edge of a bit of scrap and then drop the wheel into the knife line, push the body up to the edge and lock it down.
That one looks a lot better than the version I have. I figured this Japanese one would be ok but the little "stop" slips easy and gets out of whack
One i have
 
While I understand the concept, oftentimes I am following a plan someone made, so its nice to follow along as accurately as possible avoid issues down the road. Also, for repeatability in setting for similar parts later on. Like if i setup some parts where a joint is 1/4” from an edge on 3/4” material, and i need to make another one or replace a part that gets messed up, i’d like to be able to repeat the same setting so they look right.
Of course I have exactly these same issues. I take measurement out of it if at all possible, and simply set the distance on something, be it a combination square, a marking gauge, a pair of dividers, or whatever, and leave that set until the job is finished. I have 5 or 6 marking gauges, and on some jobs, most of them are in use. The only issue then is remembering which gauge is giving me which dimension/ mark. I keep off-cuts of all the different stock sizes and rebates etc for reference in case I need to re-make anything later on. Transferring a size from one piece of wood to another is dead easy, so long as you don't try and add a tape measure or a ruler into the mix. Don't allow measurement to confuse you as to the difference between precision and accuracy.
 
Yeah for mortise and tenons the knife wall they make is nice, and for ease of setting for dovetails, lap joints etc.
I don't think they're a lot of use for M&Ts, or for DTs. We shouldn't be referencing off the cut end of a piece of wood. We should be working from shoulders, and those can be all marked at the same time with a knife, or copied each time from a reference piece, again, using a square and a knife. And the wheel gauge is inherently inaccurate, because the shaft doesn't rub along the face of the stock material as it does with an orthodox pin-type marking gauge.
 
I don't think they're a lot of use for M&Ts, or for DTs. We shouldn't be referencing off the cut end of a piece of wood. We should be working from shoulders, and those can be all marked at the same time with a knife, or copied each time from a reference piece, again, using a square and a knife. And the wheel gauge is inherently inaccurate, because the shaft doesn't rub along the face of the stock material as it does with an orthodox pin-type marking gauge.
Well they are good enough for Rob Cosman, and I am not quite up to his level yet. So works fine for me. And the way to set thickness off of the actual stock you are using is super easy.
 
Well they are good enough for Rob Cosman, and I am not quite up to his level yet. So works fine for me. And the way to set thickness off of the actual stock you are using is super easy.
Yeah......Youtube.......It must be right.

I did actually say that the one advantage they have is for setting the stock thickness.
 
@SteveMP
At 70 my vision is not as good as it was 20 years ago therefore I find I need a lot more light and greater contrast to see what I'm doing.

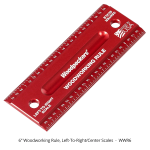
I have one similar to this as an example
1790804031020.png another red
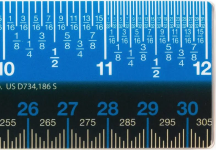
1790804251998.png
1790804462193.png

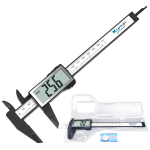
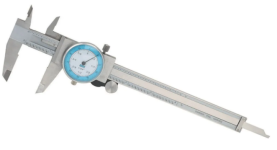
Another method I Use is a digital scale.

Kynup Digital Caliper with Large LCD Screen, 150mm Caliper Measuring Tool​

About £9 from Amazon UK

Lightweight Digital Vernier Caliper, Inch/Millimeter Conversion, Auto-Off Function, Electronic Micrometer Digital Gauge, 6''​

What I like is you can slide the scale tail out left side of picture At the distance that you need reading the digital side and then move the marking knife to the appropriate spot.
1790805031470.png
Note the button will take you from metric back to fractions. On this example if you need decimals there are some other ones that support all three choices Slightly more expensive but it can be helpful.

Hopefully some of this trivia is of some help.
 
@SteveMP
At 70 my vision is not as good as it was 20 years ago therefore I find I need a lot more light and greater contrast to see what I'm doing.

I have one similar to this as an example
View attachment 59045 another red
View attachment 59046
View attachment 59047

Another method I Use is a digital scale.

Kynup Digital Caliper with Large LCD Screen, 150mm Caliper Measuring Tool​

About £9 from Amazon UK

Lightweight Digital Vernier Caliper, Inch/Millimeter Conversion, Auto-Off Function, Electronic Micrometer Digital Gauge, 6''​

What I like is you can slide the scale tail out left side of picture At the distance that you need reading the digital side and then move the marking knife to the appropriate spot.
View attachment 59048
Note the button will take you from metric back to fractions. On this example if you need decimals there are some other ones that support all three choices Slightly more expensive but it can be helpful.

Hopefully some of this trivia is of some help.
You know what, i did read about the black ruler in one of Chris Schwarz's gift guide years ago, but these were sold out for months after he posted, like everything else sells out that he posts. https://blog.lostartpress.com/2021/10/23/anarchist-gift-guide-day-3-spi-black-rules/

For the digital caliper, i did buy one of those with the large LCD that does all 3 and its great for visibilty. My only complaint is that its "too accurate" for fractions so hard to tell what its close to. Like for example it will say like 37/64 and i have to really think what that is close to one way or the other. Whereas my analog one that has fractions is easier to tell the nearest fraction. This one is my fractional https://www.harborfreight.com/6-in-fractional-dial-caliper-63655.html
 
@SteveMP
I have an older version of the Harbor Freight Pittsburgh analog Scale It's greater than 10 years old It's also become difficult to read so it spends more time in the drawer.
1790806662452.png Harbor Freight current price is $36 American

Here's one from Amazon UK
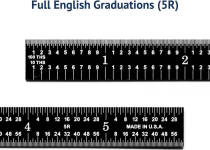
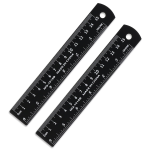
2Pcs 6 Inch Ruler Set Metal Dual Scale Metric Imperial Straight Ruler Easy to Read

1790806949797.pngAbout £5 also at Amazon
Lots of different searches can pull up one similar to this one
15cm/6" Metal Ruler, 2 Pack Aluminum Alloy Rulers with Centimeters, Millimeters, Inches and Conversion Table Straight Edge Ruler for Writing Machinist Drafting, Black

1790807642318.png This one's from the link that you provided.

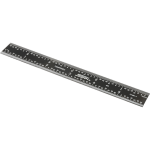
at MSC $15 Steel Rule: 6" OAL, 4R Graduation, Rigid, 3/4" OAW Black, Chrome Finish, 1/16", 1/32", 1/64" & 1/8" Graduation
 
@SteveMP
At 70 my vision is not as good as it was 20 years ago therefore I find I need a lot more light and greater contrast to see what I'm doing.

I have one similar to this as an example
View attachment 59045 another red
View attachment 59046
View attachment 59047

Another method I Use is a digital scale.

Kynup Digital Caliper with Large LCD Screen, 150mm Caliper Measuring Tool​

About £9 from Amazon UK

Lightweight Digital Vernier Caliper, Inch/Millimeter Conversion, Auto-Off Function, Electronic Micrometer Digital Gauge, 6''​

What I like is you can slide the scale tail out left side of picture At the distance that you need reading the digital side and then move the marking knife to the appropriate spot.
View attachment 59048
Note the button will take you from metric back to fractions. On this example if you need decimals there are some other ones that support all three choices Slightly more expensive but it can be helpful.

Hopefully some of this trivia is of some help.
I like the contrast with the first two black scales but using them for woodworking layout would drive me bonkers.
 
I find my long reach angle poise lamp invaluable for such.
Unlike the little thing, which is no good at anything for multiple reasons.
(i.e. it's completely unuseable.)

One being the shade is much too small to provide decent lighting,
(a few inches of extra circumference makes a huge difference!)

The second reason is that the arms are much too short, this stops the lampshade from being positioned from behind, unless you are ok with clutter on yer bench, though often even if the lamp is placed as close as can be, it's position might not cut the mustard...
and who wants to deal with that!
If it isin't perfect, as in the base mounted at the correct height, as to not fight with it's design,
That can be easily positioned anywhere on the bench, single handedely,
then there's a good chance one might not get along with it.
I mounted one before, with the base at chest height, it simply doesn't work at that height.

The eyes don't like it, when the light is facing the user, especially for those kind of jobs, whilst anything beyond two or three feet away, won't give optimal comfortable lighting, and don't get me started on any sort of blue LED lighting!.

Thats my 2 cent's regarding this extremely important tool.
SAM_4866.JPG
 
Last edited:
I don't have a wheel gauge, but at school I was taught a reliable method for setting a marking gauge. First, set it to what looks right, then partially tighten the thumb screw. Put the end of your wooden rule against the stock of the gauge and see if the point of the gauge is in the right place. If not, gently tap the stem of the gauge on the bench and re-check. If you've gone too far, tap the other end. When it's right, fully tighten the thumb screw. This way, you're never chasing a setting with the stock loose.

It takes more time to describe it than it takes to do it!
 
And the wheel gauge is inherently inaccurate, because the shaft doesn't rub along the face of the stock material as it does with an orthodox pin-type marking gauge.
I think that depends on the wheel gauge. On the first (cheap) one I bought, it had a huge cutter that was a much bigger diameter than the shaft. That was horrible to use for exactly the reason you've described. I then bought a Veritas one and the cutter is only very slightly larger than the shaft: enough to cut into the wood, but only just, so once you've pushed it into the wood the shaft rubs along the face of the stock material and it's much easier to use. Of course the downside is that the cutter won't last through as many sharpenings as the bigger diameter ones, but they don't need sharpening very often.
 
A couple things i sometimes struggle with in regards to measuring, and best practices.

1. When you want to setup a combi square to a specific line on the rule, how do you do this when you can’t really “see” the line. Like for example in the pic below, its hard to tell if i am seeing the line or the reflection of the line in the stock, then the stock gets in the way. How do you do this accurately?

2. When setting a wheel marking gauge using a square blade, how do you set it when its hard to see? I suppose its not good to let the wheel fall into the groove? I sometimes have to hold it up to the light just right with some backlighting to see when the edge if the wheel is right on the line. Its clear in the pic I take as the iphone camera focuses in and adjusts light and is held close but my eyes from arms length its nowhere near this clear to see.


View attachment 59043

View attachment 59044
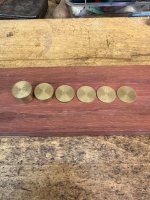
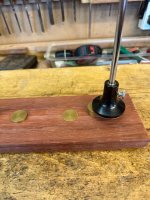
Easy peasy, 'cos what you want is a set of these bad boys:

IMG_8609.jpeg

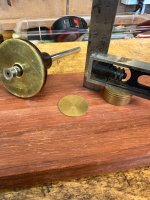
...wot I recently re-discovered and they're absolutely invaluable. This set is in brass from Axminster and is quite old, but there's a vast selection on Amazon in both metric and imperial sizes. So I want to set f'instance, a wheel gauge to 11.5mm?

IMG_8610.jpeg

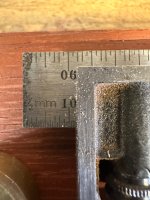
Stack up the 'chips' to make 11.5mm and use as above by dropping the cutter vertically down until it rests on the wood. The same procedure for using an adjustable square:

IMG_8611.jpeg

The square reads exactly 11.5mm (difficult to see from the pic, but it does):

IMG_8612.jpeg

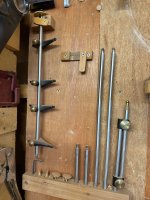
...and the wheel gauge will also be exactly 11.5mm. It's only very rarely do I have to use a rule for initial setting out, but as @Mike G and @Cabinetman have mentioned, most if not all dimensions from a project in progress are lifted directly from it, so need to use a rule. For taking measurements off a project a set of these things:

IMG_8613.jpeg

....from Veritas is superb! - Rob
 
For me it completely depends on what I'm trying to mark - and from what measurement that needs to be from -which sounds a bit nebulous - but really what I mean is that most of my own work comes from referential measurements rather than ruler or tape measure definitions.

I almost exclusively only use the wheel marking gauge for small box making - and for those the reference is the size of the prepared box sides. It doesn't matter if the stock is 16.3mm/16.5mm.16.7mm if I was "targeting 16.5mm thickness - (as long as the opposite sides are *the same*) - and then use the actual wooden pieces as the reference for the actual markings. The sides normally come from a (fairly) accurate table saw and mitre saw cut - then hand planed "to thickness" - and then use those pieces as the reference material.

Similarly for "reference" when transferring one measurement to several places using the combi square - my reason is to get one marking relatively accurate from "design intent" and then use a marking knife in the reference measure line and then set the combi square to that edge-to-marking knife reference.

Come to think of it I use combi square for a whole host of consistent markings - some of them are by setting centre of the rule line to the face of the combi square body - some of them are "by eye". Only yesterday I installed a few small LED panel light bodies in my shed joists - the first one I placed approximately by eye, penned a line in the bracket screw-hole, then set the combi-square to that line - which isn't 100% acurate - which is no matter, because I just make a new pen line around the same place as the approx measure and then repeat to get a consistent and horizontal fit across two screws per bracket...

TLDR: the vast majority of combi square and marking gauge work is by reference to other parts instead of from a ruler or tape measure/
 
I don't have a wheel gauge, but at school I was taught a reliable method for setting a marking gauge. First, set it to what looks right, then partially tighten the thumb screw. Put the end of your wooden rule against the stock of the gauge and see if the point of the gauge is in the right place. If not, gently tap the stem of the gauge on the bench and re-check. If you've gone too far, tap the other end. When it's right, fully tighten the thumb screw. This way, you're never chasing a setting with the stock loose.

It takes more time to describe it than it takes to do it!
That’s what I have always done.
 
I find my long reach angle poise lamp invaluable for such.
Unlike the little thing, which is no good at anything for multiple reasons.
(i.e. it's completely unuseable.)

One being the shade is much too small to provide decent lighting,
(a few inches of extra circumference makes a huge difference!)

The second reason is that the arms are much too short, this stops the lampshade from being positioned from behind, unless you are ok with clutter on yer bench, though often even if the lamp is placed as close as can be, it's position might not cut the mustard...
and who wants to deal with that!
If it isin't perfect, as in the base mounted at the correct height, as to not fight with it's design,
That can be easily positioned anywhere on the bench, single handedely,
then there's a good chance one might not get along with it.
I mounted one before, with the base at chest height, it simply doesn't work at that height.

The eyes don't like it, when the light is facing the user, especially for those kind of jobs, whilst anything beyond two or three feet away, won't give optimal comfortable lighting, and don't get me started on any sort of blue LED lighting!.

Thats my 2 cent's regarding this extremely important tool.
View attachment 59055
This is actually a great point and need to get something likr this. Was looking for an old swedish one but they can be pricey. I’m worried the cheap amazon ones won’t last. But thr light in my garage is crap, and its fighting the outdoor light coming through the windows etc
 
For me it completely depends on what I'm trying to mark - and from what measurement that needs to be from -which sounds a bit nebulous - but really what I mean is that most of my own work comes from referential measurements rather than ruler or tape measure definitions.

I almost exclusively only use the wheel marking gauge for small box making - and for those the reference is the size of the prepared box sides. It doesn't matter if the stock is 16.3mm/16.5mm.16.7mm if I was "targeting 16.5mm thickness - (as long as the opposite sides are *the same*) - and then use the actual wooden pieces as the reference for the actual markings. The sides normally come from a (fairly) accurate table saw and mitre saw cut - then hand planed "to thickness" - and then use those pieces as the reference material.

Similarly for "reference" when transferring one measurement to several places using the combi square - my reason is to get one marking relatively accurate from "design intent" and then use a marking knife in the reference measure line and then set the combi square to that edge-to-marking knife reference.

Come to think of it I use combi square for a whole host of consistent markings - some of them are by setting centre of the rule line to the face of the combi square body - some of them are "by eye". Only yesterday I installed a few small LED panel light bodies in my shed joists - the first one I placed approximately by eye, penned a line in the bracket screw-hole, then set the combi-square to that line - which isn't 100% acurate - which is no matter, because I just make a new pen line around the same place as the approx measure and then repeat to get a consistent and horizontal fit across two screws per bracket...

TLDR: the vast majority of combi square and marking gauge work is by reference to other parts instead of from a ruler or tape measure/
Yeah I do similar, like you said it depends. But have done all these different techniques at some point. The question in general was say following a plan for say a cabinet with detailed drawings with measurements of all pieces and joinery etc.
Like for example this part of a plan:
IMG_2450.jpeg

Easy peasy, 'cos what you want is a set of these bad boys:

View attachment 59060

...wot I recently re-discovered and they're absolutely invaluable. This set is in brass from Axminster and is quite old, but there's a vast selection on Amazon in both metric and imperial sizes. So I want to set f'instance, a wheel gauge to 11.5mm?

View attachment 59061

Stack up the 'chips' to make 11.5mm and use as above by dropping the cutter vertically down until it rests on the wood. The same procedure for using an adjustable square:

View attachment 59062

The square reads exactly 11.5mm (difficult to see from the pic, but it does):

View attachment 59063

...and the wheel gauge will also be exactly 11.5mm. It's only very rarely do I have to use a rule for initial setting out, but as @Mike G and @Cabinetman have mentioned, most if not all dimensions from a project in progress are lifted directly from it, so need to use a rule. For taking measurements off a project a set of these things:

View attachment 59065

....from Veritas is superb! - Rob
Brilliant!! Thats actually a great idea thank you
 
Yeah I do similar, like you said it depends. But have done all these different techniques at some point. The question in general was say following a plan for say a cabinet with detailed drawings with measurements of all pieces and joinery etc.
Like for example this part of a plan:
View attachment 59072


Brilliant!! Thats actually a great idea thank you
It's just so easy for initial measurements and the setting on the wheel gauge or adjustable square is almost guaranteed to be totally accurate - Rob
 
Back
Top