• Hi all and welcome to TheWoodHaven2 brought into the 21st Century, kicking and screaming! We all have Alasdair to thank for the vast bulk of the heavy lifting to get us here, no more so than me because he's taken away a huge burden of responsibility from my shoulders and brought us to this new shiny home, with all your previous content (hopefully) still intact! Please peruse and feed back. There is still plenty to do, like changing the colour scheme, adding the banner graphic, tweaking the odd setting here and there so I have added a new thread in the 'Technical Issues, Bugs and Feature Requests' forum for you to add any issues you find, any missing settings or just anything you'd like to see added/removed from the feature set that Xenforo offers. We will get to everything over the coming weeks so please be patient, but add anything at all to the thread I mention above and we promise to get to them over the next few days/weeks/months. In the meantime, please enjoy!

Banjo WIP

timothyedoran

Sapling
Joined
Jan 21, 2017
Messages
253
Reaction score
0
Location
Bath
Here will be details if my latest project, a banjo.

The plans are available at https://www.banjohangout.org/archive/300493 and it all looked quite feasible. This thread over on Banjo Hangout has loads of detail and it really was very kind of the author Rudy to write it. I have made a couple of cigar box guitars so this is the next small step up.

I am making the body from a Remo hand drum with an ash neck and mystery reclaimed mahogany type wood for the fret board. Why ash, well that's what I have some of. I have previously made a couple of cigar box guitars, and this banjo is similar in construction.

For tools I have a purposefully simple hand tool only approach but I do own a hand circular saw and power drill. All the planing and jointing will be with hand tools.

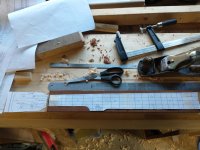
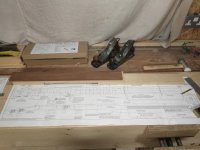
Here's the plan and the wood cut and planed up:
IMG_20210219_234300382.jpg

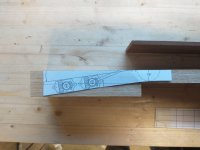
Next was to glue the headstock and tail bit (might not be the technical terms):
IMG_20210226_171342275.jpg

Headstock cut to the correct angle:
IMG_20210228_152532817.jpg

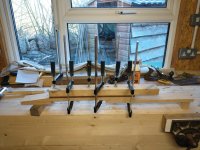
Then glue the fretboard in place. More clamps needed?
IMG_20210228_152553965.jpg

Next will be cutting out the neck shape.
 

Attachments

  • IMG_20210226_171342275.jpg
    IMG_20210226_171342275.jpg
    186.4 KB · Views: 5,925
interesting way of doing the headstock to avoid a scarf joint. can't see a reason not to do it that way.

are you going to be all modern and fit a truss rod in the neck?

should be an interesting project, keep the updates coming (says me who has reached a stall with his guitar build :) )
 
novocaine":jsn972zz said:
interesting way of doing the headstock to avoid a scarf joint. can't see a reason not to do it that way.

are you going to be all modern and fit a truss rod in the neck?

should be an interesting project, keep the updates coming (says me who has reached a stall with his guitar build :) )

I'm actually a bit further on than the photos suggest, but need to find 5 minutes to update the post.

The glue joint is nearly invisible, or maybe only visible if one looks for it expecting to see a scarf joint. I also think it's easier to make because it starts off square and then gets shaped.

No truss rod in this design, which I think will limit me to nylon strings. It's a deliberately simple design hopefully suited to a beginner like me.

I will check out your guitar build if you have a thread. But I suspect that your guitar will be way more complicated than this will be.
 
The fingerboard glue up worked well and it stayed flat. The next step has been to cut out the shape for the neck using the paper template as a guide.
IMG_20210301_150641370.jpg

Then uncut it out mostly with a panel saw but the top bit between the 5th tuner and the headstock had to be cut with a fretsaw. I made this thingy for fretsaw work and it makes cutting much easier.

IMG_20210303_224101200.jpg

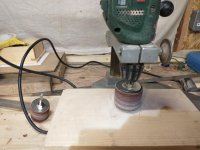
Then using a drum sanding attachment for my drill I rounded the corners.
IMG_20210306_214432338.jpg

Now starting to look banjo shaped
IMG_20210308_122445491.jpg

Next will be to cut the dowel end and make a corresponding slot in the drum.
 
A bit more progress. The rough shaping is now complete.

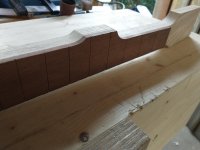
I have cut the slot in the drum for the neck to slide in to.
IMG_20210323_212836060.jpg

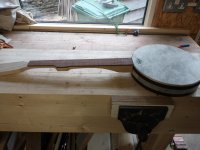
The neck slides all the way into the drum. It now looks a bit like a banjo.
IMG_20210327_153839520.jpg

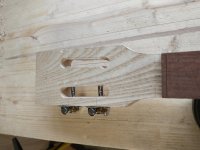
I have also cut the slots for the tuners. I drilled two holes and sawed between them with a fret saw, then cleaned up with a chisel.
IMG_20210328_145928694.jpg

IMG_20210328_154653033.jpg

That's all for now folks
 
Getting there. Always nice when it starts to feel like an instrument instead of a collection of parts.
 
I've made loads of progress since my last post, in fact I have finished and I have a complete and playable banjo.

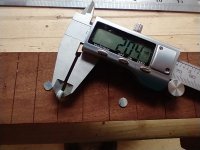
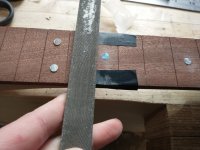
Continuing from my post last time I cut the fret slots using a pull saw. No photo of this as its not very exciting. Then I drilled holes and inlayed some paua shell fret markers. I drilled the holes with an egg whisk drill very slowly, a little at a time until I got to 1.8ish mm deep. Then filed the shell flat and scraped with a Stanley knife blade. I had heard that masking tape was good for protecting the fretboard when filing but actually electrical tape is a bit more durable and worked better

IMG_20210331_084655785.jpg

IMG_20210331_090448366.jpg

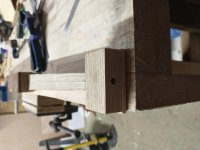
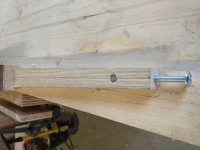
Next I drilled the barrel bolt and bolt holes. I was not looking forwards to this as a little bit of misalignment would be very bad. I made a jig to keep things straight as directed in the plans and it all worked perfectly. It really proves that its worth the time to make a jig even if its single use.

IMG_20210403_225358479.jpg

IMG_20210404_131415682.jpg

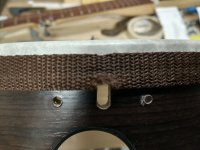
Then the last bit of wood work was to cut the slot for the bolt to fit in. By cutting a slot rather than a single hole I was able to have loads of adjustment to get the action just right.

IMG_20210426_222729655_HDR.jpg

Then all that was left was the hammer in the frets, level them up and assemble.

IMG_20210424_112913462.jpg

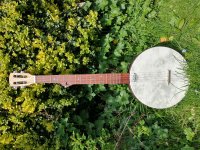
Here's the finished banjo finished with bees wax. Im really pleased with how it came out. Massive shout out of thanks to Rudy on Banjo Hangout for both providing such easy to follow plans and also to responding in real to some emailed questions.
IMG_20210429_130205682_HDR.jpg
 
Its not a banjo till its had duelin banjos played on it. Right now its a drum with strings. Its the law im afraid. :lol:

Looks very good. Great job.
 
Malc2098":13iiv066 said:
Cracking stuff!

Thanks. How is your instrument coming along?

novocaine":13iiv066 said:
Its not a banjo till its had duelin banjos played on it. Right now its a drum with strings. Its the law im afraid. :lol:

Looks very good. Great job.
That's the next challenge, learn how to play it.
 
timothyedoran":3rxcjfla said:
Thanks. How is your instrument coming along?

Both ukulele bodies and necks are ready for final sanding. Just having a break to help out with some family stuff before I get back to working on them.

I'm thinking of having a go at resin pore filling.
 
Malc2098":3mv9999p said:
timothyedoran":3mv9999p said:
Thanks. How is your instrument coming along?

Both ukulele bodies and necks are ready for final sanding. Just having a break to help out with some family stuff before I get back to working on them.

I'm thinking of having a go at resin pore filling.

Resin pore filling would give it a nice smooth feel, but is it quite a bit of work?
I did a hot bees wax finish and it feels nice and was super quick but has little water resistance. I fear I am going to regret it.
 
timothyedoran":fkao6nes said:
Resin pore filling would give it a nice smooth feel, but is it quite a bit of work?
I did a hot bees wax finish and it feels nice and was super quick but has little water resistance. I fear I am going to regret it.

You'll just have to not spill any beer on it!!!

I didn't find it easy using grain filler on the 12 String. I shall give the resin a go. I'm not pushed for time and can take my time at each stage. Using the correct resin and applying the correct amount, each coat should be dry in a few hours, so the two coats that would need to fill and the sanding could be achieved in a day. I hope.
 
Back
Top