• Hi all and welcome to TheWoodHaven2 brought into the 21st Century, kicking and screaming! We all have Alasdair to thank for the vast bulk of the heavy lifting to get us here, no more so than me because he's taken away a huge burden of responsibility from my shoulders and brought us to this new shiny home, with all your previous content (hopefully) still intact! Please peruse and feed back. There is still plenty to do, like changing the colour scheme, adding the banner graphic, tweaking the odd setting here and there so I have added a new thread in the 'Technical Issues, Bugs and Feature Requests' forum for you to add any issues you find, any missing settings or just anything you'd like to see added/removed from the feature set that Xenforo offers. We will get to everything over the coming weeks so please be patient, but add anything at all to the thread I mention above and we promise to get to them over the next few days/weeks/months. In the meantime, please enjoy!

DBT85's 30m2 build during lockdown 1.0

DBT85

Seedling
Joined
Jan 7, 2016
Messages
40
Reaction score
0
Location
Pershore, Midlands
I've been meaning to post this for quite some time. Some may have seen it all elsewhere but I figured it's only fair to share. I'll give you the same outline as the other place so you can see were I was headed from the off but there is room for a little less of the later waffle since figuring it all out. I'll try and include any pertinent information but it might take me a while to get through it all so please bear with me. Needless to say it's all built now. Enjoy!

22/05/2020 - Ordering begins
27/05/2020 - Groundworks Begin
03/06/2020 - Concrete is down
06/06/2020 - Bricklaying starts
12/06/2020 - Framework begins
15/06/2020 - Walls are up
22/06/2020 - Framing complete
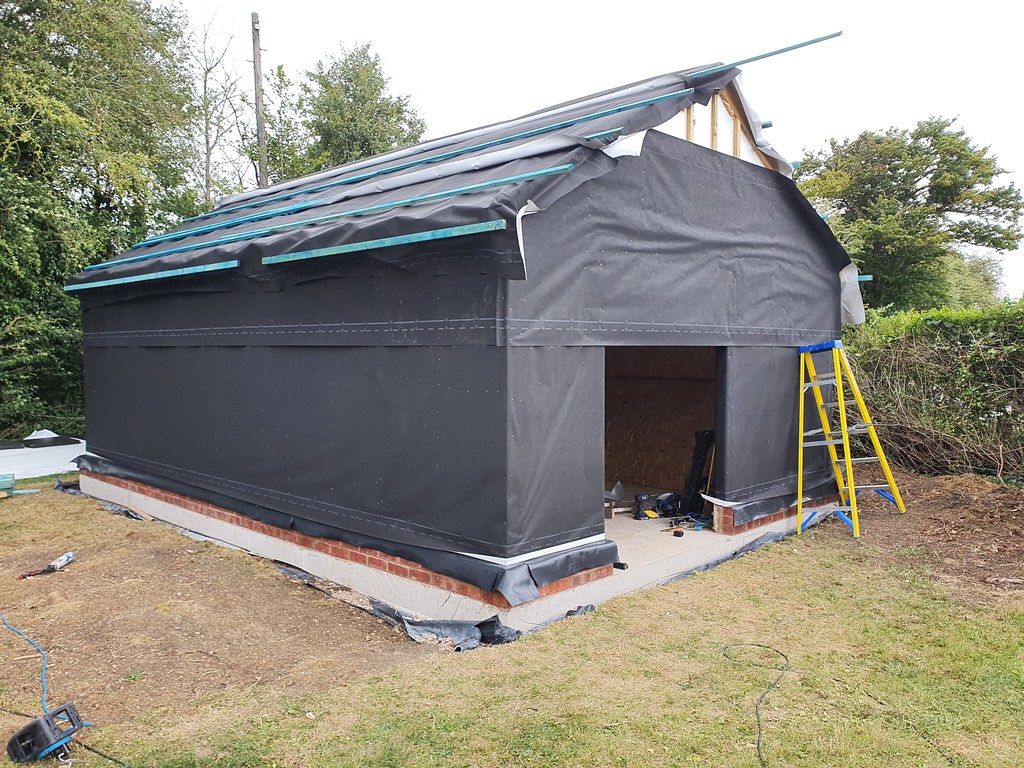
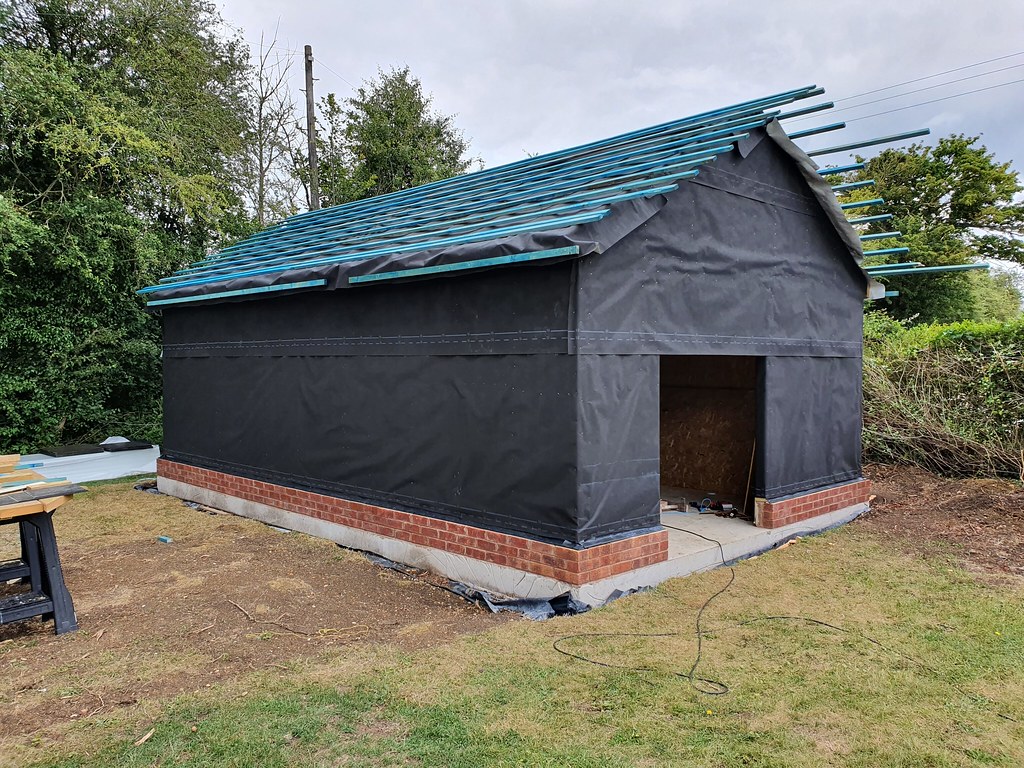
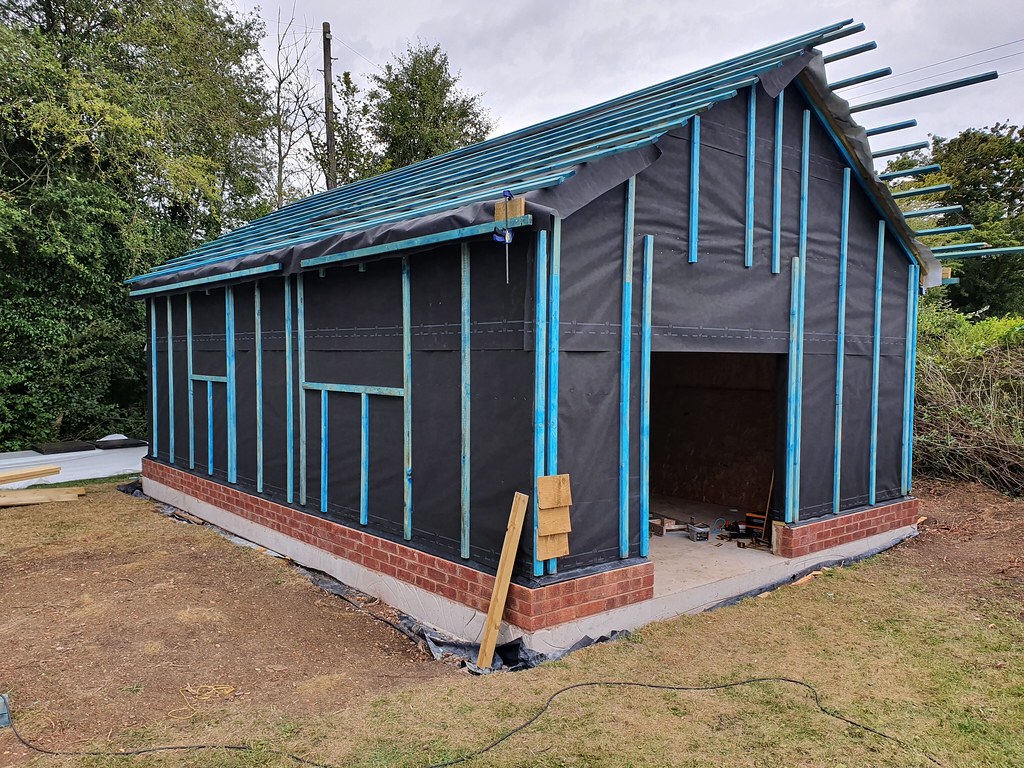
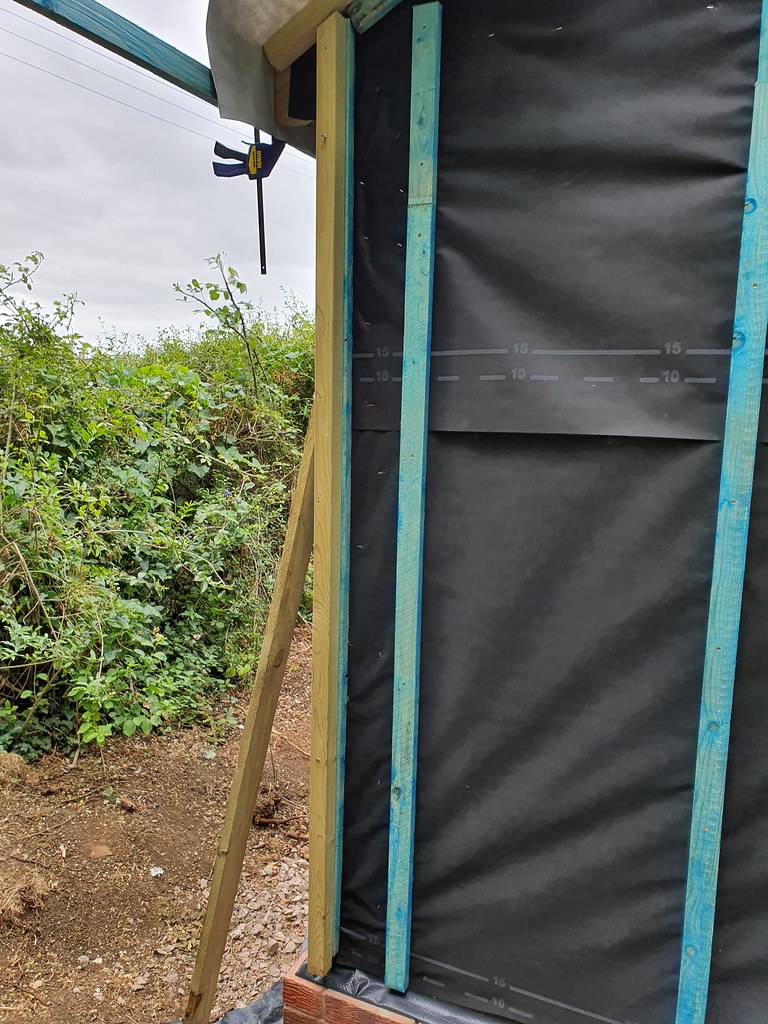
25/06/2020 - Roof insulated and everything membraned
15/07/2020 - Roof tiled
19/07/2020 - Inside painted
12/08/2020 - Lights up
01/09/2020 - Cladding painting/fitting begins
22/09/2020 - Power sorted
23/09/2020 - Doors fitted
29/09/2020 - Cladding Finished
13/10/2020 - Flooring down
15/10/2020 - Locks on, Guttering sorted, Bargeboards done
16/10/2020 - Moving day!

Time Lapse videos
Part 1 - Site clearance
Part 2 - Digging a hole
Part 3 - Filling it up
Part 4 - Brick and Block
Part 5 - Framing
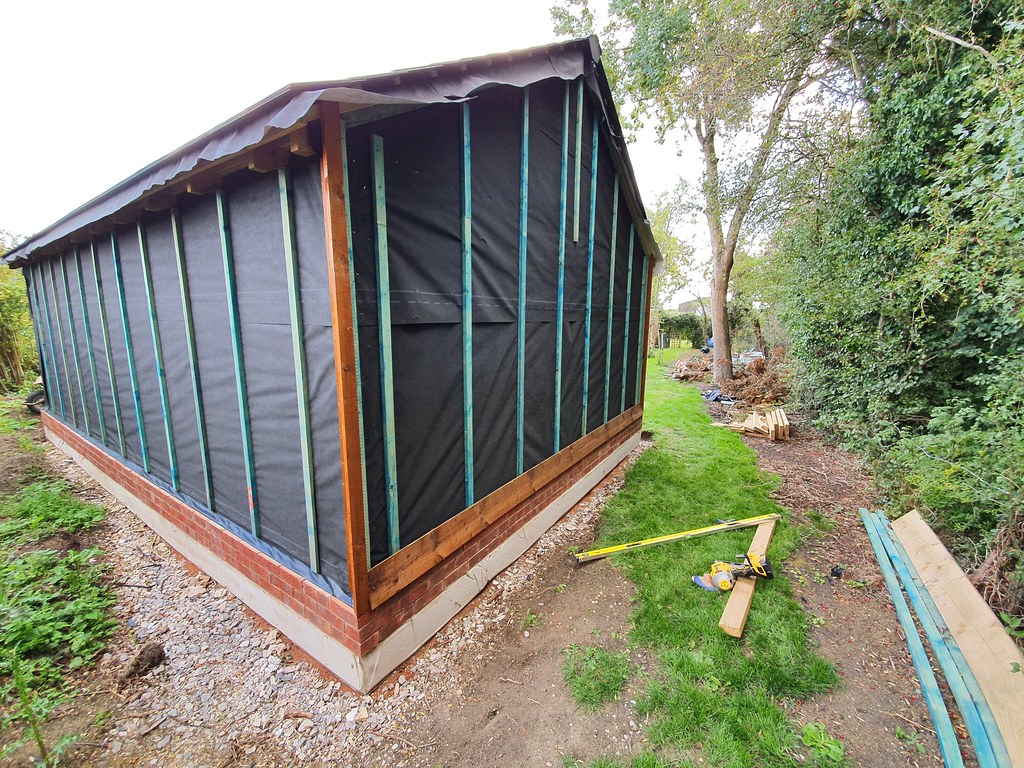
Part 6 - OSB, insulation, membrane and battens
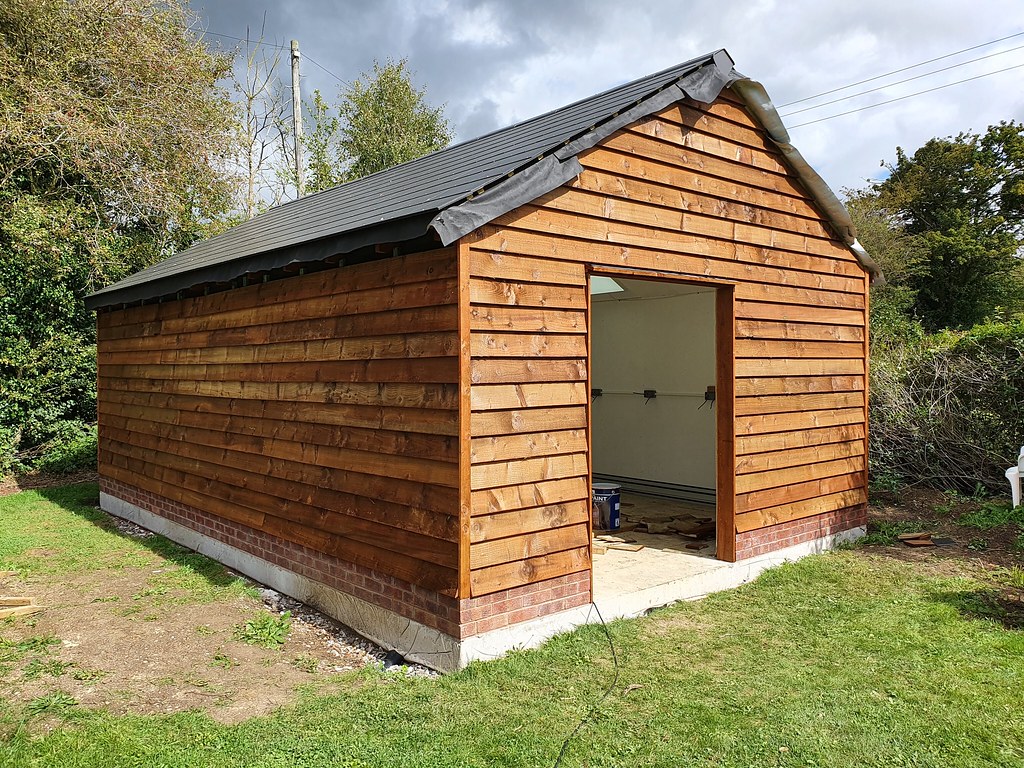
Coming soon (eventually) Part 7 - Roofing and cladding

Let me take you back to 1 year ago. March 23rd 2020 - A world in crisis...

Well while Coronavirus may almost certainly put an end to any hope I had of getting this done in 2020 (I'm a freelancer who broadcasts sport...so its going to be a long year!), I figured I'd start getting things down and plans on show so that I can find out what I'm going to be doing wrong and fix some of it before I get there. That'll all also help me budget better and get more ideas on various stages. Needless to say I've read up a lot on other threads!

Right now I have a workshop in my house, a room that's around 3x4.5m in size. Its warm and dry and a nice space, but it also ends up being a room for "we need to tidy up where can we put this". It's also next to my kids room so I basically can't get in there after 7pm. On top of that, this room and my 3x3m office are basically the home of all my tools. The plan is to house everything in the workshop and then just keep a tool tote in the house for the small jobs. That frees up 2 rooms in the house for more junk, ahem, useful things.

After reading the many threads and trying to pick up tips from them all in turn, I've been making models of the workshop in sketchup as much for something to do as for planning. This may transition to Fusion 360 depending on boredom levels with no work and time to kill. It may also make some aspects easier if changing the design.

Considerations
  • Build it Mikes way
  • Clay sub soil
  • Slab will be 25m from the nearest point a truck can get to
  • No building regs

Features
  • pitched roof
  • double door
  • no windows (this could change)
  • fully insulated
  • plenty of power
  • ethernet

Thread plan
  • Initial plans
  • you all explain why I'm wrong and or stupid
  • updated plans
  • detailed step by step on what I'll have to do/get and when
  • many questions/suggestions
  • mother of all cut lists and shopping lists
  • many photos of it going wrong

Initial Plans
The garden currently features a tatty old shed that has many many holes in although oddly none in the roof! Weather, flora and fauna have all taken their toll and its time to get it cleared of my father in laws tat and get the site cleared. 2 Birch trees may need to be redistributed to either another part of the garden or the log pile. The wife wants them saved if possible.


FLQ5BOE.png
OMopDif.png

The Workshop
I want to maximise the size before needing to adhere to building regs so will be staying under 30m2 internal. As I want to build over 2.5m in total height the workshop needs to be either 2m from any boundary or pass PP. Either are an option at this stage.

I'm looking at a pitched roof in the region of 30 degrees (7/12 pitch), a nice wide double door as the entry way in one of the gable end walls and at the moment no windows (I prefer controlled light, more wall space, less heat loss and less opportunity for thieving) however I may relent and put some in the long wall facing the garden with an internal shutter of some kind.

With a rough building length of 6.5m , the rafter ties (where used) will be placed as high as allowed to give me more head room while also offering some storage space. This will also reduce the size needed for the ridge beam as it won't have to span 6.5m but instead a shorter distance TBC. The main house also features this style of rafter ties and I wish when the extensions were done 30 years before we moved in they had done the same it really does make a room feel bigger! Alas flat roofs prevail.

Power and network will be trenched in (with a gap between them) approx 25m from the house with my electrician to give me the electricity cable spec. We could probably get away with 6mm 2 core SWA just fine but will most likely be 10mm 2 core SWA to keep the regs happy. We have a TT supply so a earth rod will have to be installed near the workshop negating the need for 3 core from the CU.

As much as I detest surface mounted electrics and wiring in conduit they do offer variability and ease of install. My guy is happy to leave me to the grunt work and to just turn up when the bits all need joining and testing.

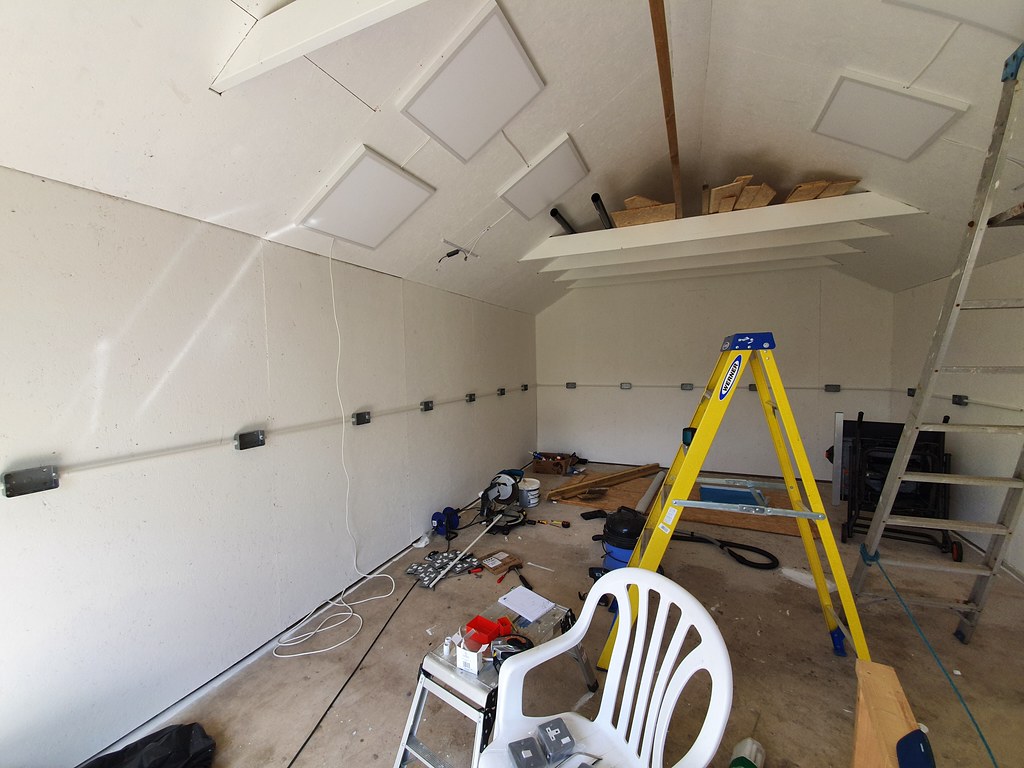
Many sockets on walls and a few in the centre of the floor. Because sockets are life. Panel LED lighting throughout.
 
The Floor
The workshop is going to have a concrete slab likely in the region of 200mm - 250mm thick. This is in part due to the close proximity of trees. I believe Mike suggested I put A142 mesh 50mm from the top and bottom. It is as yet unknown on how much hardcore will be required underneath. I have not yet dug an exploratory hole to see what I have under the grass. While I'm 100% certain its clay less than 15cm down, the bigger question is root systems from the adjacent trees. If this is the case then I could be looking at about 13 bags of type 1 and 7-8 cubes of concrete. The bags I can get lifted into the garden on some farm machinery, but the concrete will have to be lugged over, most likely in a dumper because pipper barrowing it all.

Since I won't be using it all day every day my plan is to not try and use the thermal mass of the slab. I'll insulate over it and then have a floating floor on top of the insulation. Were it to be used more regularly I might consider an insulated slab. PIR is something we have here in spades and can get readily for very reasonable prices. I can use that to also leave a small gap to run some sockets into the middle of the floor.

The walls
Walls to be constructed on 600 or 610 centres depending on the sheet goods from 100x50 treated timber. Single top plate as rafters will also be on the same spacing. Current plan calls for a big double door hole in one gable end wall and no window holes, but the latter might yet change. I shall annoy Mike by using the word header rather than lintel in the event that I do add windows.

Internally lined with 11mm OSB, filled with PIR board and sheathed in some kind of feather edge. Regular treated will of course be cheapest but if money were flush I might spring for something more exotic. Much like the roof options below, you're looking at 3x the price for Siberian Larch over regular treated wood. I don't know enough about whether you really can just leave Larch to do its thing (and so save on painting/maintenance) or not.

The roof
Also constructed on 600 or 610 centres this time from 150x50 treated timber on a 30 degree 7/12 pitch. Rafter ties to be used in places to add storage and reduce the size of ridge beam needed. Spanning 6.5m clear would need something substantial. I'm not sure how easy its going to be be to get hold of a beam that long even without it being that fat!

Like the walls, the internals would be lined in 11mm OSB so even if some scrote were to lift the tiles, progress is going to be hampered while also giving plenty of fixing space inside for things and stuffs.

Roof would be covered in either Onduline or a Decra/Metrotile type covering. The latter being about 3x the price of the former may force my hand. I'd rather spring for the better roof than the better wall cladding if I had to choose.

The contents
Right now the contents for this workshop are going to be an array of metal shelving units that currently live in my office, covered in various tools, paint, storage containers for plumbing/decorating/tiling/electrical paraphernalia, as well as the contents of my existing workshop. That comprises a English style workbench made to Paul Sellers design, and a custom MFT assembly table/wood storage unit not unlike the one that MacLellan uses (the Gosforth Handyman), just with more holes in. Also there is a very cheap Silverstone drill press, a Record Power BS250, an old Record Power DX4000 (it's blue it's that old!), a Triton spindle sander and a Record Power BDS150 belt/disk sander and a recently acquired (yesterday) Evolution table saw and Triton planer/thicknesser. Naturally in time I'd be swapping out some of those for more substantial units.

The Budget
I don't plan on starting this until I have funding in place. I really don't want it dragging out for months on end because I'm waiting for a little money to finish x or y.

If I were to go bare basics for the roof and walls I estimate I could get the whole project done for £5-6k. That's around £1400 for the base, £1300 for the timber, £1200 for the cladding and the rest taken care of in electrics, hire costs, dpm, dpc etc. As I mentioned earlier PIR board we have here in abundance and if I recall we last bought a load of about 30 50mm sheets for something like £130? I also have bricks a plenty so some saving is made there. I do also have a lot of clay roof tiles but many have seen attention from the frost monster. I'd rather not use them but they are an option.

So far the only quote I've had for concrete was 7m3 for £1280 :shock: Mostly because they only have 6m3 trucks and so I'd need 2 with one being mostly empty. I'll get a few more quotes I think!

I know that was a great wall of text with not nearly enough pics, but they will follow I promise!
 
Yeah, this one went rather well, I think. I'm looking forward to seeing you cut a window or two into it, and to seeing the interior kitted out.
 
Mike G":21a2zfor said:
Yeah, this one went rather well, I think. I'm looking forward to seeing you cut a window or two into it, and to seeing the interior kitted out.
Didn't get as far as windows yet Mike, that's a job for this year. Interior is ongoing as I need it or get time not needing to be spent on other things! I know I've said it before but I can't thank you enough for the help and advice throughout the build.

I'll get the next bit up shortly.
 
I've been in 2 minds over the PP. On the one hand its just easy to do what I want and not have to faff with it. On the other hand with the shape of the garden and length of the workshop, to keep it all a minimum of 2m from the boundary would mean the far corner would actually be nearer 3m from the boundary. It then starts to get silly when you then add in overhangs and gutterings.

In addition, when I started to look at getting the plan the other day I noticed that the OS map of our property doesn't match what is actually here. The second extension was put on this house in 1985 (by the previous owners) and the OS maps don't show it. I don't know if it's relevant but it's one more thing I'd have to chase up and find out about. I'd not want to submit anything only for a visit to point out that I have a 70m2 extension on the back of the house that isn't on the OS map (but which definitely had permission).

In my current make-it-up-as-I-go plan the overhangs are 250mm on either side and 300mm out the back and 600mm out the front. As I said, I'm literally making it up as I go. I had an idea of having a kind of deck area under the roof (at a shallower angle) to tie the building into the garden a bit more. That corner of the garden also gets sun later in the day which might make it nice. Again its added cost and complexity.

I'm fairly certain that the sparks would only do the electrical run in 10mm at a minimum anyway. Its a case of "6mm is in reality perfectly fine, but to meet the regs it needs to be 6.2mm" or something daft.

The windows is one I've been thinking about and am still undecided. It's an added expense and I'm really not bothered about natural light (my job has required me to sit in an artificially lit box for 17 years now). But being able to see the kid playing and stuff would be nice.

The PIR for insulation has come from farmers sales. My Father in law trundles off to auction and comes back with piles of the stuff. The last load was £130 for I believe about 60 1200x600x50mm sheets. He was upset at paying the £130 as 2 months before he could have had some at £120. The farmer life!

This is most likely going to be a slow burner anyway so there's time to look at it all. With the announcement from Boris a couple of hours ago and the reality of things as they are, 2020 really would be a miracle for me to get this done. A real shame as in January it looked like I've have it up by September!

I'd really like as much open space above me as possible while also obviously having some storage up there. Right now the plan has a 195x67mm beam in there, rafters every 600/610mm to match the walls and I've also put ties in on every rafter for the sake of it with the top of each being 1/3 of the vertical height from the top of the top place to the top of the ridge. From the inner edges of each top plate the span is 6639mm. Again, I'm literally making things up so everything can and likely will change as required.

The roof will be Onduline or a metal tile like Decra or Metrotile.

49699509958_4171736104_o.png
 
Keep up the work DBT85 :eusa-dance: I'm pretty much a lurker round these parts with little to add; but I like what you've done and the attitude you've done it with. The Better Half nodded off early last night so I had the pleasure of watching your build videos on the big screen. And it was a pleasure so keep 'em coming :obscene-drinkingcheers:
 
April 8th 2020...
I am now Furloughed for at least April and May so I have time to kill! Since work cant occur at the moment I'm taking the time to make a fully parametric and therefore variable workshop in Fusion 360. A remarkable application and a nice test of the brain. Will also be useful when getting my order list together. MY wife has also pledged £3000 to the project so things can start to happen soon

After talking with my father in law we're fairly sure we can get the 10 odd tons of hardcore either lifted over the hedge by a chum with a large tractor or loaded up in the same dumper we'd use for the concrete.

That'll save my back a little as it's a clear 30m from the place bags will be dropped to where the base will be!

May 13th 2020...
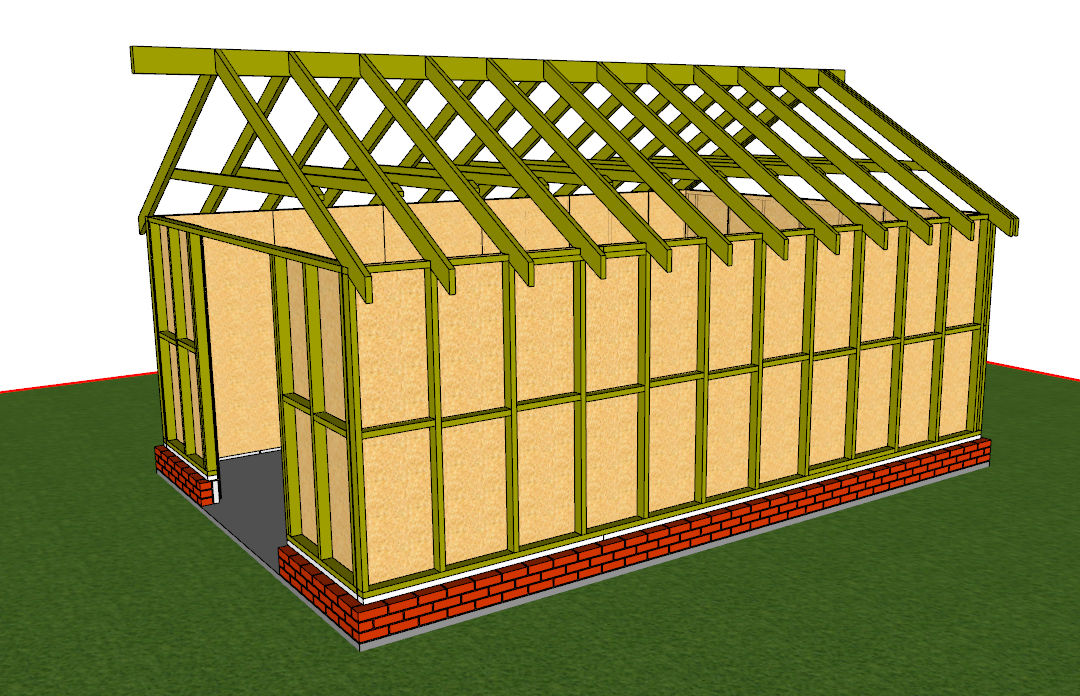
This is what I'm looking at right now, 145x45 rafters, 95x45 ties, centres all matching studwork beneath the top plate. In this drawing it's a 220x65 beam to support that 3m vaulted section.
49892277027_3c4b62dc55_b.jpg


Reality is that I don't need the vault section for the sake of ceiling height, as with a 25 degree pitch I can have a floor to ceiling of around 2.5m and still have 500mm above the ridge if I wanted to go higher. But it would be nice.

MikeG then suggests swapping the ties to 150x50 but otherwise things look good. The concern at this point is getting a 7.2m ridge beam and then getting it up there, though I have a plan for that.

May 16th 2020...
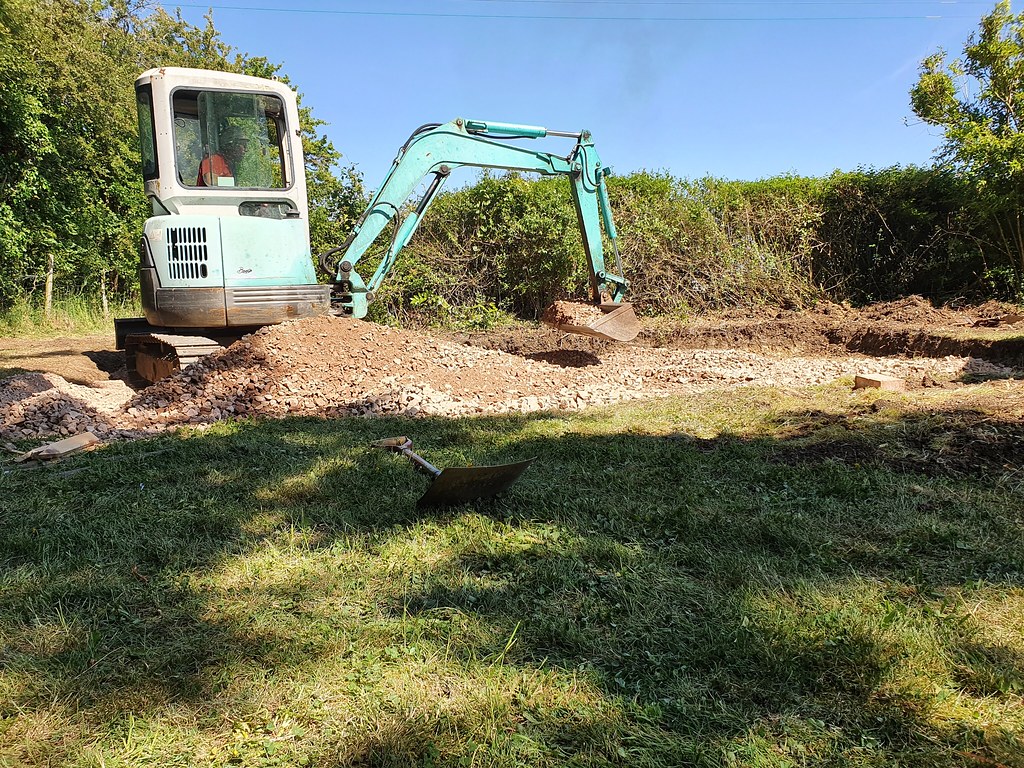
Work began with clearing the shed out and then the shed itself. The hole in the hedge to the rear of the garden has been widened to about 8ft to allow access for the digger and trailer to remove the spoil. The digger is not your usual tiddler driven through a doorway sized gap.

That extra gap will also give us access with the bale poker to bring in the bags of hardcore and sand as needed, assuming I can't persuade the HIAB driver to drive in the field and just lift them in where I want them (I'm sure he won't).

I've also been cutting down a load of other hedge that has not been needed since the guy who owns the adjacent field has left it to go wild for the past 30 years. Exhausted right now!

Tonight and tomorrow I'll carry on and I want to be at a point where I have what I need sorted so that I can make some calls and also have my shopping list sorted for sundries like dpc,dpm, m18 rod, etc etc.

This week the electrician will come and tell me what I need. My original plan was to run the conduit into the slab so that it comes up inside, I'm wondering if that's either wise or even necessary.

It's going in conduit just because we have it and I've got to dig a trench anyway. It also always give us the opportunity to run other things at a later date of ever they were needed.

Given that I am proceeding without planning (not within 2m, not over 4m not more than x% etc) I'm wondering if I should email them anyway and just check that the standard planning rules apply where I am.

So this is where we're at. Site cleared as much as it can be until my father in law walks up with the chainsaw to go at the trees. There are 2 slabs left from the old shed, they currently have inhabitants living under them. I'll move them as late as possible.
49905639007_8948bf6792_b.jpg
 
It's good to see this again. I saw the origins at the other place, but part way through I largely stopped visiting there as they managed to wind up numerous established members, including me, most of whom now reside here. Hence I never saw the end.

Personally I would put windows in as natural light is better that working in a cave, unless security is a consideration.
 
May 17th 2020...
This is the look of it right now in Fusion. Still no windows in the long side you can see, that would be only place I would put them if at all.

Still missing barge, fascia and all the cladding and the plate below the sole plate for getting level on the bricks. Also the filler pieces between the top of the studs. The studs above the top plate in the gable ends have not been done yet.

This just helps me get a list of everything I need together and I can toy with this when I can't do much else.

The design is 95% parametric. You can define roof pitch, max allowed height, total long side bricks, total short side bricks, how many bricks either side of the door, sheet good sizes, stud sizes, rafter sizes, ridge sizes, tie sizes, overhangs. Just punch in your values and it recalculates everything. All the studs, rafters, ties, bricks, blocks, noggins, OSB, etc. It's been fun and a challenge to work out some of the maths to make it work.

49905964703_1c5cb70577_b.jpg


At the moment this is looking like a 200mm slab with a142 mesh 50mm from the top and bottom, castles on the bottom and circle mesh between the top and bottom sheets to support them.

I've still not dug any exploratory holes but the idea of laying a slab on little more than a little sand and straight clay just sounds all wrong :shock:

Just getting my timber list ready for all the timber and OSB bar the cladding. Looking like £1800 from Davies Timber on their website. Cheeky sods want £30 delivery on a order that big! Am asking a few others too but it's nice to have a baseline.

Metrotile want about £150 to hire the tile bender and deliver it and collect it for a month. A little more than I need.

I've just been looking at Cembrit fibre cement slates and feel my mind must be going wrong. Their brochure says that the 600x300 tiles avg about 13.33 tiles per m2 on a 25 degree pitch (because of overlaps, got it), but they are only around £1.15 per tile, meaning my 36.5m2 roof is under 500 tiles (ignoring ordering alittle extra). That's easily half the price of the Metrotile or Decra.

The metal tiles come in at about 6kg/m2 but the cembrit come in at around 20kg/m2.

Internal area will be 29.89m2 but I need to add a lintel, doubled up studs around doors, stud from lintel to ridge.

May 18th 2020...
Groundworks have begun! Sort of.
49910533282_ba7c0a597b_b.jpg

It's thick solid clay at the bottom but I've still roots coming up. That's 225mm down.

Upset has been caused today by informing mother in law that the 2 birches are coming down. The larger of the two will only be 300mm from the wall of the shop and the smaller is maybe 1.5m away.

Current plan and expectation is 100mm type1 sub base, 30mm sand to blind, 200mm concrete. Given that I have 1x Pershore Plum and 2x birch (all 3 coming down), privet in the immediate vicinity as well as a bloody great Ash maybe 7m away, I don't mind putting in more type 1. Also, I'm not 100% sure so I'd rather have too much.

I've updated this to have the header and gable studs. My questions are thus. Usually the lintel would sit on the cripple stud and not on the regular stud. In this layout does it matter? (Mike say yes, do as you are told!) Can both just go to the underside of the header with the top plate on top? (Mike says no, see previous comment) I basically couldn't be bothered changing it right now in the drawing as it would bugger other things up that I'm too tired to fix.

49910715052_9caa182434_b.jpg


The gap betwixt the 2 gable studs is also 100mm wider than the usual 610mm on centre spacing. I'll probably put one in there anyway just to make life easier for the boarding. I also now realise that removing the tie on the first and last rafters is needed in order to get the stud from the plate to the rafter without cutting a chuffing great notch in it.

May 19th 2020...
I got outside at 11pm in the rain last night (because I was on here drawing things!) and got laser levels on all 4 corners from a fixed central point. The lowest mark was 35mm above the ground while the highest was 160. So a 125mm height difference over 5m. The other end was around 90-130mm above ground level so a fall of about 55mm over 7m and 95mm over the diagonal 8.7m. The area tilts ever so slightly toward where I take my pictures from.

Looking at my spreadsheet, we're already looking at just over £5k just to get the building up and clad and that's just materials. The groundworks and any hire costs are not borne by myself so I don't have to worry about those at least.

I've just dug more inspection holes and apart from a good inch thick root (guessing from the Ash tree) the ground is very firm clay. It's not wholly pure as there are tiny fragments of brick, but this house is about 200 years old and half a mile across the field behind us was a brick pit that this house and others were made from. So it's likely the garden area was a storage area long ago.

Honestly I'll be glad when the concrete is done, it's the only bit I'm remotely worried about and it's a good £2k of the budget considering the concrete, the mesh, the hardcore and sand.

My hole digger has been in touch, he can do next week :obscene-drinkingcheers: so I might finally actually start.

May 20th 2020...
Since I'm going to need a lot of 200mm for my formwork I'm going to use them as rafter ties where possible (at Mikes suggestion) as they'll allow heavy storage if needed

A friend is hopefully available to help me with the concrete pour when we get there. He even has his own rake. We only need to keep up with a 2ton dumper that's got a probably 60m round trip, and I doubt it'll be full. So I think that give us enough time to rake, poke, tamp as needed. I say this with all the experience of someone who's never done it before.

May 21st 2020...
Good news is that Davies Timber got back to me and knocked £300 off the price. Bad news they don't have the 250x75x7.2 I asked for.

Good news is I typed it wrong and I meant 225x75 which they have. Can get delivery at the start of June.

Just need to finalise my lists and get stuff on the way now.

Kellaway got back to me with their quote. Basically cheaper on everything and can also do the type 1, sand and mesh cheaper than anyone else I've seen. Just waiting to hear on if they have featheredge.

They are still rummaging for a ridge beam though. The savings are enough that it would make sense to order with them and just get the featheredge and ridge from Davies if I have to.

I have my suppliers for just about everything now lined up, tomorrow Mr Tesco is going to get a sharp pain in his wallet as I load up the card.

Just need to finalise my timber numbers. At least with 90% of it coming from a more local place I can get more when I get it wrong!
 
Bloody love this Darren!

Thanks for sharing and for documenting it so well, it will be a real help for anyone doing the same going forwards!

Looking forwards to seeing it progress. :obscene-drinkingcheers:
 
May 22nd 2020...
Spending has started. So it's finally happening :eusa-dance: I think my first post in a workshop thread was in about 2016, that's how long I've been thinking about it!

£2336 dropped today on a lot of the build, bar the ridge, feather edge, dpm, membrane and tiles. That includes some extras here and there in case of bent or damaged looking boards. There is also some overlap with some parts so if I'm short one I can nick it from elsewhere.

I wanted to get the ridge and FE ordered too but Davies never got back to me and by the time I called them they were shut and of course they are closed on weekends.

For anyone that might care or want to know prices and what I'm using for what, below is everything and its individual Inc vat price, I'll not include rubbish like tools as even less people will care.

Online or collected today - £85.18
60x Concrete Meshmen 40/50mm - £14.40 - To hold the bottom mesh 50mm up - Travis Perkins of all places
1x 30mx300mm DPC - £9.99 - DPC - Screwfix
1x 9.6mx20mm galv band - 7.99 - To stop the workshop being blown away :lol: - Screwfix
12x 90mm Circle Wire spacers - £28.80 - to hold the top mesh away from the bottom mesh
1x bundle of 150mm double loop ties - £24 - to wire it all together


Arriving Friday 29th - £1003.77 - Slab and plinth all from Kellaway Worcester
10x bags Type 1 - £355.20 - Subbase
3x bags sharp sand - £154.80 - blinding
12x 3.6x2m A142 mesh - £201.45 - reinforcement
5x 50x200 6m - £106.20 - formwork and later rafter ties
5x 50x50 4.8m - £24.04 - formwork support and vampire patrol
1x 50x150 6m £18.61 - tamp and later anywhere its needed
28x 100mm lightweight block - £38.64 - inner plinth
20x 25kg builders sand - £59.28 - mortar (they just sent a big bag)
5x 25kg cement - £23.94 - mortar
1x plasticiser - £3.58 - mortar

Arriving Wednesday 3rd - £1247.53 - 95% of framework all from Kellaway Worcester
15x 50x100 4.8m - £128.73 - Sole/Top plates and leveling plate on top of bricks.
45x 50x100 3m - £241.38 - Studs and noggins
4x 50x150 4.8m - £47.23 - Rafter ties (the other 3 to come from the formwork)
2x 50x50 4.8m - £12.50- infills for OSB support
4x 25x100 4.8m - £18.60 - fascias, corner details, barge boards etc
1x 25x150 4.8m - £6.99 - Asked for 25x75 for corner details but I can cut this down.
54x 25x50 4.8m blue batten - £163.94 - all the battening
35x OSB3 11mm - £417.90 - internal cladding
28x 50x150 3m - £206.64 - rafters

Tomorrow is sorting tiles, DPM, roof/wall membrane and doing my drawings for the framework and something window shaped for the one 7m wall. As I said before, I'd like to start by knowing exactly what I'm supposed to be aiming for.

As things stand I'm hoping for a hole to appear in my garden on Wednesday, fill it up once everything arrives Friday and hopefully be in a position to order the pour on Monday, probably for the Wednesday or Friday AM as the kid will be at nursery.

The photos and fun shall start soon!

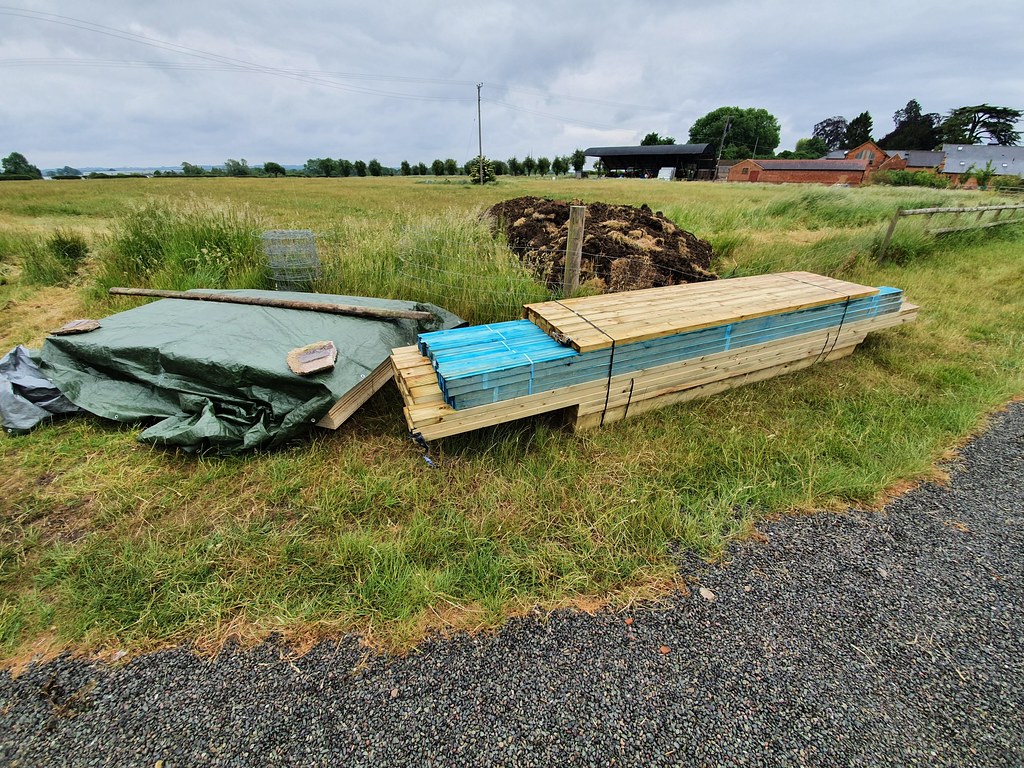
First delivery, I can now theoretically lay bricks.
49927600527_2b5f0e34db_b.jpg
 
This looks way harder than people make it out to be. How much experience of doing this sort of thing do you have?

It looks great, can't wait for the next bit. Pretty impressive that you've basically done all this on your own.

For the DPC is it (from bottom up)

Brick -> mortar -> DPC-> timber ?

is the timber attached to the brick or is it just the entire weight of the main workshop that just keeps it in place?
 
ScaredyCat":360hl3sv said:
For the DPC is it (from bottom up)

Brick -> mortar -> DPC-> timber ?

is the timber attached to the brick or is it just the entire weight of the main workshop that just keeps it in place?

Yep that's the order, but it doesn't just sit there, the galvanised strapping that he mentioned is used. That is screwed into the sole plate (timber), then run down the inside of the blocks and screwed into the blocks a couple of times, and even into the slab if you want. This ties the timber frame down to the brickwork and stops it flying away Oz style.
 
24th May 2020...
Felling occurred today, just need to finish clearing up. digger will deal with what's left.
49931586817_b67ed3f5b2_b.jpg


My first time lapse. A whopping 7 seconds of me clearing up after getting a little texas chainsaw on the trees.
https://youtu.be/IANe-41CSPw

Rejigged things and now I have this. Just realised I need to put my plate in under the sole still.
49931651452_c3c5147e91_b.jpg


26th May 2020...
Cembrit slates ordered from roofing superstore, that's another £815.57, have to get the 600x600 from elsewhere as they wanted 70 days. Selco have them so me and the kid will pop out in a bit. Oddly they sell the ridge end caps but nobody can get them at the moment, so I ordered 2 more normal ridge tiles and will change to end caps when I can.

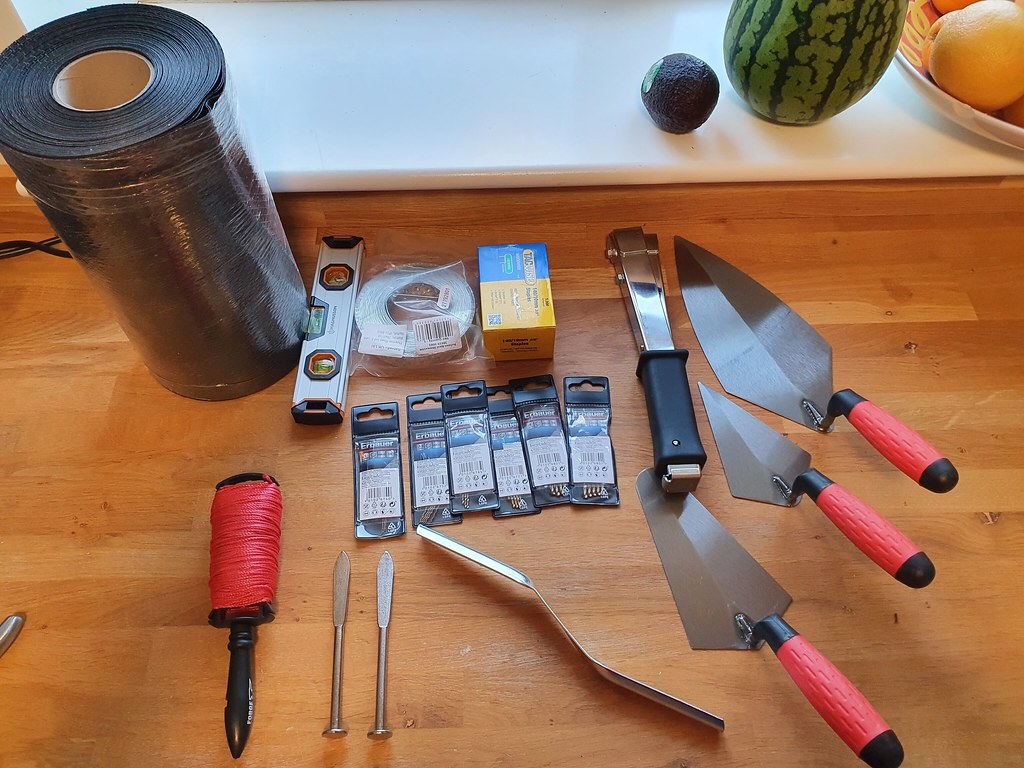
90mm Circular mesh spacers, ties and tool have also arrived.

312 Clayton Red bricks added to my order at Kellaway. 68p per inc vat. Only need 290 but they had 312 sitting on a pallet so I just took the lot. Sadly the ones in piles on the farm just aren't going to work without cleanup and its just not worth it. (I think they delivered a whole pallet)

Ordered my ridge from Davies Timber, but they don't have any of the 175*38 featheredge left and might not get any for 3 plus weeks.

The ridge is a finger jointed job from Sweden or something. Still c24. Didn't know that was a thing but from reading online more and more projects are calling for longer and longer beams. This place can make them upto 13m long!

The first 28 tiles are also here. In the boot of my car! Doubles from selco as roofing super ultra amazing warehouse wanted 70 days.

I think I may have made a minor mistake. I ordered 135 degree ridge tiles, but I have a 25 degree roof. So that's a 130 degree ridge, so I should have gone a size smaller and got the 120 degree tiles?

In other news, my man is arriving with a digger tomorrow morning!

27th May 2020...
So, yes I ordered 135 degree tiles for my planned 25 degree roof. On top of that I also ordered graphite ones (just because they didn't have any others available and nor does anyone else). After receiving the order this morning the delivery note had a number for Cembrit on so I called them. The lady was very helpful and said that they do make them in different colours but its only been in the last month that you could get them in the UK, so thats why nobody seems to give colour options. She gave me all the codes and also confirmed stock of the end caps all in the 120 degree and black colour.

Then on to roofingsuperstore who so far have been similarly helpful, taking the new order codes to try and get me the things I actually need, and arrange return of the ones I don't. It'll likely cost me a bit but hopefully less than buying all new ridge tiles from elsewhere (everyone else wants £14 each, roofing superstore only wanted £8).

Oddly, Roofgiant (the only place that uses the manufacturer product codes on their site) want £205 for the tiles and end caps I need but its free delivery. Roofing superstore only want about £110 but want to tack on £75 delivery on even just 1 ridge tile. Hopefully this will all be sorted soon without too much cost to myself for my own error. I have no idea where I got the need for 135 degree ridges from. Stupid.

More importantly, its 9:15 and my digger isn't here.

With 120 degree ridge's on the way I just need to decide on whether I stick to 25 degrees or go up to 30 which was my original idea.

Later that day...
Chuffing warm out there today but work was done
49940809733_4dcc931820_b.jpg


A successful day all in. Richard arrived around 10 to start working and so the camera started to roll. Below is the time lapse if anyone wants to watch a hole get made. Couple of minutes long.
Part 2 - Digging a hole
[youtube]8d0dv_7s-90[/youtube]

First out came the trees as seen above, then we marked out and he got digging. We're on a slight slope so one side is deeper than the other. It was pretty hard going as we were just at the point in the ground that it was a little tougher to dig apparently. Had I wanted a hole 2" deeper it would have been easier.

The clay is so hard, but as you can see life finds a way and its peppered with roots. The Birch trees in particular were particularly stubborn.

I've just been out with some line and stakes and my little laser level to get an idea in the morning of how far out it is across the whole area. There are always highs and lows but its looking pretty good. Richard has also pledged to help lift the bulk bags round from the delivery site to the hole, so this weekend I might not actually exhaust myself entirely barrowing 12 ish tons of aggregate 30 yards. I do plan to hire a whacker plate and laser level for the weekend so I can get it all prepped.

I shall call the concrete place tomorrow morning and hopefully get booked for Wednesday. It's possible it might be ready Monday, but since I can't be sure and wouldn't want to cancel on the morning itself, Wednesday it'll have to be. Undecided on how long to wait until laying first bricks.

49943098811_04a35d0620_b.jpg

49943097041_3726ae4a14_b.jpg
 
I shan't reply to all the good wishes and thanks but please know they are appreciated! I can't "like" stuff so this'll have to do. By all means ask questions and when I'm done copying pasting and editing I'll answer where I can. Though Mike knows far more thn me.
ScaredyCat":19qxpvt7 said:
This looks way harder than people make it out to be. How much experience of doing this sort of thing do you have?

It looks great, can't wait for the next bit. Pretty impressive that you've basically done all this on your own.

For the DPC is it (from bottom up)

Brick -> mortar -> DPC-> timber ?

is the timber attached to the brick or is it just the entire weight of the main workshop that just keeps it in place?

Experience of this? zip. Never built a form, poured concrete, laid a brick, framed so much as a stud wall, tiled a roof, clad a building etc. But I'm handy. I've been doing DIY since I was 10 and have designed and installed 5 or 6 kitchens, bathrooms for myself or friends and family over the last 15 years or so on top of the usual handy type stuff. I pick things up quickly by seeing it done and trying to understand why it's being done so things like Youtube for me are great. My job since I was 18 has been broadcasting live sport and news all over the globe. No use whatsoever in this case apart from giving me LOTS of time to think, plan, draw and ask questions and learn.

My attitude has always been learn by doing. I think that's roughly "discimus agere agendo" but that's just a google translation meaning "we learn to do by doing".

Yes, the bottomplate is secured to the brick or the concrete with strapping. Pics later. I think I went into the concrete.
 
TrimTheKing":2wpkugcv said:
Yep that's the order, but it doesn't just sit there, the galvanised strapping that he mentioned is used. That is screwed into the sole plate (timber), then run down the inside of the blocks and screwed into the blocks a couple of times, and even into the slab if you want. This ties the timber frame down to the brickwork and stops it flying away Oz style.

I did wonder what stopped it flying away, but I suspect there's substantial weight. I must have missed the attachment of the strapping to the sole plate.

DBT85":2wpkugcv said:
Experience of this? zip. Never built a form, poured concrete, laid a brick, framed so much as a stud wall, tiled a roof, clad a building etc.

Now you're just showing off :text-lol: :eusa-clap: :eusa-clap:
 
May 27th 2020...
I've drawn it up with the 2 large windows that are kicking around the farmyard. 960x1750 and 960x1140. Maybe too large for that 100x150 lintel??

Thought they'd look too big but it's not too bad. Given though that I can just order windows any size I want (and would eventually have to replace these dead ones anyway) I might just not bother with them at all.
49943154886_e3a75a51ef_b.jpg


After much gnashing of teeth I resolved to not use those panels and design in slightly smaller apertures so as not to lose as much wall space.

Concrete booked for 8am Wednesday. Gives me plenty of time to get it all ready. Could possibly have had it done Monday but couldn't be 100% sure it would be ready so figured it was best to wait.

360m of 175ex38 cladding ordered, 75 lengths for £576 including the £30 delivery. They aren't 100% sure when its coming but no major rush. I can get the roof done and go from there. Plenty to keep me busy.

29th May 2020...
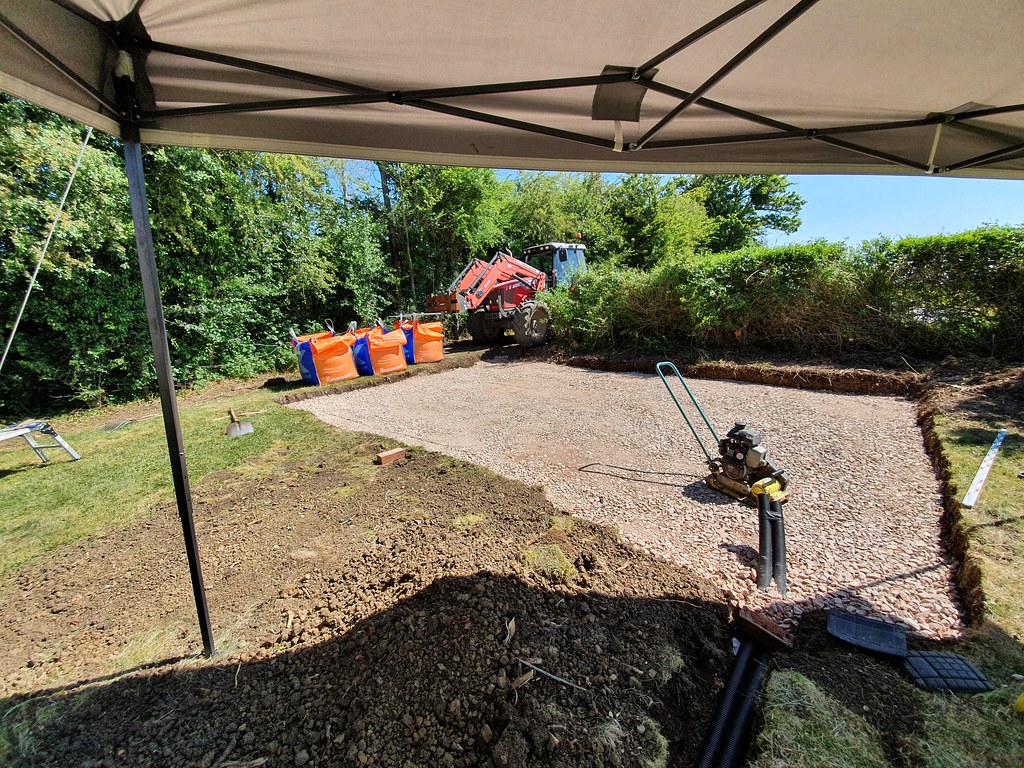
Busy day today made much less deadly thanks to Richard once again. He arrived at 2 with his big red tractor to lift 10 bags of type 1 into the hole he dug just 2 days ago. He managed to get the entire tractor into the pit in the end, we split the bags and then he drove little digger in and levelled it off a bit. Despite that I still ended up knackered as I was still shovelling and also had to dig the first part of the service trench...right through where the bigger birch once lived. Roots everywhere :evil: .

Also popped to the hire shop and got the Leica level and the whacker plate and ordered my roof and wall membrane from ebay.

I was actually concerned that we wouldn't have enough type 1. I calculated for a 7.2x5m hole and we ended up with one nearer 7.6 and 5.5, despite that, the 10 bags did it pretty much bang on. I've gone over it a couple of times with the whacker but had to stop for the evening, so will do more and check it all again. First time over I could feel it was still too undulating so moved some around and it had a better feeling after a second pass.

We have a slight high spot in this one
49949532967_8aebf8f016_b.jpg


Pretty good in the end
49949243021_36b6b17272_b.jpg


8:30 tomorrow the sand arrives and Richard shall valiantly return again to drop it next to the pit. Saving me considerable work. After that is done I can form up, DPM down, mesh down and relax till Wednesday morning when concrete occurs.

On that subject, the weather is roasting and I don't want a slab pour ruined. I don't have 30m2 of hessian in my cupboard to cover it with :lol:

Not much going on today, the second delivery arrived first thing and big red Fergus moved all but the mesh (as well as my tiles which arrived days ago) round the back into the field. The sharp sand for blinding the hardcore he dumped right next to the slab so that I can finish compacting.

I Spy a Tractor in my Garden
49952298417_7b6a841b77_b.jpg


Like a Dog With a Bone
49951506903_9748257717_b.jpg


Crappy English Weather
49951508553_5bc3b87d02_b.jpg


Perfection :text-lol:
49951787823_beb8005c59_b.jpg


I got on and did more of that but not much. As you can see from the photo, this very wavy length of 50*200 shows that my initial passes yesterday were perfectly flat. I moved some more around and got another pass with the whacker before I ran out of fuel for the day.

Tomorrow its more compacting, get the sand out and compacted and then at least some of the formwork. I'm not sure how the hell I'm going to stick my stakes through the type 1 to hold the boards in place.
 
31st May 2020...
New problem. I made a jig and can nicely make my vampire spikes.

They don't want to go through the type 1. Going to have to rake out around the formwork to allow the stakes into the ground. Yay.

The end of today.

Got my formwork made up and sand spread around.
49955996387_1abc3e2357_b.jpg


Need stakes, make janky jig
49956810332_ba61b86a31_b.jpg


Todays end point. All 4 corners double staked and perfectly level according to the Leica laser level. The diagonal is out by 2mm. I'll live with it.
49956523781_813be4a251_b.jpg


Just ordered the 2core SWA from superlec direct. a fair bit cheaper than TLC which I was surprised at. £20 saving alone in delivery! That's another £122 on the list. Before you ask! I only have a TT earth (spike in the ground) being out in the sticks. So there won't be earth from the workshop to the house, the workshop will have its own spike for earth. This is what I expected to happen anyway and then confirmed by the electrician.

1st June 2020...
All sides are now level and staked at every 1200mm. Just did that to get the level back to the hire place.

Today proved fruitful again but I am now stuck without assistance tomorrow. I just can't put that mesh down on my own without puncturing the dpm I don't think.

Formwork re-checked for levels, staked to 600mm and tops sawn off.

DPM unfolded and laid out, corners folded.

First bit of mesh moved but I just gave up without help. Hopefully tomorrow morning father in law can come up and give me a hand to get them down.

49960417251_d0b95b4ddb_b.jpg


49960700747_231226276e_b.jpg


2nd June 2020...
Well apart from the Drama of the Missing Poker today was another good day. Father in Law Mike arrived at 10 to help get the mesh down and in little time we got the first layer down and tied together, then then circular spacers wired in and then the top layer tied in too. Apart from that all that was left for the site was to clear up to give us space to work tomorrow.

My 7.2m 75x225 also arrived from Davies timber, a solid lump and nicely straight.

The local hire company (whom we know well enough that I can just walk in and take things off the shelf) delivered a lifting rotating tipping 2 ton dumper and the easy float, but not the fearsome poker. More than a little annoyed at not being told until 16:45 when they knew I needed it for the last 5 days and I even checked on Monday to be sure they had it.

Anyway, off to screwfix to collect the 5x8m tarp and M16 rod. The former to cover the slab and the latter for the rafter/tie joint.

Tomorrow morning the concrete is due at 8:00 from Accumix Concrete (mix on site), Mike will deal with the dumper while Jim and I rake, poke, and tamp the slab. The dumper is a little snug on the access path and will likely only be able to dump from 75% of one long side and half of one short side, so I'm going to be raking a fair bit. Fortunately we're going to have the time it takes him to make his round trip back to the mixer.

In the morning I'm going to try the local hire firms and even places like Travis to see if I can get a poker a little closer to home as Solihul (the nearest HSS to collect from) is far enough away to be a pain in the backside.

Anyway, pictures. I have been doing the time lapse stuff, but will just put one video together for all of the hole being filled. Some has been missed because I thought it was on when it wasn't, but most is there.

A snug fit
49964379181_a9c3a616f5_b.jpg


All set for the morning
49964661292_94c2a695d5_b.jpg


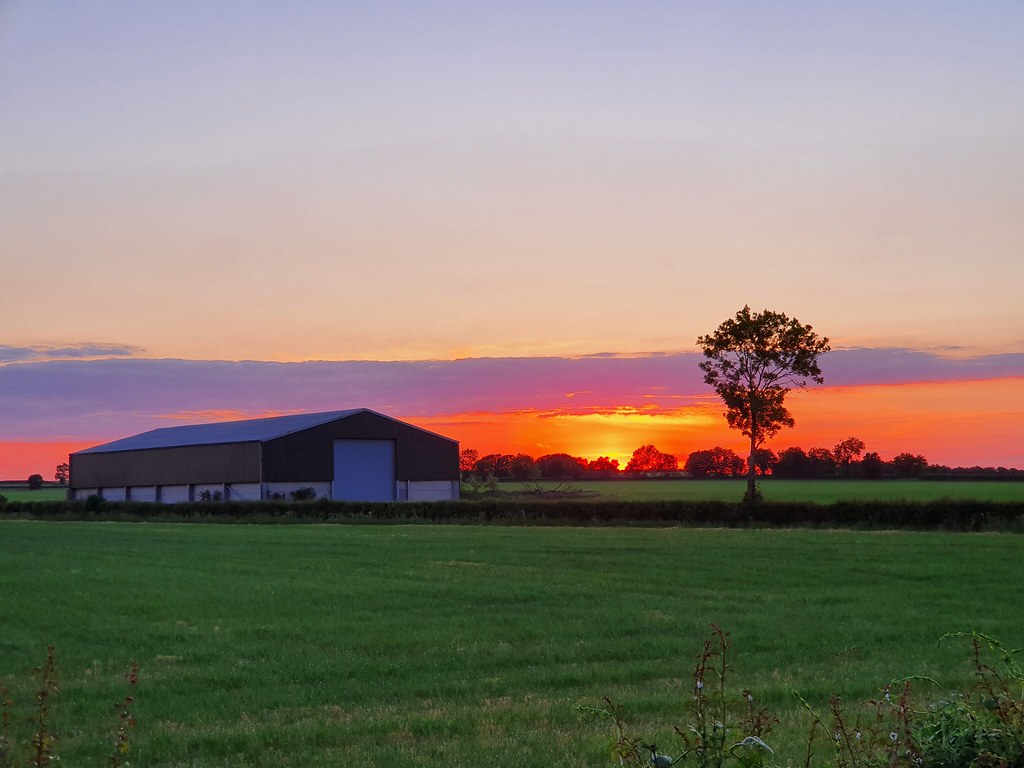
Yesterdays crappy sunset
49964649097_fc4356ef16_b.jpg


June 3rd 2020...
After weeks of blistering weather it's now overcast and spitting on concrete day. There's been a mad panic to get a concrete poker after my hire shop let me down.

After 3 trips with the dumper taking forever the dude driving the on site mixing truck said he'd park in the field and so things moved a little more swiftly as he dumped right in to the hole. By the time we felt we were nearly done with pouring we got him to half fill the dumper so he could wash out and leave. All of the dumper went in as well as some of his wash out! Ended up not even using the poker.

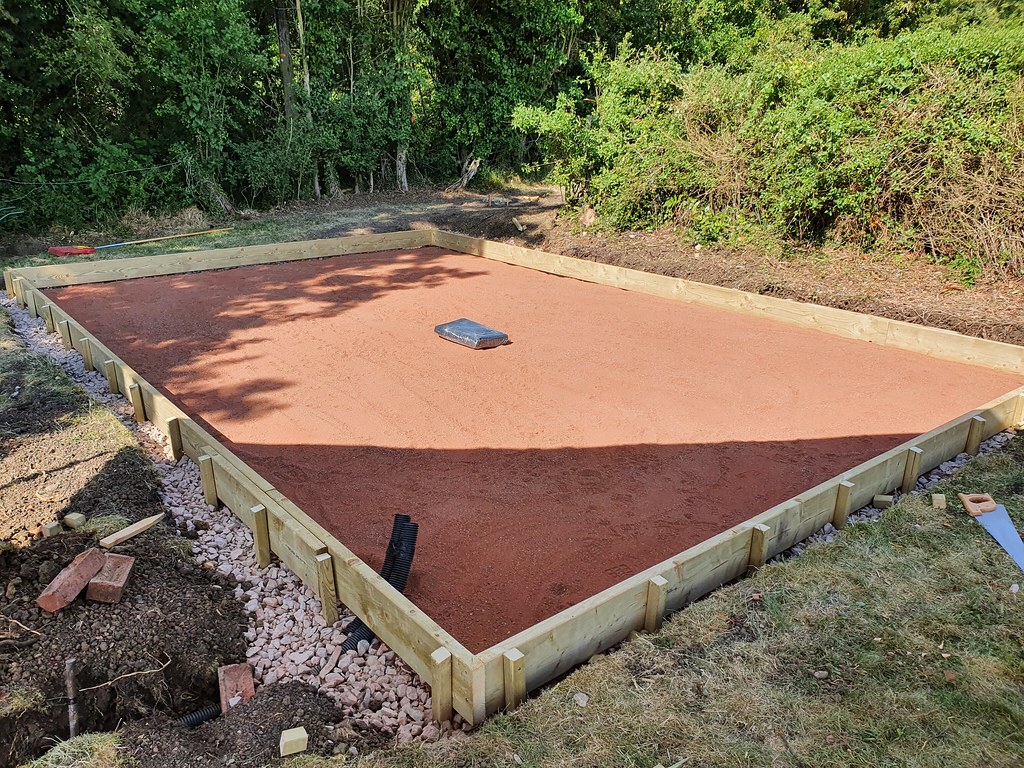
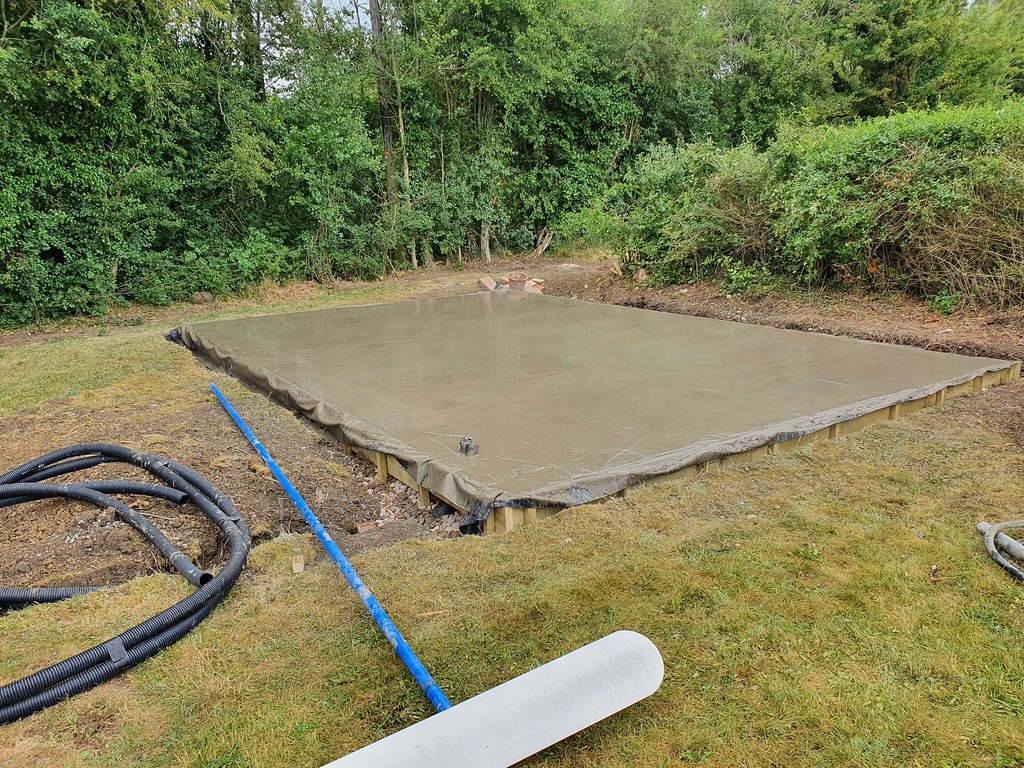
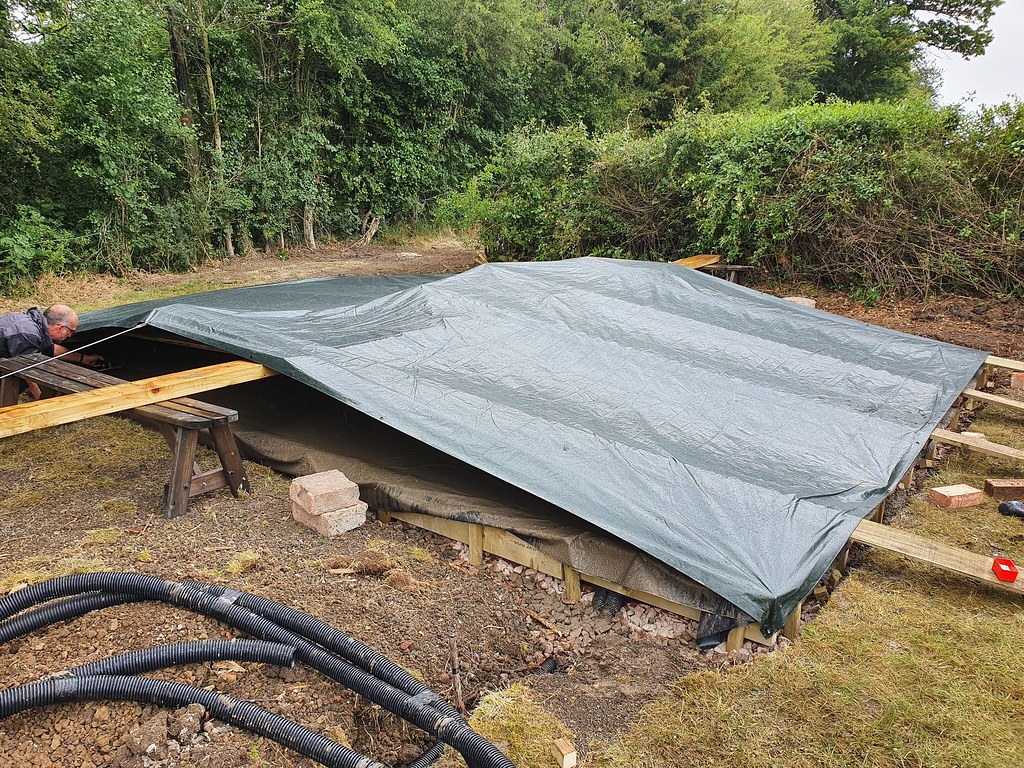
It's as done as it can be for now, the rain is falling at an annoying level so that small craters will still appear if not covered, so we made a tent.

It's had 2 easyfloats to deal with the bulk of it and I'm hoping to get on it and trowel later once it's firmed up a bit further.

I'm thankful for the cooler weather but the spitty rain is a pain in the backside.

Regardless, what's there right now will suffice for a surface to then cover anyway. But if I can improve it a little I'll try.

Very thankful to Jim as he was invaluable.

After first float
49966815151_d6a6c4e8e6_b.jpg


As she rests now after a second float
49967089752_bec0876839_b.jpg


Got on it a bit late so could only towel this much. A shame but lucky I planned on having a floating floor!
49967284383_12eb0ba29d_b.jpg


The surface of the moon or a rain pocked slab?
49967795866_2b99968270_b.jpg


Anyway, the only part of the whole build that scared me is now done.

I used half a cube more than calculated and they charged me 15 mins extra wait time. Had I just poured from the truck in the first place we'd have been done in plenty of time. Note to others, ask the driver if he can move the truck, don't rely on the "no" you get from the person booking the delivery.

The featheredge arrived while we were having a break so we had to offload that. Come friday the only thing I'll not have on site for the entire build will be a nail gun and any paint for the featheredge.

OSB and most of the framework delivered flatpack style
49967798136_9945381cba_b.jpg


Over the next 2 or 3 days I can finalise framing plans and slice some blocks and then at some point over the weekend get some bricks on, at which point things should hopefully continue at a reasonable pace.

4th June 2020...
formwork off and stacked off the ground for use later, snots cleared, re waterd and covered again.

Took the time to clear some of the rest of the mess that was made :lol:

The difference in finish between the side I manage to trowel and the one I didn't is startling.
49970116757_1c2d669d17_b.jpg


Last but not least, the time lapse of it all.
Part 3 - Filling it up
[youtube]aTXx9B3SsIQ[/youtube]
 
5th June 2020...
Todays job was getting the trench sorted for the power and ethernet. Conduit was already installed in the slab so I just needed to dig out the remaining 9 ish meters back to the house.

Once it was all dug out, Charles lent a hand to pull through some draw string. His nozzle was a perfectly snug fit in the conduit and I was impressed at his level of suck given a 10m run in ribbed conduit.
49974631971_5d430ac253_b.jpg


Drawstrings in it was time to fill it all back up again.
49974631321_7f2585020b_b.jpg


Mike also gave me a well earned break from digging a trench and instead brought up the trailer so that I could sort and move all the timber from the pile dumped on the driveway. It was all delivered in one bundle in a mishmash order, so now its all in bits together and easy to access.
49974110813_a99f168765_b.jpg


Regarding the costs so far for anyone interested. The slab all in has run to £2064, not including the cost to dig the hole or hire costs of the dumper, costs I do not know the number of. The total projected cost is still just under £6000. So 1/3 of it went into the ground.

The breakdown for the slab is thus
10x bags Type 1 £364.20
3x bags sharp sand £154.80
1x 6x8m DPM £49
12x A142 Mesh 3.6x2m £201.45
60x Meshmen £17.28
12x 90mm Circular mesh spacers £28.80
1x pack of double loop ties £24
1x double loop tool £27
7.5m2 concrete £1055.82
formwork £106.20
stakes £24.04

6th June 2020...
The weather is rubbish here today, on and off spitting and just now its started raining proper. Given that I'd never rolled mortar let along laid bricks, I set up a little demo to give myself a first go. Just 4 trowels of sand, 1 cement and appropriate water and febmix.

It took me the better part of 45 minutes in the end and it's not perfect, but I'm very happy with my first attempt. The rain has come just as I've finished so for now I'll head back to workshop 1 and get a jig made up to cut the blocks needed later. Hopefully the weather perks up and I can actually lay for real.

Early takeaways are: I need more mortar down as its too easy to end up short in gauge and with no room to adjust if you don't put enough down in the first place.

49976847717_1009e7059d_b.jpg

49976847382_31e5dc22d0_b.jpg


The weather abated and so I set out my corners and marked out what needed to be where, got my spot board in place and got mixing. I went with 6:1 in the end for fear of death from Mike :lol: . I'm literally only mixing up a bucket at a time as I can barely get to the end of it before its started to stiffen despite being a lovely texture to start.

Just as I was about to mix up the first batch it started to spit with rain, I cursed in the direction of the sky and it stopped. I managed to get 2 full corners and the first 3 bricks of the third complete before packing up time. Time to be dad.

I did at least also get a little jig made up for the blocks to make cutting them easy enough.

If the weather behaves tomorrow then I'll get my corners finished and my two stopped ends for the doorway.

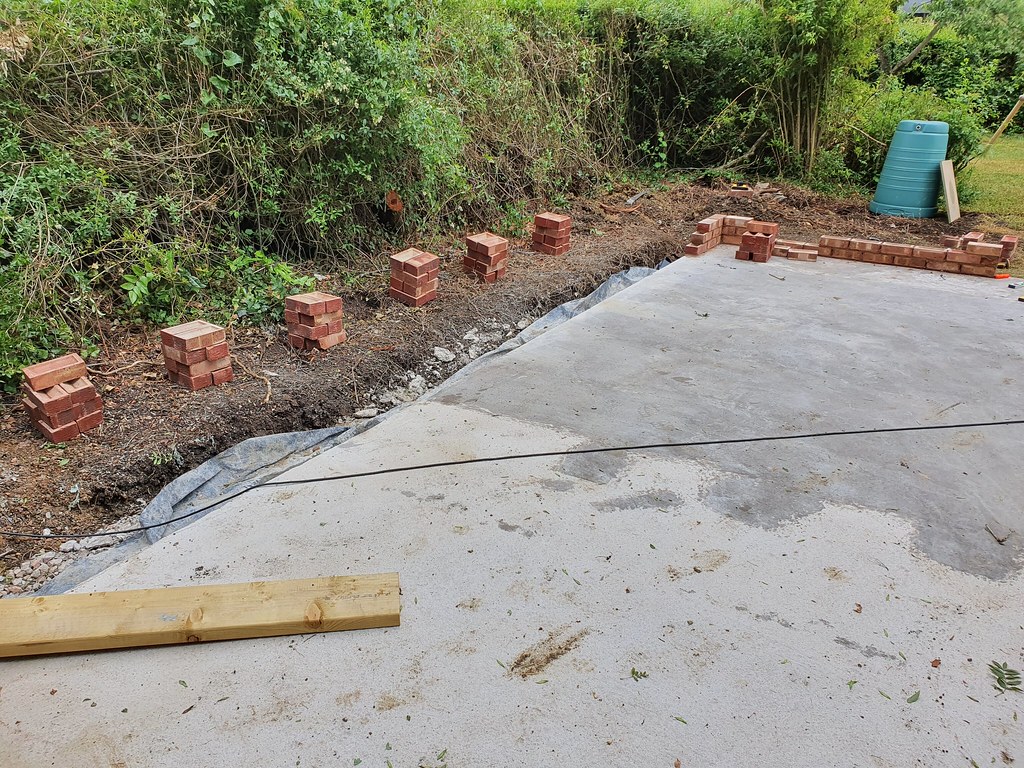
Not perfect at all, but it will suffice. I did find putting the top course on frog down harder than expected!
49977866236_494c90348c_b.jpg


7th June 2020...
A good day, though my back would disagree.

All corners and stop ends completed, and I've done my first running in. I also managed to leave the camera on normal mode and not time lapse, so I have a LOT of video to go through for Episode 4. Fixed now for the running in which is much easier and faster too.

I've also actually been measuring my mortar out by volume so now I know exactly how much water and febmix, and each batch (still one bucket at a time) is consistent.

Corners complete and first running in complete
49980169398_e81116c7fe_b.jpg


Stacked up ready for one long back side.
49980948032_8fbb9c7d74_b.jpg


I deigned to stop at 5:20 when my mortar ran out just 2 bricks shy of finishing the first course on the long side.

The door side has all of its bricks complete. tada. Didn't need to cut any apart from the single half bat at the stop end. Juuuuust about made it fit. My perp sizes need work.
49981849497_52827ccb7d_b.jpg


2 bricks shy of the end, but the important part is that those 2 bricks are going to fit! I checked.
49981846892_ac01de555a_b.jpg


Tomorrow I'll unleash the mixer we have here and hopefully finish off the bricks. Now that I'm only laying to the line and am more comfortable, I don't mind making up a larger batch to use.

8th June 2020...
Brickwork was undertaken...eventually. I had to spend a hour trying to find the bolt cutters to release the mixer it from it's prison on the farm. I found them right where I left them (and was SURE I hadn't left them) by the farm gate when I opened it up to allow the concrete mixer into the field.

Once carted up and got going it seemed to go ok, though it's rather large for the batches I'm making up, but they did seem to last better and work better. My 6kg of cement and appropriate sand seemed a little lost inside, despite being triple my bucket mix. I was at least able to get some going before I broke for lunch and again while finishing the last of that batch off, so less time was lost arsing about.

150 odd laid today in the end, less than I'd hoped and as always 1 brick left as the mortar ran out (though had I not chucked 1/4 a load on the floor trying to pour it out of the mixer...). My perps were all over the place and I had to cut 10mm off a brick to make a course fit in the end. I'm going to have to do the same to the one that remains in that same wall. I'm going to blame the bricks being 216mm instead of the standard 215mm, instead of my ineptitude.

To make matters worse, the second course on the window side started out fine, but because I knew I had to make some snug perps at the far end of the first course, I started doing it early. It wasn't long before I'm no longer close to a proper stretcher bond. Mike, if he'd been daft enough to have done it would likely have ripped them out. My body burning in pain and annoyance made me just carry on. While being appropriately annoyed I glanced over at the other side completed this morning and noticed that 2 sodding bricks are face side in!

Fortunately its on the back side of the shop, and will perhaps one day get covered by a DX cabinet should I get around to it.

Tomorrow I can start a bit earlier as I no longer need to locate some bolt cutters. I have about 50 bricks to do and then 21 blocks to cleft in twain and then try and do those too.

I still need to buy some cut end treatment and I'm also not looking forward to trying to bed 2 7m long bits of 4x2 onto a DPC and some mortar.

Just the one pic today
49985790322_927f7f7f61_b.jpg


FUUUUUU I've just noticed a third brick. FUUUUUUUUUUUUUUUUUUUUUUUUUUUUUUUUUUUU
 
Good to see your thread over here, Darren.

Have you been to any of Pugh's woodworking auctions at Ledbury ?

And most importantly, have you still got your S2000 ?
 
9th June 2020...
After must deliberation I've ordered the Dewalt battery first fix nailer (£440 from ITS) rather than buying a paslode or hiring a gun. I might need it for a while so this will work out cheaper as I can sell it on later.

It felt like a slower day today despite getting out earlier.

I chopped those three bricks that were the wrong way around out and turned them around. It was surprisingly easy to saw the mortar out and a light tap with the lump hammer and off they popped.

After that I got the mixer going and in what felt like fairly short order used up the last of my mix. It was probably nearly 11:30 by then but it felt smooth and "easy" to lay a whopping 43 bricks. Not wanting to mix up another batch and have some left over, I decided that next I'd cut up the 100mm Quinnlite B5 blocks ready for the inner skin before finishing the last few bricks.

I did a couple and then took the kid off my wifes hands for an hour and popped to B&Q to pick up my tin of end grain treatment. Lunch occurred and then I went back at it. I'm still not finished. Probably another 7 or 8 to cut. Not as easy as you'd think.

That was all she wrote for today. These blocks are a pain and I'll be glad when they are finished. I hope (pray) to get them cut then mix up a batch and get the last 11 bricks and then these blocks all laid tomorrow so that I can start getting the plates down on Thursday.

Soon I shall stop posting pics of just bricks and concrete. I promise.

In the meantime I want to double check my framing details and things like stud heights. Oh and I measured my outer brick to outer brick on the short sides (I can't recall why). Both are exactly 4719mm. They were supposed to be 4715mm. I have failed. :eusa-violin:

49989189442_7de08f425e_b.jpg


10th June 2020...
Many hours and all the blocks are in place. My knees and back are in pain but it's done. There are no more blocks or bricks to lay. Maybe just a little pointing here and there.

As always I ran out of mortar with just 4 left to go so my last mix of the day was in a bucket.

49992363047_00956a00f3_b.jpg


Also this arrived in an hilariously oversized carry case
49992362662_f67099fe89_b.jpg


Time lapse for the bricking
Part 4 - Brick and block
[youtube]JHBFYrWCnSI[/youtube]
 
RogerS":2czupmqn said:
Good to see your thread over here, Darren.

Have you been to any of Pugh's woodworking auctions at Ledbury ?

And most importantly, have you still got your S2000 ?
Hi Roger nice to see you too!

I haven't even heard of them so no. I'll keep an eye out though.

S2000 is still cowering under the carport at the inlaws (100m away). Was on the road for all of a month last year as we couldn't go anywhere. Once we can drop the kid off at preschool and then drive off into the deep dark countryside to find a pup lunch we'll be making the most of it! I really need to get the cat rattle fixed though. It's awful at 4k.
 
They have their traditional January sale results here and sometimes later ones in the year. I could have done with some of those gouges like Lot 739. I used to sell surplus offcuts for turning ! Great source of beer money :D
 
11th June 2020...
I really like Fusion, but how can it be that Sketchup has a better bloody measure tool than it for this purpose. Fortunately I've calculated it all anyway but it would be nice to just be able to click a point and it to measure a distance on the same plane. Eugh.

Stud lengths will be 1900mm.

This allows for the 235mm plinth + bedding mortar under the DPC, 118mm from the top of the top plate to the top of the rafter and an overall 2035mm frame height based on top plate, sole plate and other sole plate.

That brings the top of my rafters up to 2388mm, plus 50mm for the slightly exposed slab (I'll actually need to lower the far corner a little to do that so there is wiggle room).

So 2438mm, plus battens and tiles should bring me in under the 2.5m eaves height. My calcs are based on the face of the stud and not the face of the cladding, which would actually bring the intersection of top of roof and wall down a little further.
49994867632_7662ef47b3_b.jpg


An easier day today, lawns mowed, numbers checked, back and knees given a slightly easier time.

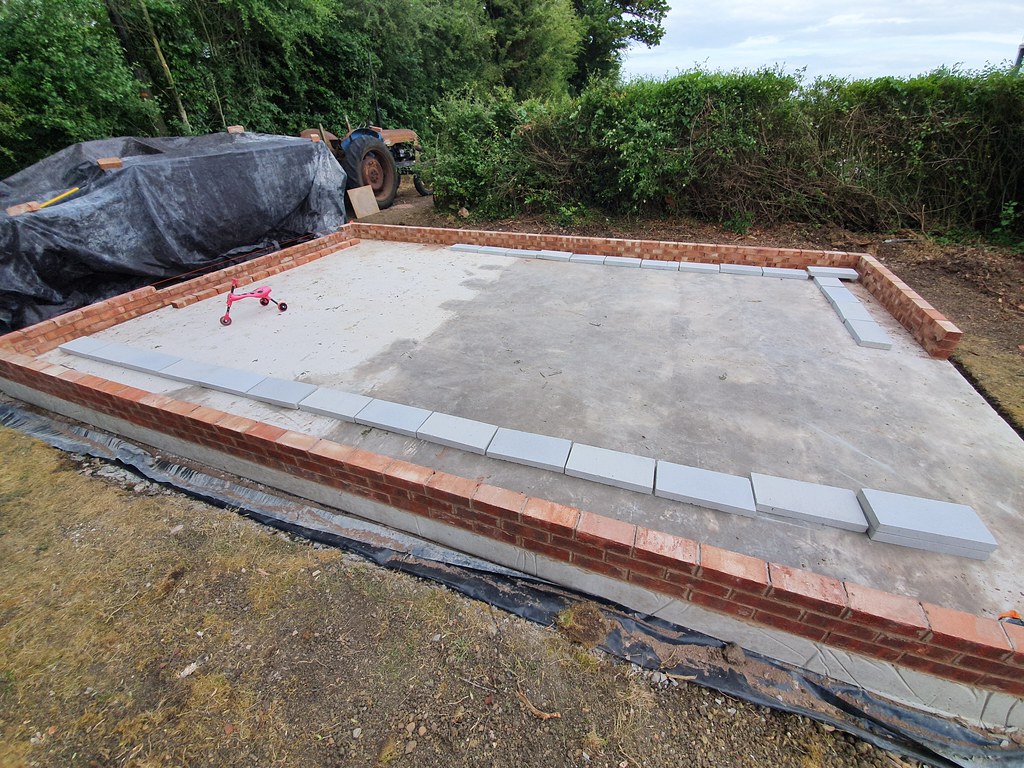
Saw bench made up from formwork timbers, work support added and the 6 pieces I need for bedding onto the mortar are cut, strap housings routed out and it all treated with cut end protector. I even cut one of the sole plates.

Naturally it took longer to find my safety glasses than it did to actually route out the housings.

Tomorrow morning I'll staple the DPC onto the bottom of these and get some mortar made up to get them bedded down and secured to the slab.
49994829573_178ed05e17_b.jpg


12th June 2020...

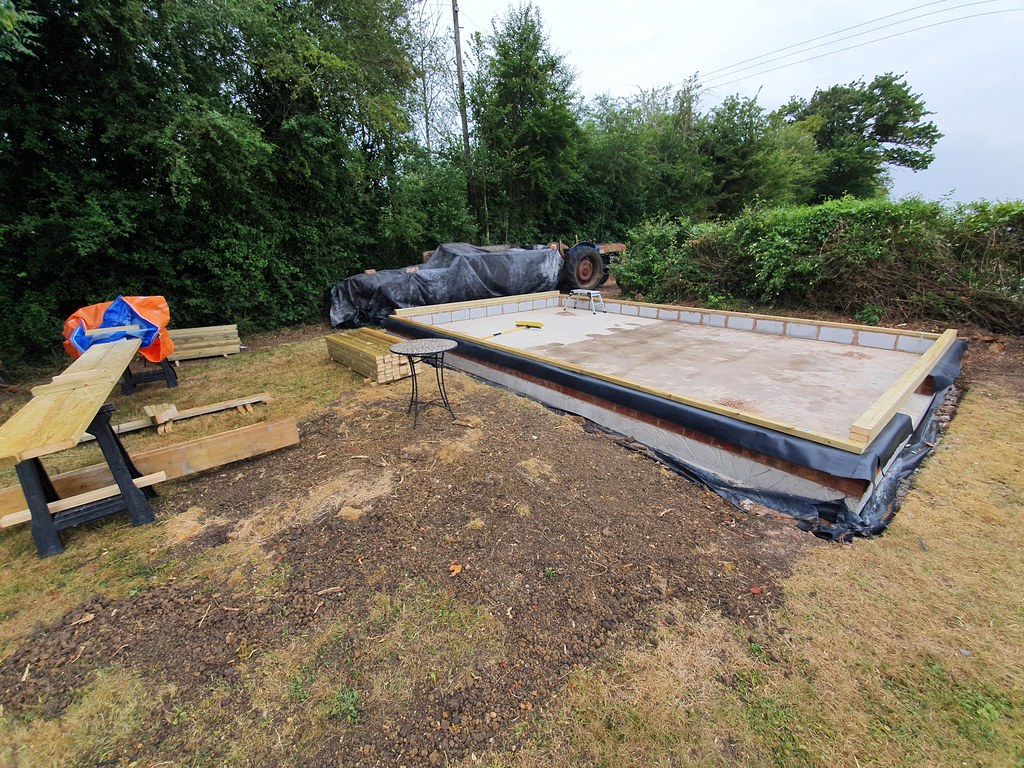
Well the plates are mortared down with DPC stapled to the underside. This was the first bit that actually went easier than I expected.

Like Mike have have used wider DPC so that it can roll back up and over an arris and up the studs behind the cladding.
49997491083_dd581d1425_b.jpg


After a tasty jacket spud and a bit of a tidy up I got the straps screwed down and started cutting up my framework. 43 studs to 1900mm, 3 more plates to 4361mm.

I have realised though that I have my first materials shortage. I made my cut list before finishing my plans for windows and obviously windows need more timber than just plain walls. :oops:

So I have enough to complete 3 walls, just not the more complicated wall with the windows in. I need 5x 3m lengths so not the end of the world but an annoyance. I'll go get some first thing tomorrow if I can. Annoyingly Travis are closed and I have a suspicion my timber yard will want to book me in for a collection. When I try and use their brand new website it wants me to collect in about 3 weeks!

Tish and pish.

A slightly earlier finish today. Time to dad.

49998903447_4ddd0f1a3d_b.jpg


13th June 2020...
I headed out early doors with the sprog in tow to Kellaway to pick up the timbers I needed. Queued for the better part of 50 minutes only to pull in and be told "sorry we're all out till Monday...maybe".

With that and a BBQ afternoon all I got done was cutting down more timber for plates, lintels and whatever name is appropriate in your geography for the bits that hold lintels up :lol:

I did make one daft decision in that I ended up using 2 of my 2x6 boards for some lintels and had bits left over from each that would have served as another smaller lintel... which I'd already cut. So now I have 26 bits of 2x6 and 26 rafters to cut. Maybe I'll pick up a couple of spares just in case.

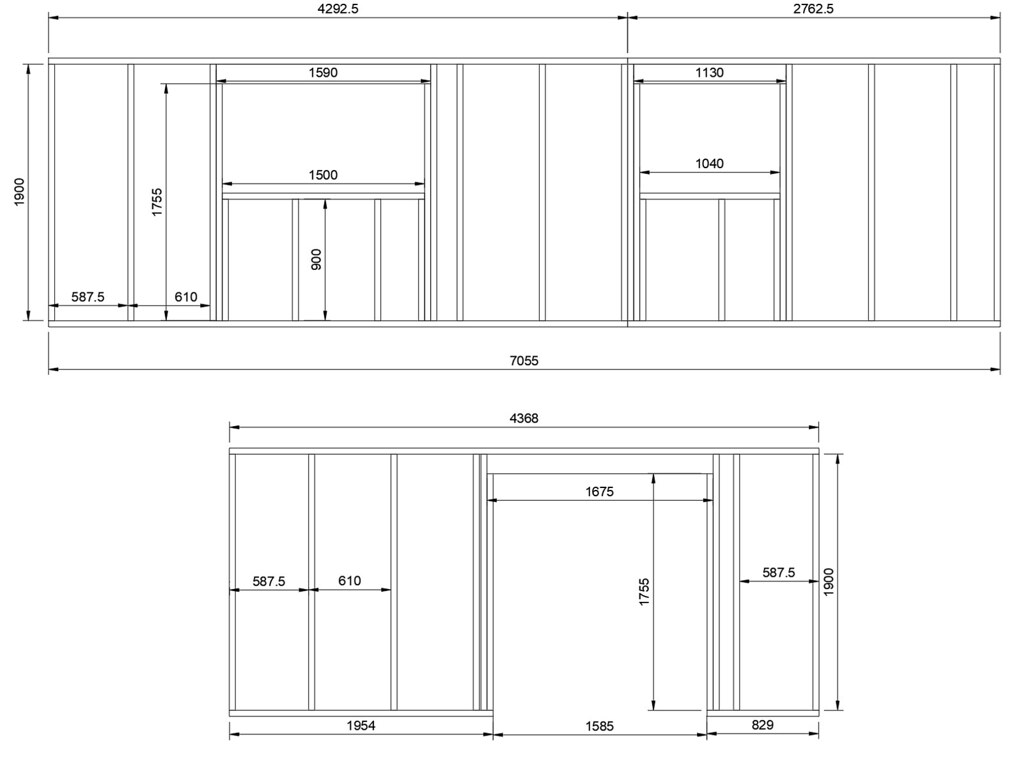
I also made one other mistake when planning my timber. My long 7055mm sides require two panels to complete. Once again I made my cut list before actually drawing the specifics (in my initial drawings its just one 7055mm long timber). That cut list was made along the lines of "I need 7.1m, I can get that from a 4.8m and less than half of 4.8m, so 3x 4.8m lengths will sort all my sole plates, and 3 more will do my top plates."

But when actually drawing it up the sections are 4292mm and 2763mm. The latter does not go into 4.8m twice!

You may ask why not just use 4.8m and then a section to finish? OSB comes in at 1220mm wide, 4x 1220 is 4880mm. So either I faff and have extra studs in places they aren't needed (I'd need one at the end of the 4.8m, and then another at the start of the next section, and then yet another to support the edge of the sheets), or I cut the first plate down to 3.5 sheets of OSB, and then the next plate will join on and the OSB sheet will overlap. BUT I hear you cry, 1220 multiplied by 3.5 does not equal 4292. Correct. But the first stud will be entirely covered in OSB, rather than only half covered, so that extra 22mm needs to be added on.

This probably makes no sense.

Here are the drawings of my frames. OSB will cover the entire face of each stud, which is why not all studs are on 610 centres.
50002050553_a05c1321ba_b.jpg

50002570176_de62cc903b_b.jpg


14th June 2021...
Early finish today. 4 of the 6 frames are done, just the 2 for the window wall to go and I can't do those till I have more timber. Hopefully that will be tomorrow.

Just using some of the 2x6 that will soon be rafters to hold the frames up out of the way for tonight. I braced the short sides square with a batten and will do the long sides tomorrow with the OSB that will be going on.

Everything mostly went ok. I had a couple of bits that were very bendy and needed persuading into shape but I got there in the end.

The nailer isn't that heavy when you just pick it up, but it feels it in the hand. It would probably need a 12ah battery to really balance it out and feel good. But it sunk everything nicely.

50005631632_2dd3088df0_b.jpg


15th June 2020...
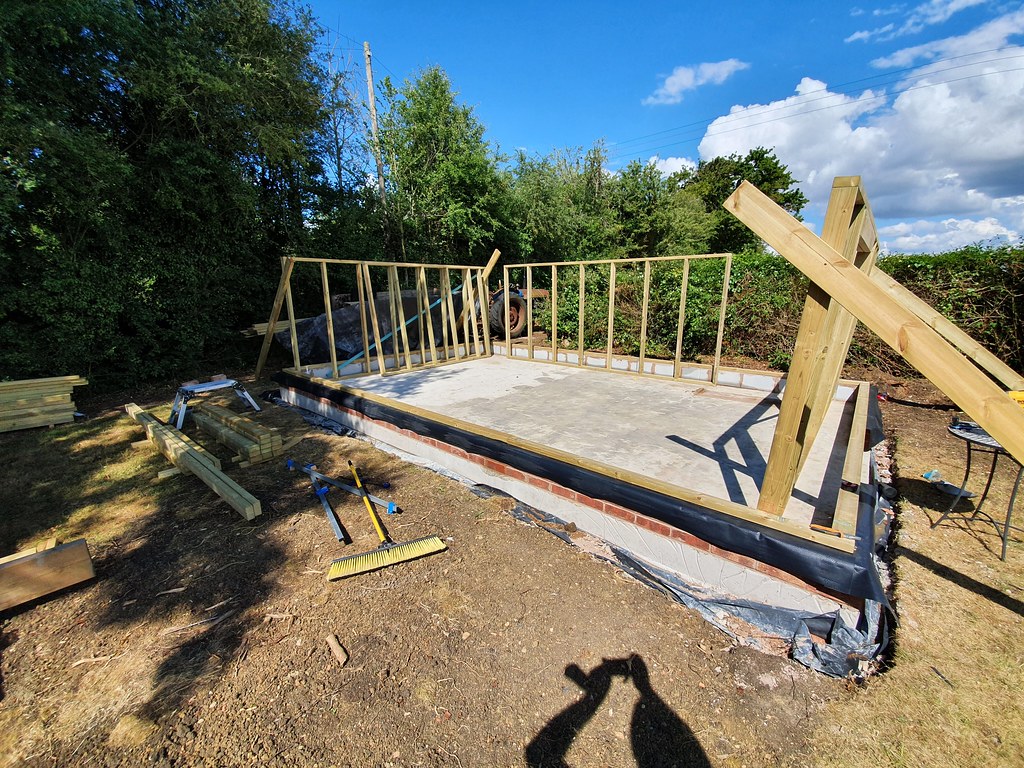
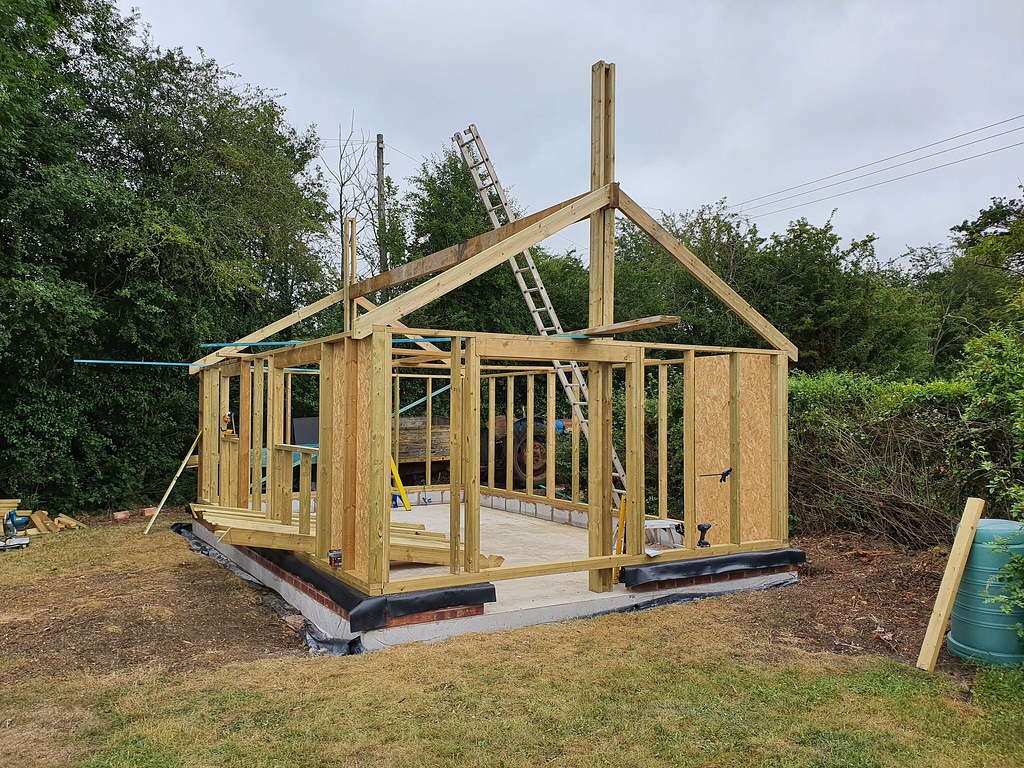
A good day on site. Travis had the timber in so I picked it up at 10:30 by which time I'd already done the large window panel. Got back and made up the small window panel and then got that, the empty side and the smaller of the 2 panels for the backs side up and clamped together before Mike appeared to help with the bigger lifts. Getting the large window panel up with OSB sticking out the bottom by nearly 30cm was a treat, as was then remembering to cut a notch in the OSB for the service conduit once it was upright.

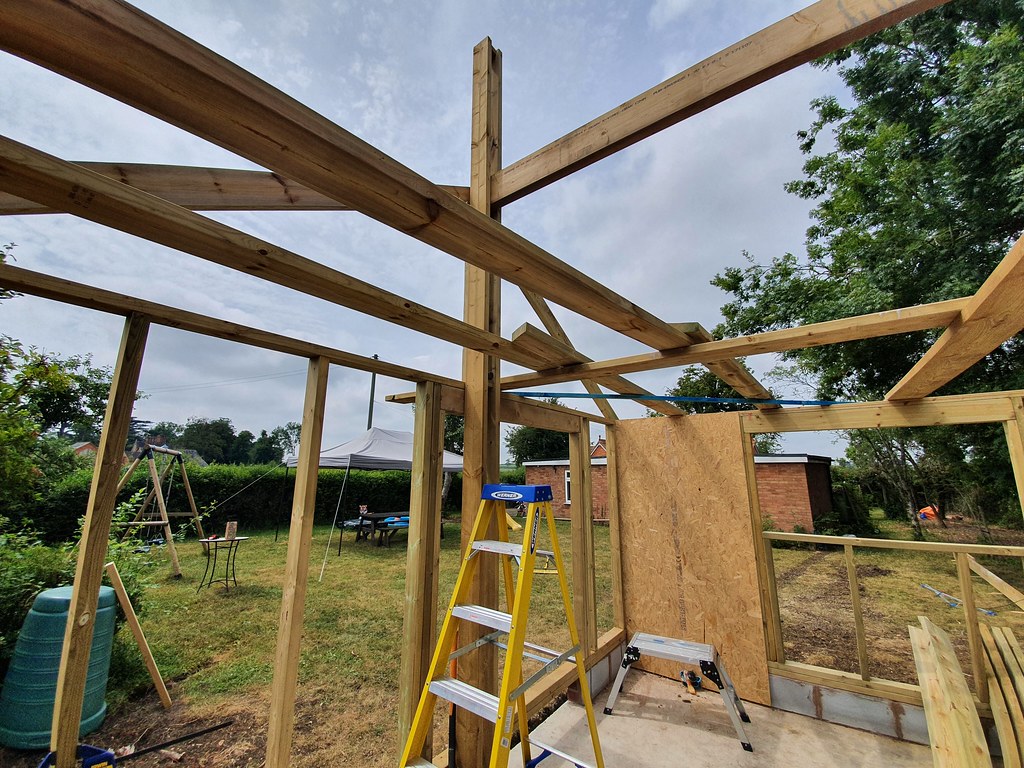
Got all frames up and squared, secured together and down on the plates. Then we started making the temporary supports for the ridge. Its 7.2m long and 220x70 so not too light. With some supports made from future rafter ties to prevent side to side motion and a spacer in between, we secured them to the middle of the gable walls and then decided we might as well get the ridge up to top plate height and move on tomorrow.

While the ridge is heavy, when it can't move left or right its actually just a dead lift and no trouble at all to lift one end up about a meter and stand it on an offcut, do the same at the other end, then raise again up and over the plates at both ends. We did need my Mk10 hammer to persuade it back over the second plate as it was too high to push it easily.

Tomorrow I'll be raising it in smaller sections and placing something under it each time to hold it up, with all lateral motion prevented its an easy enough lift. Once in place I can start on cutting the rafters.

These ridge supports are 4.8m and the ridge only needs to go to about 3.6m, so they are a bit longer than needed, but were on hand.

It's feeling like a nice big workshop at the moment. While the space will be more than double my current space, the extra headroom will give me a lot more volume than I have now so it will feel even bigger.

50009970806_e15c939b28_b.jpg
 
16th June 2020...
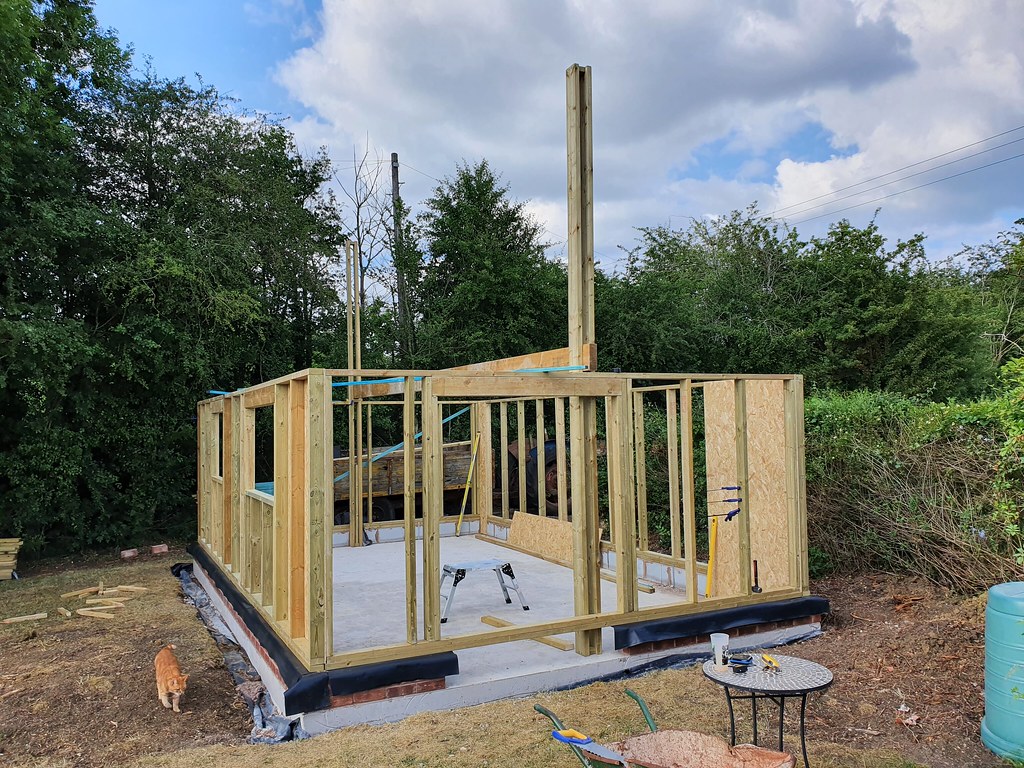
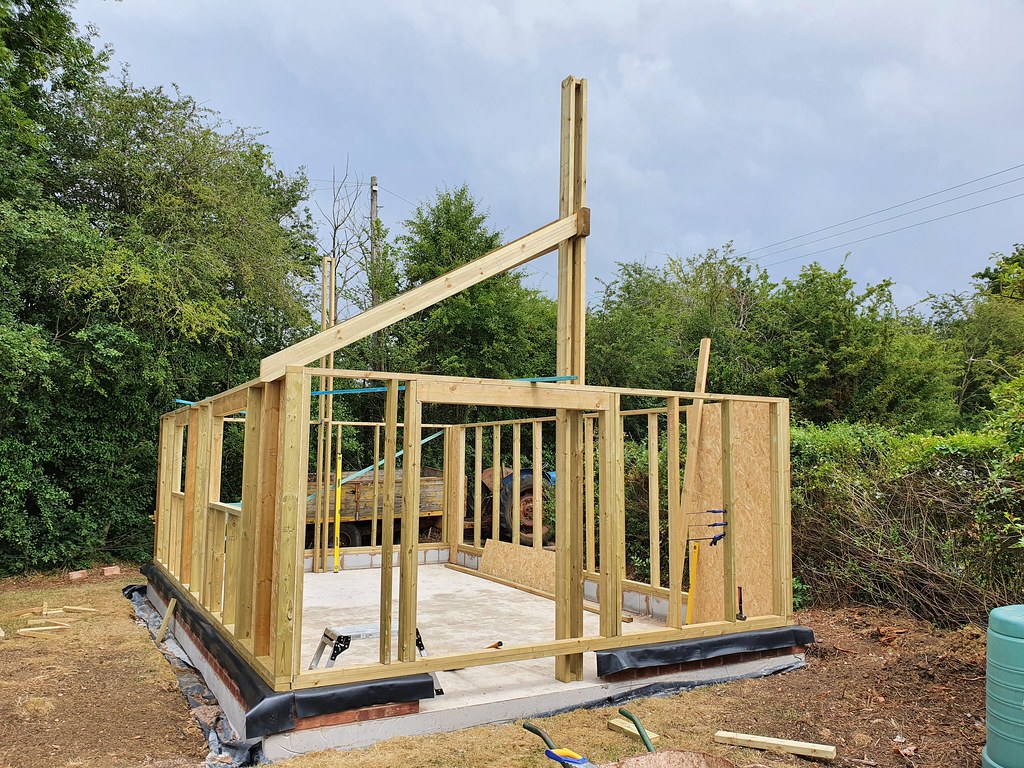
Lift complete alone and without any issues. The joy of limiting its movement to vertical only. I used a series of offcuts placed on the top the plate to raise it up about 400mm at a time to the final height. Just used other longer offcuts and then my 1.8m level as something to put under it and lift with the legs as it's too much to lift with arms above your head.

First rafter is cut to plan using a speed square and offered up.

50011878333_ffcf447eb2_b.jpg


So after off again on again off again rain and thunderstorms all day, plus me spending too long trying to make up a damned OSB template to make life easier, I eventually got all 26 rafters cut to size. Had I not bothered trying to make the template I'd have been done by flippin 3pm.

50013761382_261e84b9ee_b.jpg


If the weather holds off tomorrow then the rafters will go up.

3.6m is quite high when you're down at 1.8m looking up at it squinting because of the sunlight.

17th June 2020...
I started off by getting my first 4 rafters marked up at the gable ends and toe nailed in place and settled on both sides of the ridge. Then I could rest my very long ladder against the ridge with its foot against the block wall. With both ends nailed up I could work out how I was going to mark out the ridge (listen people, do it BEFORE you lift it). With the tape measure clipped over the end of the first rafter I could get up and down the ladder to mark each rafter position on both sides. I did at least manage to do both sides at the same time.

Gable rafters up
50016450403_ecd34aae9b_b.jpg


With everything marked up I got 4 more rafters up to a working height and settled into my system for mounting. Rafter up and roughly in position, clamp over the plumb cut and the top plate to pull it tight while I cracked the underside of the rafter with my hand to jiggle it enough to settle the seat and then nail it on. Same on the other side and then repeat.

Setting out ready to start the rest
50017238332_bb1d2702f3_b.jpg


With 4 done I got yet another ladder out and got up there to nail the rafters in place at the ridge. Just rinse and repeat till it was done!

Halfway there
50016449773_4bb4265f2c_b.jpg


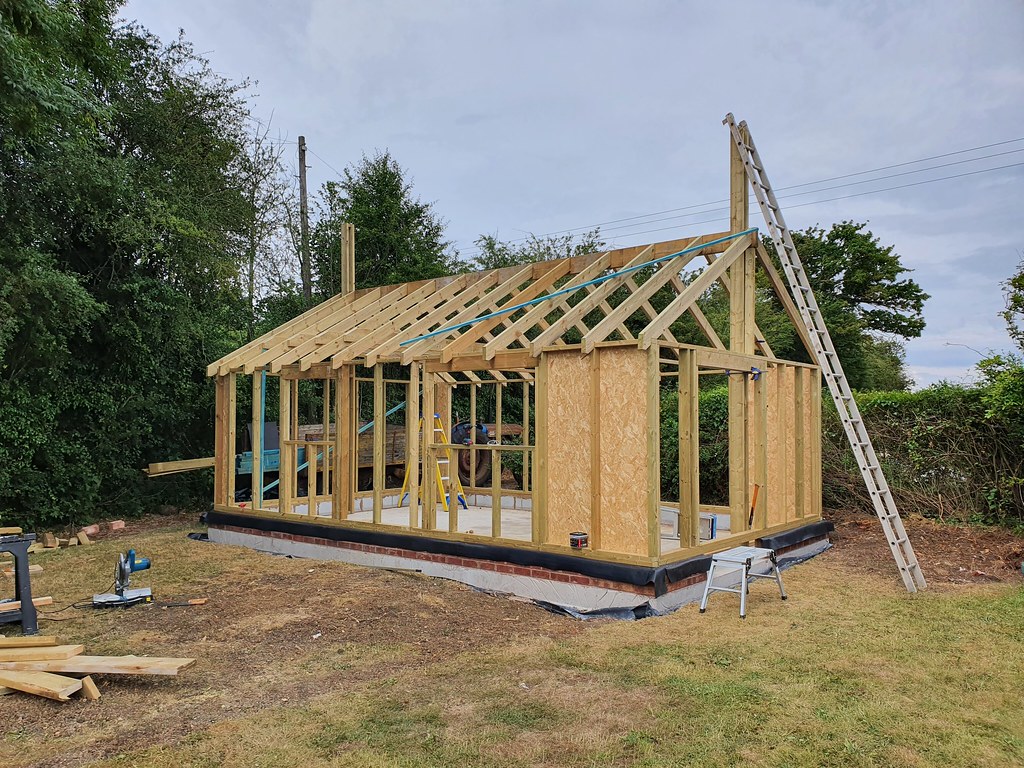
26 rafters completed
50016976226_db5e81ce01_b.jpg


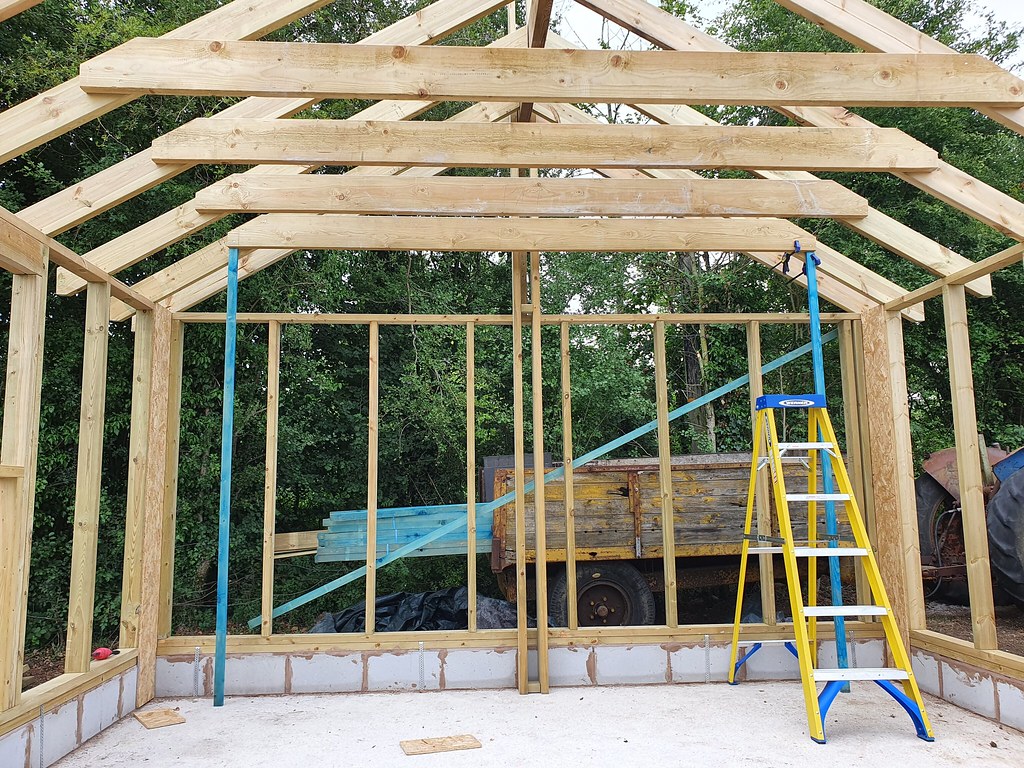
With them all up and out of the way I started cutting my larger rafter ties from my old formwork. These are 50x200 so oversize for the job at hand. I cut up a pair of battens as a gauge, clamped them to the rafter with the other end on the floor, then lifted each tie up, clamped one end, screwed the other, then the other. I have moved more ladders today than I care to remember. The ties are only double screwed at each end for now. Once all 7 are done I'll stick a homemade M16 bolt through each end.

4 of 7 rafter ties in place
50016449133_c76ea10d20_b.jpg


A decent days work
50016975751_66755f1f8c_b.jpg


Tomorrow those ridge supports can come down as I need them to cut the last of my rafter ties. Then I'll work out what I'm doing next.

I've enough offcuts to do my noggins but not enough to make something to close off the eaves like Mike did on his.

Saying that, I'll have a fair bit of 200x50 and 150x50 offcuts that I could rip down.
 
18th June 2020...
Due to torrential rain my workshop is now a swimming pool. The sum total of my work today. All cut dutifully on the evolution table saw with the sliding carriage. Very clean and the majority needed no attention at the ends to get a nut on. I've cut rod before and know to keep a nut on there to fix the threads when you wind it off, but no need with that saw.
50020038176_713ab11f42_c.jpg


A used CladMan tool also arrived from ebay. £100 so £50 off the usual price and it'll help put up my feather edge and can be sold again after I'm done with it.

For larks I checked the size difference between workshop 1 and workshop 2.

Workshop 1) 4m x 3.25m x 2.27m
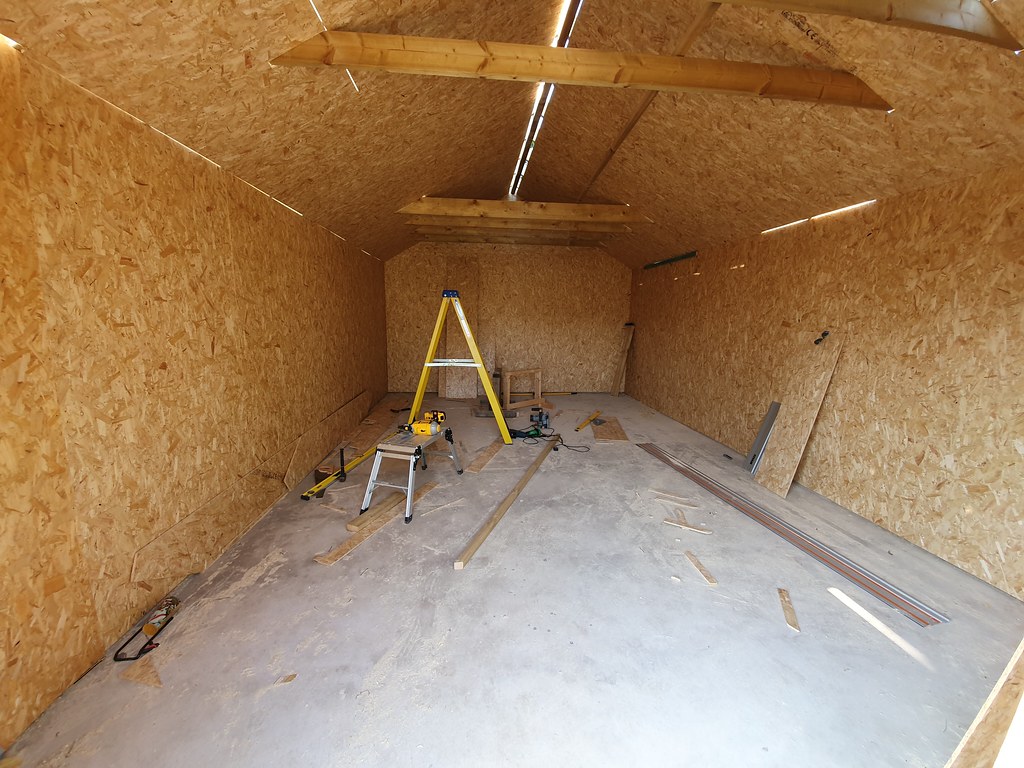
Workshop 2) 6.86m x 4.37m x 2.51m to 3.38m

13m2 area and 29.5 m3 volume for workshop 1 compared to 29.9 m2 area (230%) and 83m3 (280%) volume for Workshop 2. That's not including the storage space up in the roof which adds another 5 or so. :obscene-drinkingcheers:

19th June 2020...

Crappy weather again today though it did brighten up eventually.

All I did today was get the ridge supports down, cut the last 3 rafter ties and got them fitted and the M16 bolts in place. Well that and swept the Atlantic out of my workshop.

50023025508_1f72014af9_c.jpg


The weather is improving basically from now so I'd like to get it water proof by next weekend if I can.

I reckon I can use offcuts of 50x100 and the 25x100 I ordered for use on the corners of the cladding to get the eaves closed. That will mean I can get it all covered in membrane at least.

Early start tomorrow, noggins cut and in and then maybe start on the OSB. "That'll be fun" he said.

20th June 2020...
Done for today now. Doesn't look like much but it felt productive.

Used all of the offcuts for the studs to make the noggins first. Naturally the gaps are not all perfect so I had a quick measure and made them in batches that were close enough and then went around and trimmed those that needed it, treated the ends and got them nailed in.


Then it was time to tackle the closing of the eaves. I still had some 50x100 left over but sadly the offcuts from my noggins were about 40mm short, so I had to use what was left of the stud offcuts. I set up a stop block and cut everything to 570mm, slightly larger than any gap between rafters. I literally ran out with the last one cut. I now probably have 12m of 530mm offcuts.

That solved one angle, the rise was dealt with by using the 25x100 that I'd ordered for the cladding corners, so more will be needed later.
50026831487_1a0c7f29b8_c.jpg


With everything cut I started to screw the first one together and remembered I had a nail gun. That was much easier.
50026028918_26111234ae_c.jpg


All nailed together it was time to trim each one to size and use the Mk3 Persuader to encourage them to sit snugly without putting undue pressure on the rafters. Each one was fitted with the previous ones still in place to ensure it will still fit when actually nailed in place.

With that done they could all be taken out and treated. Jim has come through with an electric planer as I don't have one so I can do that before getting the roof membrane on.

50026569966_c6e4239348_c.jpg

Looks like so little but it was a satisfying day in the end.

Tomorrow it's time to get those fitted then get my OSB cut and the walls lined. I can then bring up the estimated 75 half sheets of insulation I need for the walls and roof from the farmyard. Bought at a farm auction a year ago for £130 for about 120 600x2400mm sheets of 60mm? That'll do nicely.
 
22nd June 2020...
Something approaching work was done today.

Despite wanting to crack on with the boarding I knew I'd need the gable studs (ladder?) done, so I set about that. The first issue being I have no bits of 50x100 on hand that are longer than 530mm. A shame as I have 40 odd of those. That size would at least serve for the 4 smallest studs, so I used some up to get those done to hone my plan. If I got something wrong I had lots of offcuts to redo it on.

With the 4 small ones complete I could resaw the 50x150 offcuts I had kicking around down to 50x100. The Evolution table saw dealt with that easily enough and then I could offer each up to mark it accordingly, carefully noting which side needing chopping out and numbering each one so I knew where it needed to go when I was done. Rather than chopping and changing everything around I did all of the ones where the right side needed chopping out, then all the ones where the left side needed chopping out.

Gable studs done and rafter fillers trimmed
50033613478_aa1a9e7b00_b.jpg


Naturally it was just as I was treating these ends that I ran out of the cut end treatment so had to waste time going out to get more.

With framing pretty much complete here is the time lapse
Part 5 - Framing
[youtubessl]5LDYIWEbas[/youtubessl]

Anyway, with those all done and fitted I could finally start getting some OSB up. These were still out on the driveway where they were delivered so for the first time I had to actually lug materials round to the workshop. I wanted to get the long side walls done first as those were the easy ones. 4 and a half sheets each side.

First up I trimmed 4 all at once with the tracksaw but I didn't bother doing it again as it was too much of a faff lining all 4 up to be cut the same. The sheets are cut to be about 25mm shy of the floor as I'll run some kind of skirting around to finish it off, and there will be a floating floor anyway. It wasn't long before I'd got my method down and I had both sides sorted. I can already see and feel a difference between the new sheets and the ones that have been up a few days and been rained on. Needs must.

It would be nice if the nail gun beeped at you when it knew it only had x nails left. It knows it's running short as it won't fire if it's only got 3 or 4 left, so just beep at me a bit before so that I've not got a sheet held up ready to nail only for it to not fire and then I notice I'm out. I was going through those 50mm nails quite quickly while putting the sheets up!

50034152121_70a9524065_b.jpg

50034151771_f5ac85be14_b.jpg

50033612628_42c52d6c5f_b.jpg


Tomorrow I'll have to run a little timber into the gables for the diagonal tops of sheets to nail to. Then the fun of boarding those out and then the underside of the rafters! Yay.

23rd June 2020...
I now have 12 of the framed panels that fellow workshop builder SheptonPhil used on their way (an offer from the seller for 12 for £256) 600x600, 6500k and many lumens.

The bigger question now is how am I going to mount them. I don't have a flat ceiling like Phil and obviously I have the vaulted section.

A productive day again on site though. With the long walls finished off yesterday it was time to start on the gable walls. I did the easy end first and did the easy part of that first, just the sheets that went along. I was fortunate enough that I was able to cut the whole gable from one sheet of OSB. A small notch later for the ridge and one end was done.

Easy gable done
50038051646_0071947f31_b.jpg


Diagonal cut needed to make the gable triangles.
50038051356_c0b87f3557_b.jpg


With that end done I set about the door end. Wifey helped by marking out where the door hole was while I held the sheet up on both sides and then I just needed to make a little infill for the section above the door. The batten you can see was something I added to push my sheets upto to get the same height all across. It's hard enough lifting them with one hand and holding them there, let alone trying to align them too!
50038051151_196cbd3891_b.jpg

Before I could start boarding out the rafters I had to add yet another piece for the boards to secure to, this was the first real mistake I'd made on the job so far. For reasons known only to me (I'm claiming heat stroke) I didn't check where that new piece needed to go properly. Batten was secured to the gable rafters at sort of the right place, and then I realised it needed to be in the actual right place for the sheets to nail to. First use of the crowbar helped get the 60mm nails out without too much grief. With the battens properly secured in place (Using another pair of battens clamped to the underside of the rafters as a guide), I could start on the boarding.

I decided to stick to boarding in the same orientation as the walls and to begin by boarding above the joists up to the ridge. Naturally I had to cut the board a little short to allow it to swing past the ridge, but that gap will be closed off by securing more OSB to the underside of the ridge.

With the first 2 boards cut to the correct width (the first boards on the walls fly past the gable wall, so I had to cut these ones down as they would be butting up to the internal OSB) and height, I could lift them onto the joists and then get up there and nail in place.
50038050811_a3585562a0_b.jpg

That was all for the day. We also had a crew come in to take some of the Ash branches down so the garden is looking a little busy!

I'm really hoping to get the boarding done tomorrow so that I can get the insulation in and the membrane over at least the roof before the rain comes back in earnest.
 
24th June 2020...
Another grand day. I started off by getting the easy boards up in the roof, this comprised of 2 whole sheets, 2 99% whole sheets and then 4 smaller cut pieces. With those in place I could start the fiddly bit of cutting around the rest of the rafter ties/joists.

A handy resting place for an unwieldy sheet
50041544571_170cc6f279_b.jpg


"Easy" sheets complete
50041806727_3291930f33_b.jpg


I was once again fortunate that the distance from the wall to the ridge was nigh on 2480mm, and I needed to leave a little gap to be able to swing boards up past the ridge as it sticks out below the rafters. So a 2440 sheet pretty much filled the gap entirely. The gap at the ridge will be covered with a single piece nailed to the underside of the ridge.

So with the offcuts of my earlier exertions I could begin measuring, marking, measuring again, writing on the wall, checking and finally cutting. All in all not too difficult, though true to the rest of the project I was unable to not copy Mike in one more way. For one cut, just one, I had measured the distance to the rafter, and not the joist. Ploppers.

Todays cockup
50041544046_4c29ebf278_b.jpg


Todays result
50041806237_60e4e37bd5_b.jpg


With that all finished I could hop (more like teeter) onto the roof and nail on some supports for those cut ends, then come down again to finish the nailing inside.

Next up it was time to attack the insulation. I had 23 sheets of 610x2440 60mm insulation already up from the farm. While the stuff is easy enough to cut I do find that handsaws make an inordinate mess. Add to that an element of drunken blade wander and I figured since the table saw was still out it was the work of a moment to rip all the sheets down to size, and lo, it was. A nice finish on the edge too so less bits flapping around.

This is the insulation that cost £120 for 60 sheets, so thats 30 full sheets, equalling just £4 for a full sheet. The joy of farmers sales. The second batch did test the wallet a bit though at...£6 per full sheet. :oops: Again, these were not bought for this job, they were bought for use around the farm (cottages, houses etc) over a year ago.
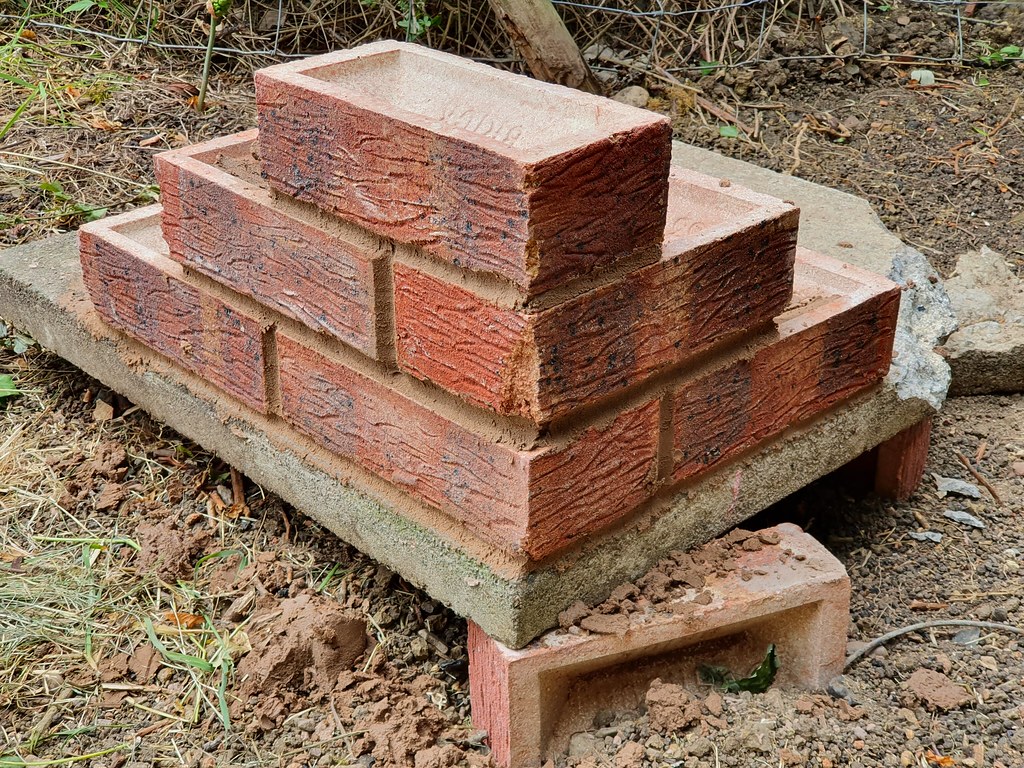
So off I started carving them up to work around bolts and joists and so on. Once you have a pattern for the first one the next become much easier. I ended the day doing the nice easy sheets in the vaulted section with no pesky bits to cut out. Just trim an angle off the end of the first piece and in they sailed.

I'll have more insulation and expandy foam brought up tomorrow morning while I'm sorting the remaining sheets out. Hopefully I can get them all done, foamed and membraned before the expected thunderstorms on Friday morning. It would be nice to get the walls done too, but its just not going to happen. I'm a little less worried about those.
50040990313_609d2d479d_b.jpg


25th June 2020... It's hot out there
It's 9:40 and it's 23 degrees already. I have at least got my next batch of insulation here already. Time to take on water like the Titanic and cut the next 24 boards to width.

Everything went pretty well for the most part. You get surprisingly comfortable climbing wonky ladders and crawling all over your roof when you have to do it for a few days. I had a lie in yesterday and didn't get out of bed till 7 helped by the fact that my kid also decided that sleep was good.

While my wimmin slept I woke up and got ready to go and move the truck to get more insulation. Lo and behold as I walked out to where the track was, it wasn't. Mike had already been up and was driving across the field with my next batch of insulation. All £48 worth. Great. All materials on site to crack on.

I'd already cut all but the last 2 bits (which are narrower than normal) to width the night before so I could carve up my first one for the door end, check my measurements and then make 2 more to the same pattern, and 3 more bits to go over the top. With those all in place I then did the easy one at the end, just a straight run to two different widths.

One half complete
50046552752_04c35f0d38_b.jpg


Time to fire up the saw again and make some mess.
50046294006_04a345bb3d_b.jpg


I know most only use a hand saw for the insulation but honestly I'd do it again with the table saw. 20 pieces all cut to perfect width in a minute or two with less mess and no marking out. This is obviously easier when the boards come in half widths in the first place.

I started hacking bits away to get the other side done and it all went in without major issue. As always you work it out slowly and it only gets faster as you start banging it up. It really helped noting the cuts from the first boards to just mark out the same for the next 3 or 4 for around the joists. I could do minimal trips around the garden to the saw and up and down the ladder.

The far side was complete by about 2:15. The temperature was about TooHot degrees.
50046552437_80611fddce_b.jpg


We'd had some friends arrive for a distanced BBQ and with them came grown up conversation and cold beer, so I wasn't going to miss out after 3 months. Really the only thing I've missed since lockdown started was this kind of afternoon with friends.

Despite that I needed to get my foam in so I hoofed it up onto the ridge once more with the foam lance. Wifey and friend Lee proved adept at launching cans of foam up to me on the ridge and I worked my way along the top doing the gap and as far down the rafter edges as I could comfortably reach. Then it was time to scamper across the rafters to do the rest of it, then the other side. But it was done by about 3:30 and I could sit, eat have a much needed beer and enjoy a natter while the foam cured.

They did the foxtrot come 6 and so I could get back up and trim any odd bits that had bubbled up out of nowhere and clean up a little of the more overzealous foam. Then I set out my membrane on the floor and marked out 5x 7.5m lengths, enough to do the whole roof with excess.

That's where I started getting hot under the collar. The merest gnats fart had the stuff billowing all over the place, and I'd only folded the membrane up to get it up onto the ridge and work down. Never again. Don't do it this way. I've warned you! With the ridge piece on I could come back down for my second length. This proved more difficult as I was rapidly running out of rafter to hold onto or stand on. The third and final length for the far side was completed mostly from the ladder. That side looks rubbish compared to the side in the photo, but it doesn't need to look pretty.

The side you've seen was done marginally better and slightly differently. I rolled up my membrane as tight as I could and after clambering onto the roof went to the farthest end from the ladder and worked backwards. I wasn't quite getting in my own way as often, but boy was I glad I didn't have a steeper pitch to try standing on. With that one down it was fairly easy to do the last bit down at the eaves once again all from the ladder.

LESSON: Start at the bottom and work up using battens. Oddly, exactly as you're supposed to do it!

I wish I'd worked out something for my batten spacings before getting to this point so I could have put some up without them being temporary. But time was also in the way as the potential for rain was high enough that I didn't want my hard work ruined.

So that's that. I'd never do it that way again, but apart from the membrane part it all went ok given the ridiculous temperatures.

All in all the insulation cost for the roof came to £92. Not bad for 34m2 of 120mm insulation. A new record perhaps?

End of the day...
Well its done. The phrase rhymes with clucking bell.

50045129922_eb20e2f3c9_b.jpg


The forecast said today you shall bake and tomorrow you shall drown. Hopefully it doesn't hit here anyway but at least it's got some protection.
 
Cracking WIP, Darren. Are you working on your lonesome ?
 
RogerS":vqloqjnn said:
Cracking WIP, Darren. Are you working on your lonesome ?
Yes Rodger apart from where mentioned it was all done solo.

Father in Law Mike helped a bit with clearing the site, the pour, getting the mesh down and also to get the ridge to head height. Jim helped on the pour and supplied a planer. Wife drew a line on a bit of OSB around the door but also basically did all of the childcare for several months and most of the cooking and lunches. Typically I'm a lt more involved but she understood it needed to get one once it was started.
 
27th June 2020...

After a moment to un collate (de collate?) some nails (I literally had no nails that were not glued together) I headed up in the spitting rain to get some emergency battens on to help keep the membrane on the roof with the incoming weather. About half way through I cracked my thumb with the hammer. Everyone in the county heard me.

I got up the other side and got some battens up there too, also did my thumb again. Why don't I use more nails I wonder? (hammer) These were not driven with the nailer as I wanted to leave them proud so that I could easily move them once I sort my batten spacing for the roof.

As I don't have much time today I then banged up what I could on the walls to help keep some wet out as it's drizzly. The 8x6m tarp that covered the slab is on the back wall (that wall got hit harder with the overnight rain), the smaller tarp we had went over the door to keep the worst out and then I used what was left of the first roll of membrane on the window wall and then as far as I could on the short back wall. I'm fairly certain I won't actually need it anyway if I wreck it getting it off again, but I can be careful removing the staples.

50050227707_da78426c90_b.jpg


It'll have to do.

Months and months of amazing weather and now this at the worst time.

29th June 2020...
Well after the most of the weekend off I cracked on again this morning. I used some of that time to get my head around the correct batten spacing for the roof.

First up was to get the walls insulated. I already had enough insulation here so it just needed trimming to width on the table saw and then cutting to length to fit around the noggins. I did the easy walls first, the long side with no windows and the doorless gable end.

50059246166_2189da248b_b.jpg


Next up was the door side and I just about managed to fix the last bit in place before my lunchtime pizza was served at 1:40.

Pizza and Coke consumed it was time to get the window wall sorted. While I didn't quite go to the extremes that Steve Maskery went to using offcuts, I did manage to end with no big bits left over. A few skinny offcuts were used here and there where it made sense.

50059245771_cd03826a95_b.jpg


With that all in I marked a chalk line 1450mm up from the bottom of the lowest plate and used that as the top of my 1500mm membrane. I left it on the roll and just went round 3 sides without stopping all the way to the door. I took that end inside for now and then just used a small bit to finish off. I was getting there and it hadn't been horrible to do despite the gale blowing all day. This was helped by it still being on the large roll.

50058674673_f3e91204f0_b.jpg


The remaining uncovered area on the long sides was exactly half the width of the membrane so I reeled off 7.5m, rolled it back onto the tube from the other roll and then marked it halfway and cut it with the saw. Easy. Then I could tack it on without too much fuss on the long sides, the tops around the rafter feet need finishing off.

Then the fun of a 5x 1.5m section blowing all over the place as I secured it across the gable door end. That was less fun on a ladder and with it billowing everywhere.

That's where I ended for the day. First thing tomorrow I can get the rest covered and then sort the details. I've not tacked it all the way to the bottom as I might yet still do the half batten wedge wrapped in DPC on top of the bricks.

50059245196_10af2ea73b_b.jpg


30th June 2020...
It looks less impressive today but a bunch of bits got sorted.

I finally chopped the ends off my ridge while sitting astride it, once complete I could get the last of the membrane on and tuck it under the roof membrane on the gable rafters.

With those two sails fitted in yet another gale I neatened up the membrane around the rafter feet before cutting up some batten on the table saw to use as my arris wrapped in DPC. For the first time in a few weeks I can see my brickwork properly!
50062810592_5b51c07eb6_b.jpg


50062556541_d3a6ef5343_b.jpg

And that was basically that. I started a bit of tidying inside the workshop itself as it basically just sawdust, membrane and OSB offcuts and tools sprawled everywhere.

My wife says my erection looks much less impressive when covered in plastic.


Stop it.
 
1st July 2020...
Another day that doesn't look like much. Just the roof battens done though not cut to length yet. It took a while with bits of tile and fascia in my hands and on a worktop to work out exactly what I was doing and where the first few needed to go, then measuring, checking, measuring, checking and finally doing.

So after all that its probably wrong anyway. :lol:

50064942903_696e5bfd04_b.jpg


More battens, 22x100 and 50x50 arrives tomorrow. A welcome surprise as I only ordered it at 2pm. Kellaways Worcester apparently have another truck on the go now so no longer is it a week wait for everything. Maybe by the end of tomorrow I'll basically be ready to tile/clad? I still haven't even thought about a colour for paint.

2nd July 2020...
A bunch more battening done, just the other gable end to finish now. I spent a fair while working out which bits of the gable to do in which order and which bits if any were going to be visible or not. EG, the 50x50 along the underside of the roof battens mustn't stick out beyond the fascia which isn't yet fitted, so I got a bit of that clamped in place to cut and fix the 50x50, then I could work out the end battens, then the battens that sit under that 2x2, and then finally all the bits in the middle.

I've just chopped up a couple of bits of featheredge to see how far it protrudes so that I can mount the corner detail appropriately. That's with a 40mm overlap.
50069345492_e0981b7fd2_b.jpg

50069345292_d123f54887_b.jpg


The LED panels also arrived so are tucked away. I'm waiting for the electrician to let me know when he can come and fit a CU in the workshop and hook me up with some power while I progress.

Still no closer on paint.

3rd July 2020...
That's the other gable battened out. My workshop currently looks like a Tron tribute.

I then spent some time sorting these corner details out. Making sure I had the battens in the right place, 25x100 in the right place and 25x65 in the right place, as per Mikes drawing.
LLWd9UU.png

I secured a bit of 45x45 to the batten which gave me the leading edge I needed to mount to as that's how far my FE will protrude as measured from my 200mm demo section pictured earlier. Trying to hold up bits in the wind and measure and screw them was pointless so this solved that as I had something I could clamp the 25x100 to as well.

45x45 mounted to batten as a gauge and clamping point
50071831957_e5367f7e9f_b.jpg

Once finished the 25x65 bit to be painted was sticking out way past the brickwork. NOOOOOO I specifically did the brick and block plinth to help avoid this. I got it wrong. :oops: Fortunately it was only a test run with everything screwed in place. I had the 25x100 mounted so that IT would cover the whole ends of the FE, which then meant that the 25x65 trim would stick out past it. Once I worked that out I re fitted and now it looks much better.

Fitted correctly, and nicely aligned with the plinth
50071831837_834699dab1_b.jpg


What I'm still working out is the top. This test was just using an offcut for the 25x65 bit, so its only 600mm long and down at the bottom of the wall. For the top I need to work out where it will end, because there is a barge board to come down under the tiles as well as a fascia to fit to the plumb cut on the rafters. I don't the fiddly details, they don't show huge progress in just a few hours like framing or getting walls up!

What to do at the top for the corner detail.
50071578931_8c84002905_b.jpg


All 4 corner details are now fixed in place with a few screws. I can secure them more while painting them.

I do need to decide if I want to fill this gap in the support for the corner detail. The gap you'd be able to see would be minimal. You can just about see the support in the next photo. I should do it shouldn't I really.
50072056781_19742425a3_b.jpg

50071491693_5b4735f4d6_b.jpg

I removed my test featheredge and refitted once the corner detail was done to see how it looked. I'm happy with that. The bottom board is just pinned in place poking out a bit, I've not gone to the effort of doing the wedges yet, let alone taking the corner off of the feather edge.
50072056591_71535ee188_b.jpg


Now that I can see where the fascia will end (as I now know where the barge board will come down) I can sort those tomorrow and do the juggling act of trying to work out how high it needs to be to keep my tiles supported properly. I think I'll tape the 3 bits I have together so at least I've a few less things to worry about. Maybe by Monday I can actually start tiling.

I also need to sort out around the door. I see Mike used some 25 by something as the end point for the cladding. Naturally I have some 25x150 here and I'd need 25x175 ish to cover the osb, stud, batten and cladding all around the door.

July 4th 2020...
It seems we might have decided on colour. We like the appeal of a stain rather than a paint but the medium oak appears a little too orange for our liking (I say this as a man with a ginger wife!) so after seeing this in the mahogany bedec we're probably going in that direction. Brewers want £250 for a 20l tin which is £50 more than online places. If anyone knows what it's like with a trade account I'd appreciate it.

EDIT: After having another look side by side and on a proper screen rather than a OLED phone with the chroma cranked up, we're now back with Medium Oak :lol:

50074799707_28d643c69f_b.jpg

In other news the electrician can't come for 3 weeks, on the up side that gives me time to basically it all in and ready to do and tested in one day.
 
6th July 2030...

It's feeling like slow days despite tinkering away most of the day.

I started off by finishing off the emergency lighting. I can now at least potter in there with light of an evening until the electrician comes in 3 weeks. Some of the 12 panels I have will be mounted like this, though not necessarily in this exact position. So this gives me an idea of how much light I'm working with and where it's being cast. When I do it properly the drivers will be hidden, though the flex will have to be on show albeit white against a white wall. I'll have to notch the frames to allow the flex in and out but it's only thin metal.

Emergency lighting
50084250836_769af49c03_b.jpg


With that done I finally cut my fascias after first screwing up some offcuts to give me a position to work to. Faffing around trying to measure with a tape over 5-7m is a pain in the butt, so I just cut the first one to end on a rafter foot and then offered up a second to make it where it needed to be cut. Tidy.

With the length sorted I taped together my 3 tiles which will form the eaves and secured them to a batten, from there I could see how high the fascia needed to be and put a couple of screws in along the fascia to hold it there. It'll come off for painting.

Eaves tiles taped, though I guess I could have just used a straight edge for this bit.
50082070303_fb51ba2b7b_b.jpg

Fake bargeboard in place
50082894712_7648520d50_b.jpg


Fascia on and lots of rafter foot on show. Too much?
50084486477_8f15553ede_b.jpg


Next was the joyus job of trimming all the roof battens. 23 (I think) on each side so 92 all in. Most cut from atop the roof with the couple nearer the eaves done from the ladder. I sat and thought about it for about 10 minutes before cutting, pondering not only whether I should just use the tracksaw (I didn't), but also whether my brain was working right and I was correct in my thinking of where I needed to cut them. Checking a few reference photos and yes, they need to be behind the barge board and I now know exactly where that needs to be.

Off they all came and then I stuck some treatment on the ends just in case.

Next up was to cut those tiny filler bits for the corner details I questioned about the other day. Easy job. Then I got the corner details off, fitted the fillers and added a few more screws to hold everything together.

Onto the door hole and at last I cut some of the 25x150 to size and secured it in place. I only put a bit of 25x100 at the top because I don't have any more 25x150. Since I have to add extra to the 25x150 anyway to span the whole distance required I'll just do the same at the top with whatever I have left.

Battens cut, fascias fitted, door defined
50084250436_f558b09a5a_b.jpg


That was that for the day. I'm really looking forward to having my paint so I can start making the large satisfying strides that make you feel like you actually got somewhere each day.

Last but not least, I now have some modicum of a deadline. I shall once again be broadcasting live sports as of the 23rd of July. My desire is to get the roof and walls clad and a door fitted before then. Anything else is a bonus.

7th July 2020...
Today was another rubbish day although it has reinforced my plan to get the roof done ASAP.

Brewers account activated. Hurrah.

20l tin of Bedec reduced to £180 with the voucher a new trade account gets. Hurrah.

Possibly a week for it to be in stock. NOOOOO!

Given that I don't want to go back to work with the roof and walls not clad, I'm going to take the decision to not wait to paint the fascias before the tiles go up. It's not ideal but it'll just have to do. There's no way I can do the roof and the walls in a week.

The reason I don't want it left as once I'm back at work properly I'm away for 4 or 5 days at a time and when I'm back I try to get at least some time with my wife and kid, so I'd rather not be tackling these big jobs that you just want to plough through all day.

With that in mind, a scaffold tower will be here at 9 tomorrow morning. I'd better work out what the hell I'm doing then really!

A late start coupled with the trip to get the interior paint, other home duties and the torrential downpour limited my actual progress to... sealing the 8 cut ends of the fascia.

I spent a bit of the afternoon making up a couple of jigs for tile cutting so that I'm not trying to measure and then hold a straight edge in place on the 46 eaves slates or all the doubles that will go up the verge. Those templates also include the holes for rivets on those verge slates so hopefully some of the brain work is already done. It also meant I was making my mistakes on the ground in the dry rather than on a scaffold in the pouring rain. The one I did make is of no consequence as the tile can be used elsewhere.

While in the dry of the workshop (and the slightly warmer as it was cold AF in the rain) and with my emergency lights on (which dim when I turn my tracksaw on!) I noticed a couple of drips coming from the rafter ties. I know the membrane is good as it was pooling with water at the rafter feet behind the fascia, I guess nail and staple holes were letting a little water in. The rain was constant for about 2 hours and the worst it got was a couple of tennis ball sized damp spots on the floor. With an actual roof over it it'll never be a problem.

I did also calculate my verge overhang so hopefully with the scaffold and the 70% chance of rain tomorrow I can get started.

50087887842_59b67f274e_b.jpg


8th July 2020...
Scaffold arrived
50090467342_d38b7b0d8e_b.jpg


Tentatively plodding away. Though now I feel much more comfortable.
50089652808_6cbb82bf2a_b.jpg


The heavens have opened once more and while I am stupid I'm not a fool. Time to stop for the day.

All in all happy enough with the progress, it feels quite slow but I've got the first verge finished now so I can just bang up the next 170 odd standard slates without too much fuss and then deal with the other verge.

The time spent thinking yesterday was well worth it, if nothing else it helped me wrap my head around it a bit more. As with everything it all clicks together once you've been at it all day. I've even stopped forgetting to put rivets in under the eaves tiles where needed. One thing that did come up was that my sums were out. Somehow I'd calculated that my tiles would overhang the end of the fascia board by 70mm. Fortunately I checked by nailing both ends up and measuring the distance and spotted the error. It should be 35mm.

Slate cutting was easy enough with the scribe tool from Hardy though I only cut one on the ridge. Since its rinse and repeat I batched a bunch out inside as well as drilling the appropriate holes for nails and rivets.

I got to the ridge and my brain did a little melt. I'd ended the penultimate tile on the batten just like all the others and cut the final tile to length. I kept looking at it thinking it must be wrong, that there wasn't enough lap from the ridge down to the penultimate course. A trip down to check the Marley documentation (because the Cembrit stuff is rubbish) and sure enough mine looks the same as the picture so happy days. To be sure I hopped up with a ridge tile and sure enough the edge of it comes down far enough that I'm happy. I'll cut the rest of the penultimate row a little longer anyway.

50090193663_0a64e1bc51_b.jpg

My to do list includes cutting a bunch more first and second course tiles as well as 23 top course and 21 penultimate course tiles to size. With those done I can just hoof them onto the roof and get them up without stopping to cut tiles on the roof all the time.

I'll have to make sure I give myself an escape route on the other side of the roof!

So there we have it. Some progress at last.
50090193348_d32ea98954_b.jpg
 
July 9th 2020...
Another one of those days. A haircut (finally), a meeting and the wettest July in memory have helped contribute to about 14 tiles going up compared to yesterday.

I started off by getting to the ridge with some batten. I was going to need to put some on the ridge itself to help screw the ridge tiles to anyway, but I had a cunning plan. While my penultimate and top slates were apparently ok, it still left me feeling irked. A solution presented itself easily enough. Take the penultimate tile right up to the batten on the ridge, and nail the top tiles to the ridge batten itself. A much larger lap is achieved below the ridge tile.
50098063851_4fcbd36184_b.jpg


So batten up, new 1.5 tile cut, drilled, part nailed, nails removed because I forgot the farkin rivet, rivet in place, secured again, top tile cut and secured in place.

Next up I wanted some string lines to make sure things were running right. Just pinned under the ends of the eaves slates and taught around a nail at the opposite end. I now have 3 handy trip wires on the working side of the roof because it's not hazardous enough up there.

I sat and tiled in some rain before it really started belting down. Time to get off the roof before I slide off it.
50094412282_48484575f1_b.jpg


It looks pitiful compared to yesterday but I've sorted some bits out and worked out how best to place the rivets for the next tiles so I'll take it for now. Tomorrow I have a whole day to myself and only 10% chance of rain with good weather for the next 4 or 5 days, at last. The ground around the workshop is like a bog.

I already had 50 odd tiles in the workshop ready for cutting to size so I took the chance in the pouring rain to get those done. I now have enough cut to do all the 1st, 2nd and penultimate tiles without cutting on this side of the roof. The penultimate ones are a bit of a pain as I need to cut 20mm off the end. They score easily enough but with not much material to grab hold of snapping the waste off isn't easy, so a little grabby jig later and I could do them in short order.

Tiles cut and ready and a few template tiles used to cut and drill others
50093596798_51f3a3fbce_b.jpg


Maybe, just maybe, I can make better progress tomorrow.

10th July 2020...
A nice day for it today. It still spat a bit but no torrential rain. Shocking news. When you're not getting urinated on from a great height you can actually get things done!

Its not been easy moving the scaffold around the soggy clay surrounding the workshop but its now at its final resting place for that side of the roof. I even already have my ladder set up on the other side as an escape route.

I got plenty done today and am now 9 tiles from the point that I have to start the other verge. I did get the tape measure out to check my laps and make a few minor corrections along the roof as I was worried about getting to the other end and being out. Most importantly I got to the other end with my first course and everything fit so my spacings were ok
50098289757_fff9998547_b.jpg


11th July 2020...
The roof is half done! Hurrah.

I'd hoped to get a bit more done but some bits came up, I was at least able to start prep for tomorrow which will be getting the first verge done on the visible side of the workshop.

The biggest faff in all honesty has been moving the scaffold around as its been so wet. Fortunately it was easy enough for the final bit on that verge and now it'll be fine on the other side of the workshop.

Tomorrow will only be a half day so I can enjoy a film and some popcorn with my little girl, then Monday I can get into it full swing and see how far along I can get! I do need to get the screws to hold the ridge tiles down so may well go fetch them tomorrow or Monday.

Is there any reason I can't be putting ridge tiles on as I'm going along rather than doing it all at the end?

Still working out my shopping list for electrical bits inside too.
50101766347_5708b8c17a_b.jpg

50100957198_50acf818f6_b.jpg


July 14th 2020...
Looking forward to getting the roof all done and the cladding on.

I've gone and burned the back of my neck over the last few days. My tan all came while I was a hairy sod during lockdown, now that I've had it cut back my neck was the only bit that was still pastey white and is now glowing red. Despite that sunshine, it's also been raining a lot. so its been stop start.

It's still not done, but the end is nigh.

With the rain stopping play quite early yesterday the plan today was to just crack on and do as much as I could.

With the scaffold now much easier to move around I managed to get all the way to the point where I now just have to deal with the final verge. That'll be fun. When I did the other side I could just escape down this side when I was finished. I'll have no such luxury this time. Fortunately this scaffold goes to 3m if I need it which I think I probably will.

All that remains
50112762666_c895c322c6_b.jpg


Ridge tiles on and finishing it off nicely
50112762756_0258b7c6c5_b.jpg


A huge box of sockets, conduit fittings and gutter fitting arrived today. With the roof soon to be complete I can worry about painting the inside. I didn't want to do that while I was still getting drips in places. Once its got paint up I can do my sockets and get the SWA in ready for whenever the electrician is coming.

Can't wait to not be on the roof any more. My backside is so sore and bruised from sitting on battens all day.

15th July 2020...
Done. Finally.
50116734872_d78787d199_b.jpg


Tomorrow I can finish off some little OSB bits inside under the ridge and maybe get some white on the walls.

So pleased to be done with the roof!
 
19th July 2020...
With no hope at all of getting the cladding done (still no paint) and no materials or an idea where to start on a door and work looming on Wednesday, I started on the inside instead. First up was to cover the void under the ridge. Some OSB cut to width and then with a shallower angle than the roof cut on either side meant it went up quite well. Then it was time to paint. Yay.

1st coat done
50128037338_bb185f711c_o.jpg


15l of paint later and it's as done as it's going to get. Sadly I don't have a nice sprayer so it was all done with a roller. One downside of the OSB is that with all the little surface voids it can be a pain getting a perfect finish, but at the end of the day it's only a workshop. I'm happy enough. It was at least nice to have it completely empty while painting so none of the usual trying to move things around or climb over stuff as you go.

With that done I started mounting the frames for some of the lights. I'm putting 4 up on the ceiling either side in the vaulted section and then 2 each at either end mounted on the underside of the joists. Those will probably be added to in time to balance the light out a bit if I feel like it needs it.

6 LED panel mounts up
50128037173_2791db7f1d_o.jpg


Very short day today as it's movie day and then I've decided to give myself the afternoon watching the F1 and the football, something I've not actually done since its all come back as I've been doing all this.

Once the lights are mounted I can start on sorting sockets out and running the SWA and ethernet in.

20th July 2020...
With no cable to continue (and screwfix not having any either) I cracked on mounting sockets and conduit. I got a nice height with my little laser level (step 4 on my ladder!) and put the first ones in 50cm from the wall and then divided the gap into a number that looked ok. They are on about 815mm centres in the end Way more than I'll ever need, but I'll never be looking for a socket at least. I ran out of sockets so I have 8 more to go in. You do have to be careful doing the knockouts though as if you just go for brute force you'll bend the boxes!

It's not going to get much more done for a bit now as I'm back at work for 4 days as of Wednesday. Now I'm going to have to go back to balancing work, parenting and nobbing around in the garden doing this!
50133804533_f3a9be768a_b.jpg


21st July 2020...
This is where I've ended for now. I finished putting my sockets up and running the conduit and then used what 2.5mm t&e I had to get some cable in. Since I also had the smoke detector in hand I secured that in place.
50137457041_722e090758_b.jpg


I now have to go back to work so progress will slow substantially.

12th August 2020...
Well its been nearly a month since my last update but such is life and work when it gets in the way.

Over the last couple of days I managed to get all 12 lights up and lit. Their connections should be final but the lashed up plug to see how it looks is naturally not final.

My paint is also in stock so I might actually be able to get this cladded this year!

It's not as overly bright in the middle as I expected which I'm guessing is down to the height of the top 4 lights spreading the love everywhere. I may end up changing things but right now I'm happy with the lighting.

SWA is being run around the house but it's baking here today so a break has been earned.
50218040736_1c10a73046_b.jpg


28th August 2020...
Exactly what I feared would happen has happened. Time has evaporated as soon as I had to go back to work.

I have at least got just over half of the featheredge painted ready to start fitting this coming week. Hopefully the weather plays ball. I'll not be able to get anything done again after this week for at least 2 weeks.

1st Sep 2020...
I needed to get my wedges cut for my bottom board, but since I figured that would be easiest with a bottom board with the routed section on it I got one of my test pieces cut first. I only really needed the one router bit but since that was going to be a tenner I just got the Trend 30 piece set for I tihnk £35. I'll probably never use many of them, but If I only ever use a handful It'll have been ok. If I wear one out I can just buy a more expensive one for that in particular.

Anyway, routed edge cut with my little Bosch 600 palm router and it worked fine in 2 or 3 passes. Next to cut some wedges. I just used the mitre saw to get some batten to length and then had to nob about swapping blades over on my bandsaw to cut them to an actual wedge, it took a couple of attempts to get the right size. With those cut and treated I secured them on the small back wall and set about installing the stainless steel insect mesh.

Finally ready to board!

Except I now need to cut a board to length, route the cove on the back, paint the cove and the end and THEN I can install it.

So that was my progress. One board. Tomorrow at least I can just bang a load up and feel better about myself!

40 something boards painted and now dry. It's like painting a sponge. A full 9" roller covers maybe 3 or at best 4ft before needing to be dunked again.

50294870018_67ce9d7afe_b.jpg


Today's progress. 1 board.
50295547756_3b659f97c3_b.jpg


Apart from that, my electrician has had to move the install date owing to his mothers funeral being on the same day :( He apologised. I told him some things in life are more important.
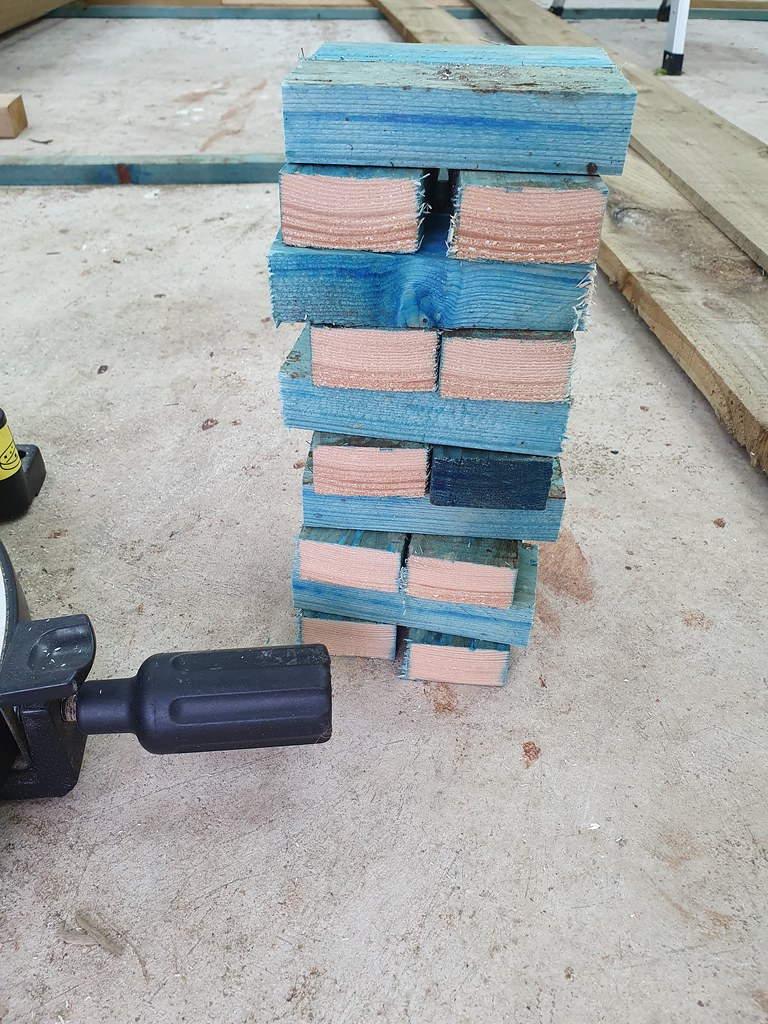
Also I ordered my doors, I don't have the time or skill yet to make my own and I need it done. I opted for two equal doors of 780mm. In my head I thought that wasn't wide enough if I only want to open one until I actually measured one of the doors in the house!

Also I treated (trut? trote?) myself to a Festool TS55. My first Festool so the mortgage payments aren't yet too high. £400 for the saw in systainer with the 1.4m track so a little less than I've seen it for before.

Oh any my heater arrived. Only a 2kw for now but there's room to add another if needed.
 
2nd Sep 2020...
Naturally it started raining again just as I started boarding again today so I finished off upto the start of the gable and then set about other tasks like cutting the other 40 wedges, cutting boards for the door side etc.

Just about to start putting those up to at least the top of the door. Then the fiddly bit of cutting around the door or doing the gable cuts can start.

I think I've just enough boards painted now to do one full long side, leaving just the other long side and the gables to finish.

Nice to feel like some progress even if at this exact moment it's only actually 13 boards nailed up today. The actual boarding is the fast bit!

Many bits of batten cut to length prior to being cleft in twain by the bandsaw to use was wedges.
50298668632_1b2c42f23b_b.jpg


Cladman tool in use, works very well and it only took about 25 minutes to go from this to the next photo
50298515901_66472138c8_b.jpg


As I said, putting the boards up is the fastest bit after you've painted them, cut them, re painted the ends, routed the cove in the first board etc.
50298515261_29d00195fd_b.jpg


Last bit for the day was sorting the wedges and mesh on the door wall. I then nailed the first boards up either side of the door and called it a day.
50298667967_f79d501261_b.jpg


3rd Sep 2020...
Well that's it for the cladding today as I have no more painted boards left. I was on track to be able to do 2 rows on the long side with just 3 boards, till I remembered that there isn't a stud at 4.8m from one end so I'd have to cut every board until I reached the windows.

Since the windows are being covered for now but will at some point be cut out properly, I got away with using full boards and some of the offcuts from the rows below. The ends are not fixed in the middle of the window opening but that's fine as it's getting cut out eventually anyway. I've staggered the boards so there's not actually any movement to worry about at the ends anyway. It'll look nicer when it has windows that's for sure.

Time to clean the workshop and get ready to paint the remaining 32 boards. I THINK I have enough to do everything that's left. :shock: That's why I've done the front before the back. I'd rather have as few joins as possible in the side that'll get more eyes on it.

6th Sep 2020...
The end of my week at home and I'm happy enough with the progress. There are 2 rows to finish on the back side, 1 on the front and then the gable at the far end. I'm about 5 boards short to do it all :text-lol: :ROFLMAO: . Me covering up those windows has bitten me a little there I think.
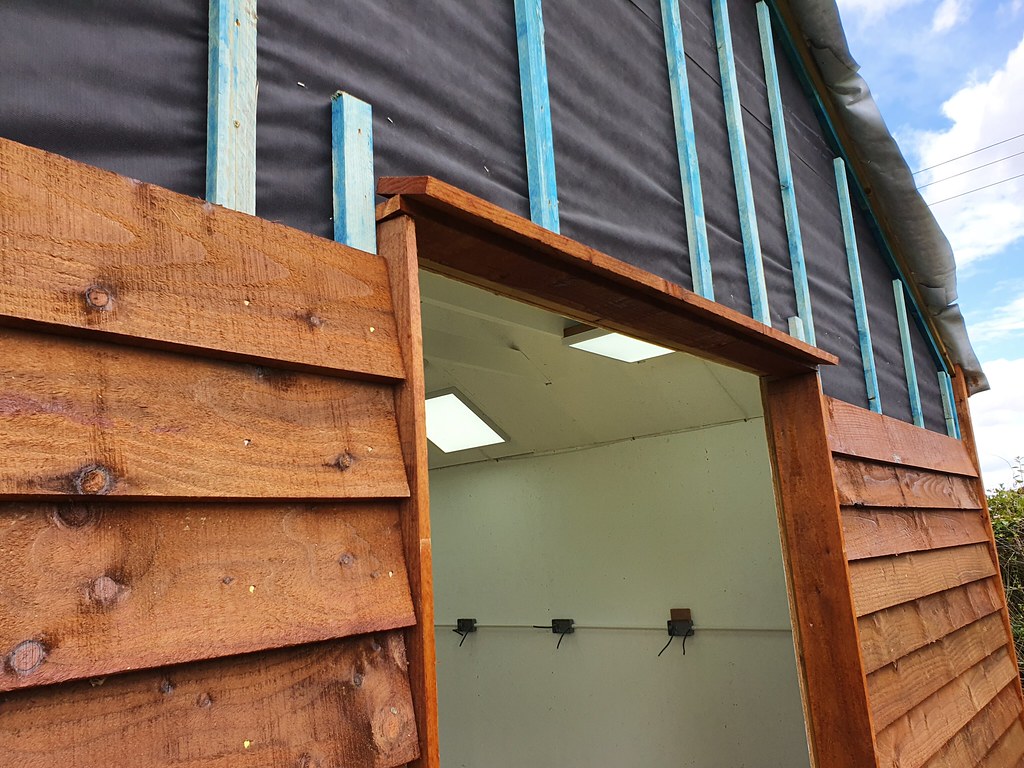
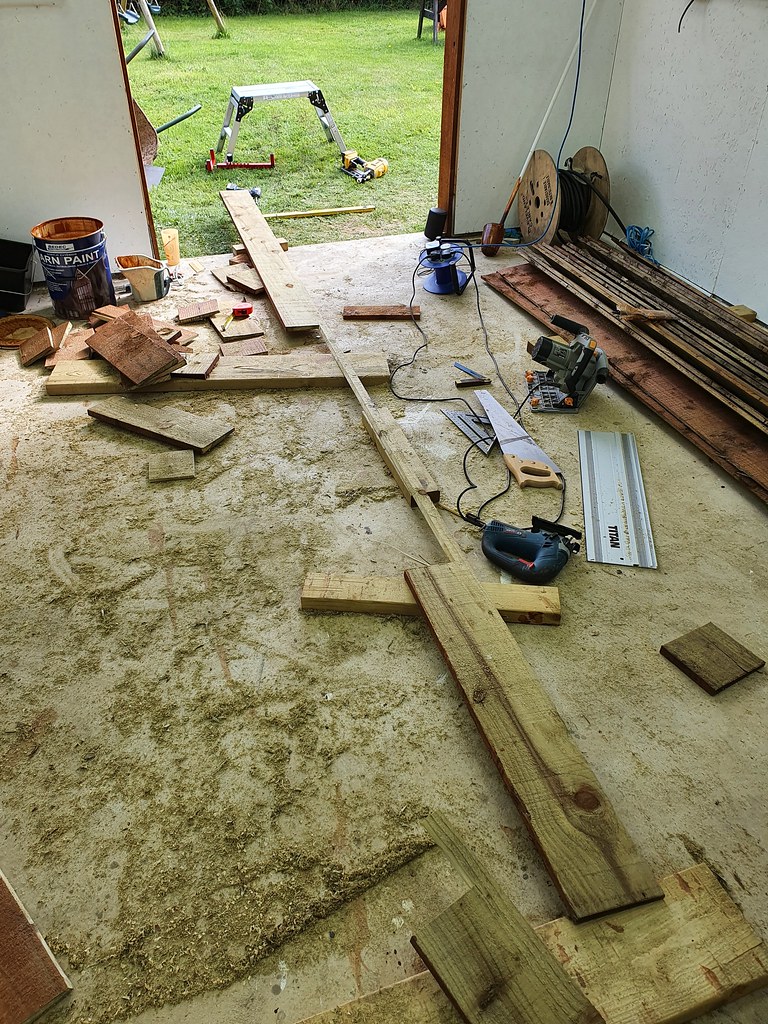
Anyway, pentice board in place (I did put with some dpc up behind itbefore continuing to board). I'll be redoing the vertical parts of the door frame as I want to neaten that up and they actually aren't deep enough anyway as its only 1x6 and needs to be nearer 1x7.
50311658831_1dcc505510_b.jpg


Then it was time to cut out the part over the door. Fortunately the wife helped me lift that up otherwise it was going to split. I used an offcut to make a template to test one end and when happy just marked a board appropriately.

50311830857_fa2138d370_b.jpg


The fun of measuring the gable end. I ended up cutting 2 offcuts to the right angle, securing them in place with a screw and then measuring between the tips. Worked great and it turned out that each row was simply 500mm shorter than the one below. That made life a bit easier.

50311830397_999627a3f8_b.jpg


Where we stand for the moment. I'm happier now that it is much better protected than it was at the start of the week. It'll probably be 2 weeks now before I can do much more and of course I need more featheredge and some other bits to finish it all off anyway.

50310990543_96db5c1916_b.jpg


50301844767_f6c35ef5f7_b.jpg
 
TrimTheKing":2kkctjsz said:
Very nice looking building indeed mate.

So I'm intrigued, who do you work for in your broadcasting, if you don't mind me asking?
Thanks!

These days it's IMG for the Premier League (most countries that are not the UK) and Sport 24 (live sport on ships and planes). Over the last 18 years its been CNBC (live stocks and shares new channel), SciFi channel, Eurosport channels and this. I also worked briefly for the Football League also here at IMG on the iFollow productions. "directed" a few league 1 and 2 games and cut the 2 and 10 minute highlights together. I use directed in quotes because those games were only 1 camera :lol: . But still had to do all the replays, update the scoreboard, show graphics for subs and cars etc.

Incidentally today is my last day as a full time freelancer. Only doing 6 days a month from now on.
 
Back
Top