
-
Hi all and welcome to TheWoodHaven2 brought into the 21st Century, kicking and screaming! We all have Alasdair to thank for the vast bulk of the heavy lifting to get us here, no more so than me because he's taken away a huge burden of responsibility from my shoulders and brought us to this new shiny home, with all your previous content (hopefully) still intact! Please peruse and feed back. There is still plenty to do, like changing the colour scheme, adding the banner graphic, tweaking the odd setting here and there so I have added a new thread in the 'Technical Issues, Bugs and Feature Requests' forum for you to add any issues you find, any missing settings or just anything you'd like to see added/removed from the feature set that Xenforo offers. We will get to everything over the coming weeks so please be patient, but add anything at all to the thread I mention above and we promise to get to them over the next few days/weeks/months. In the meantime, please enjoy!
You are using an out of date browser. It may not display this or other websites correctly.
You should upgrade or use an alternative browser.
You should upgrade or use an alternative browser.
The Orangerie - duff glass-fibre-coating REPAIRED
- Thread starter RogerS
- Start date


Indeed. when is it coming?

- Joined
- Jul 21, 2014
- Messages
- 10,414
- Reaction score
- 165
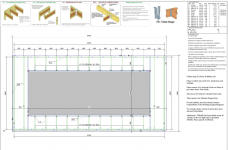
RogerS":1e38b61q said:Roof design by North Yorkshire Timber. Cannot recommend them highly enough. Superb service.
So are you going for the mix of glulam and I beams shown on the diagram or traditional beams plus glulams?
Just wondering about the aesthetics of I beams really.
Bob

Andyp":z8gfungp said:Indeed. when is it coming?
Dunno !
Malc2098":2qqduumu said:Are they fitting, or are you getting extra hands?
Moi! plus ano
9fingers":3iotbh86 said:RogerS":3iotbh86 said:Roof design by North Yorkshire Timber. Cannot recommend them highly enough. Superb service.
So are you going for the mix of glulam and I beams shown on the diagram or traditional beams plus glulams?
Just wondering about the aesthetics of I beams really.
Bob
Missed this one, Bob. A good point but the i-beams will be hidden. A little bit like this one I prepared earlier.

This time I'd like to see the glulams.
First attempt was a cock-up. Putting the beam there added little to the stability. 
Very Japanese looking though.
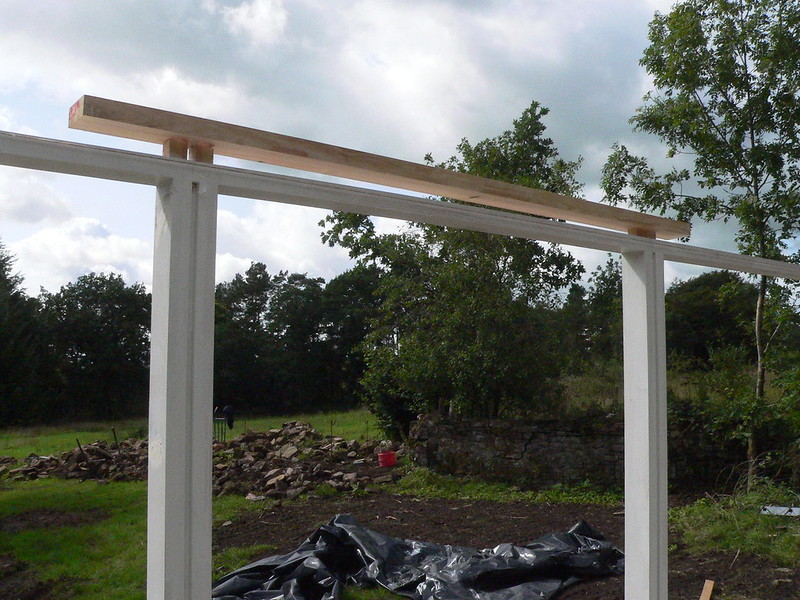
These went in better and straightened up and strengthened the long wall. Finished one long side and half of one end.
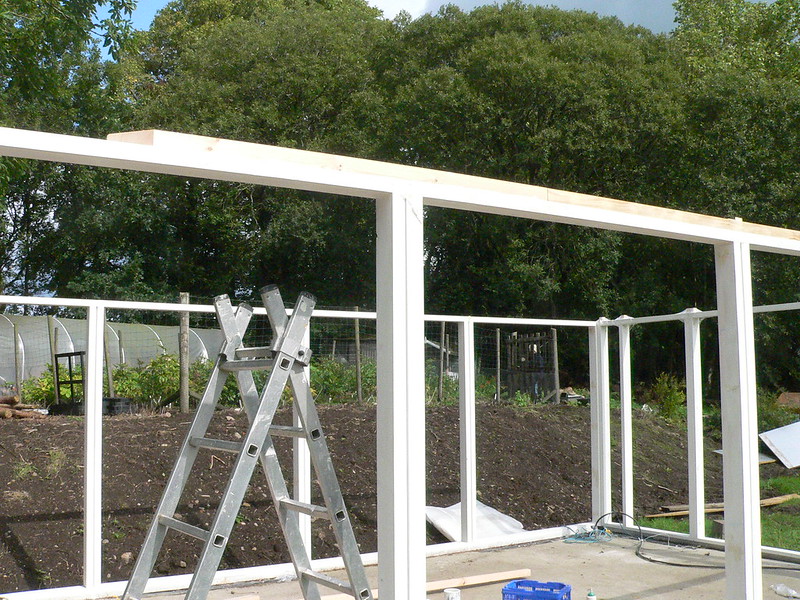
Am in a bit of a quandary what to do at the two front corners.
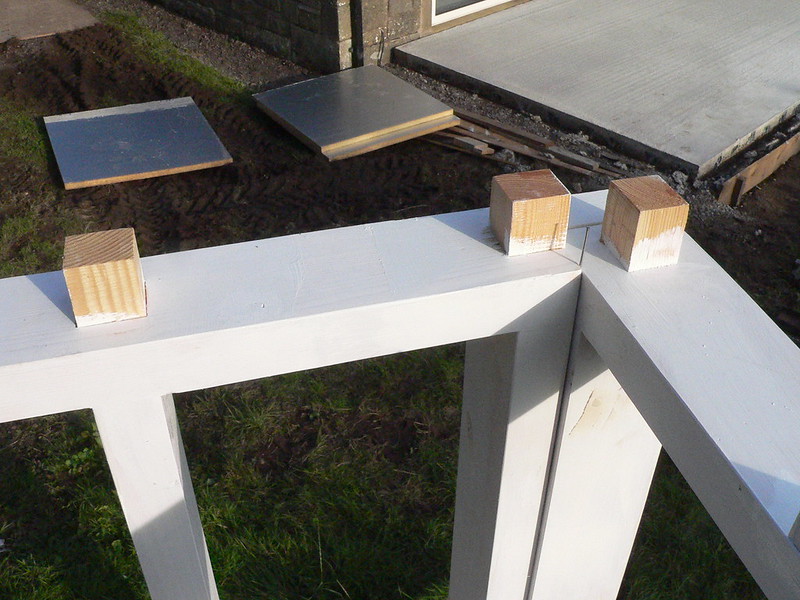
The rightmost tenon is forward of the side frames. Not sure whether to mortice out several triangular pieces of ply to give extra stability to these corners. Probably not as there is going to be the flat roof going around the perimeter and so that will provide that stability.
Of course, it didn't all go to plan. My self-inflicted problem is that I have too many things on the go at once. Liaising with builders, suppliers, SWMBO. When it's raining I'm laying the oak flooring indoors. When it's not, I'm outside. Plus my version control of my SketchUp drawings is non-existent and which is why my cookie-cutter approach to the frames has failed in that the original longside made with Domino's has a 1570mm wide opening in each frame. But the 'new' tenoned frames seem to have ended up at 1565mm
In hindsight I should have rebated the frames so that the window frames will 'sit' much better. I wish I had Mike G's forward planning skills.
Also to support the cookie-cutter approach, I knew that I'd need to put in filler pieces between each sub-frame but realised that I could take advantage of this by offsetting them forward of the sub-frames to give (a) a bit of detail on the outside face
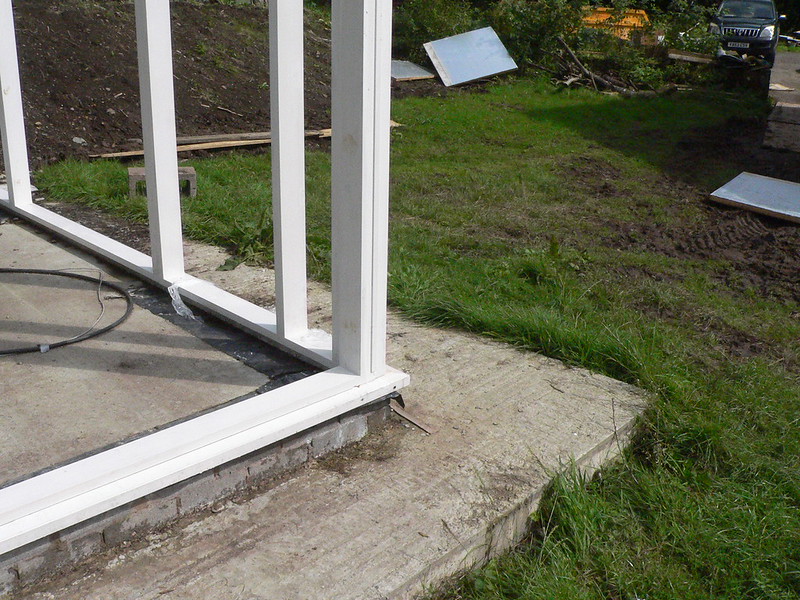
and (b) give me some channels inside in which to run any power cables etc
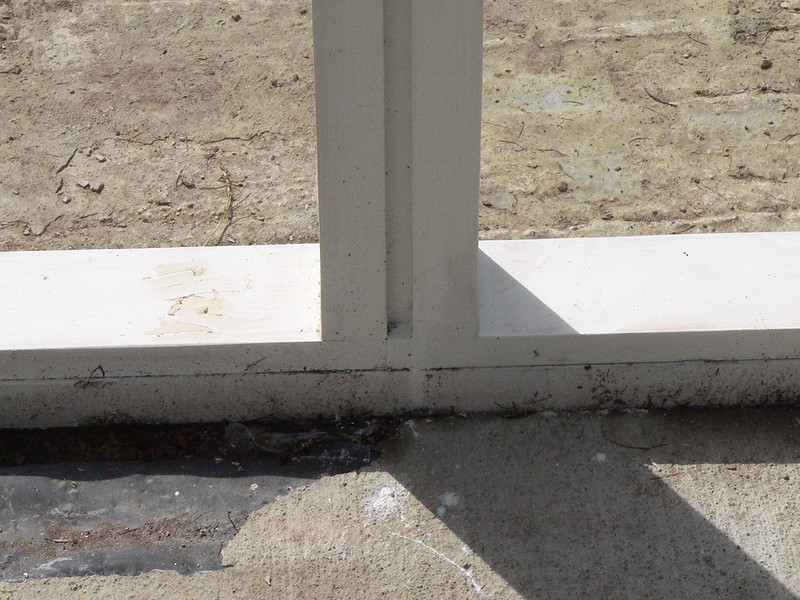
and if I made everything so that the sub-frames were offset inwards over the cills like this
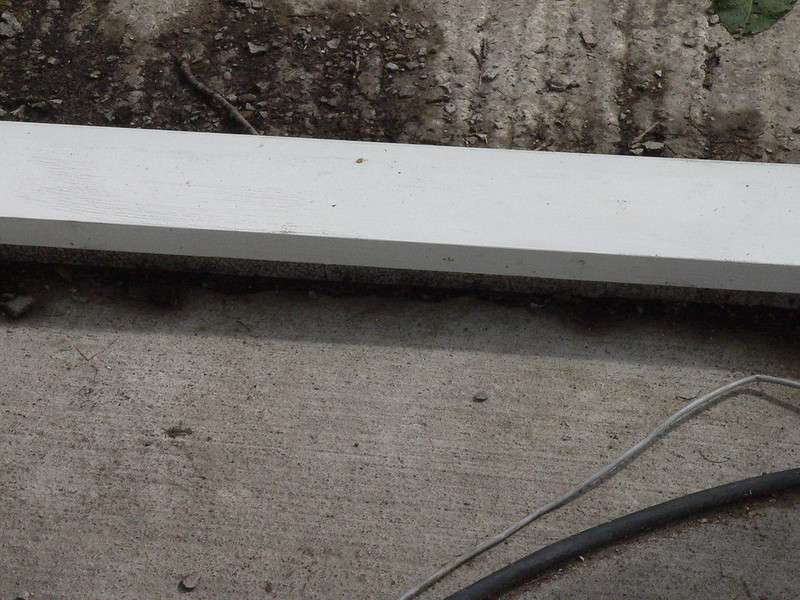
then those same power cables could be run out of sight. Only ....
only..did I tell you that my version control was non-existent
No overlap
Not the end of the world.
Thinking ahead re the glulam and roofing stuff, I reckon that if I hire one of my all-time favourite bits of kit
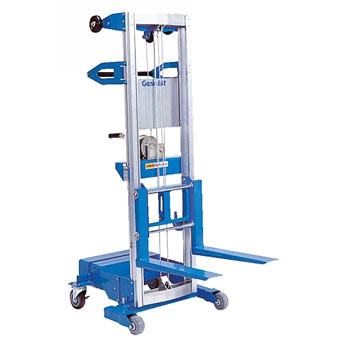
then I can do it all myself. TBH I'd prefer it that way as then I can go at my own pace and work out any problems etc. The only problem I foresee with that approach is nailing stuff to the rimboard but I'll use screws instead.
Very Japanese looking though.
These went in better and straightened up and strengthened the long wall. Finished one long side and half of one end.
Am in a bit of a quandary what to do at the two front corners.
The rightmost tenon is forward of the side frames. Not sure whether to mortice out several triangular pieces of ply to give extra stability to these corners. Probably not as there is going to be the flat roof going around the perimeter and so that will provide that stability.
Of course, it didn't all go to plan. My self-inflicted problem is that I have too many things on the go at once. Liaising with builders, suppliers, SWMBO. When it's raining I'm laying the oak flooring indoors. When it's not, I'm outside. Plus my version control of my SketchUp drawings is non-existent and which is why my cookie-cutter approach to the frames has failed in that the original longside made with Domino's has a 1570mm wide opening in each frame. But the 'new' tenoned frames seem to have ended up at 1565mm
In hindsight I should have rebated the frames so that the window frames will 'sit' much better. I wish I had Mike G's forward planning skills.
Also to support the cookie-cutter approach, I knew that I'd need to put in filler pieces between each sub-frame but realised that I could take advantage of this by offsetting them forward of the sub-frames to give (a) a bit of detail on the outside face
and (b) give me some channels inside in which to run any power cables etc
and if I made everything so that the sub-frames were offset inwards over the cills like this
then those same power cables could be run out of sight. Only ....
only..did I tell you that my version control was non-existent
No overlap
Not the end of the world.
Thinking ahead re the glulam and roofing stuff, I reckon that if I hire one of my all-time favourite bits of kit
then I can do it all myself. TBH I'd prefer it that way as then I can go at my own pace and work out any problems etc. The only problem I foresee with that approach is nailing stuff to the rimboard but I'll use screws instead.
- Joined
- Jul 21, 2014
- Messages
- 10,414
- Reaction score
- 165
Agreed. Exposed glulams can look nice.
Bob
Bob
Big day, today. Glulams and associated roofing beams arriving on a Hi-Ab. I'd like to try and persaude the driver to bring his truck right up to the orangerie and use his Hi-Ab to put a couple of glulams up on top but somehow I don't think he'll bite.
I've also decided to go for fibreglass protection rather than EDPM as I can add a coloured pigment to the fibreglass as I didn't really fancy the drab greyness of EDPM.
I've also decided to go for fibreglass protection rather than EDPM as I can add a coloured pigment to the fibreglass as I didn't really fancy the drab greyness of EDPM.

Coley
Sapling
- Joined
- Jul 26, 2014
- Messages
- 330
- Reaction score
- 0
No harm in asking him Roger. Perhaps the promise of a small bribe might give him an incentive [emoji6] You're making good progress with this especially when you're lumping it around on your own. Are you still rating the linseed paint, any regrets with it?RogerS":2xur361h said:Big day, today. Glulams and associated roofing beams arriving on a Hi-Ab. I'd like to try and persaude the driver to bring his truck right up to the orangerie and use his Hi-Ab to put a couple of glulams up on top but somehow I don't think he'll bite.
Sent from my SM-G900F using Tapatalk

Mike G
Petrified Pine
RogerS":1lo24hfb said:Big day, today. Glulams and associated roofing beams arriving on a Hi-Ab. I'd like to try and persaude the driver to bring his truck right up to the orangerie and use his Hi-Ab to put a couple of glulams up on top but somehow I don't think he'll bite.........
They generally will in my experience, so long as there is a clear drive in and some hardstanding so they don't get bogged. A bottle of wine or half a dozen beers usually helps the decision making process.
Not quite as exciting as I was expecting TBH.
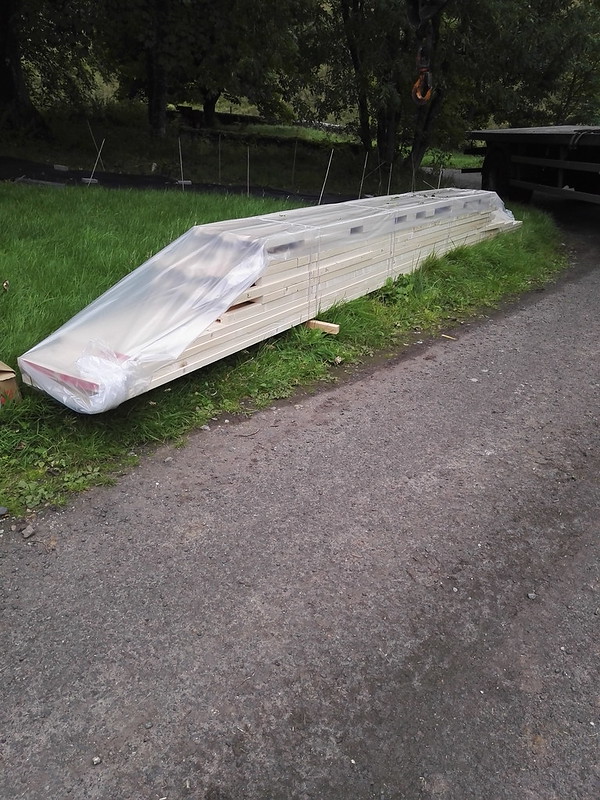
The glulams are nothing like the over-engineered ones we had at the place pictured a few posts back.
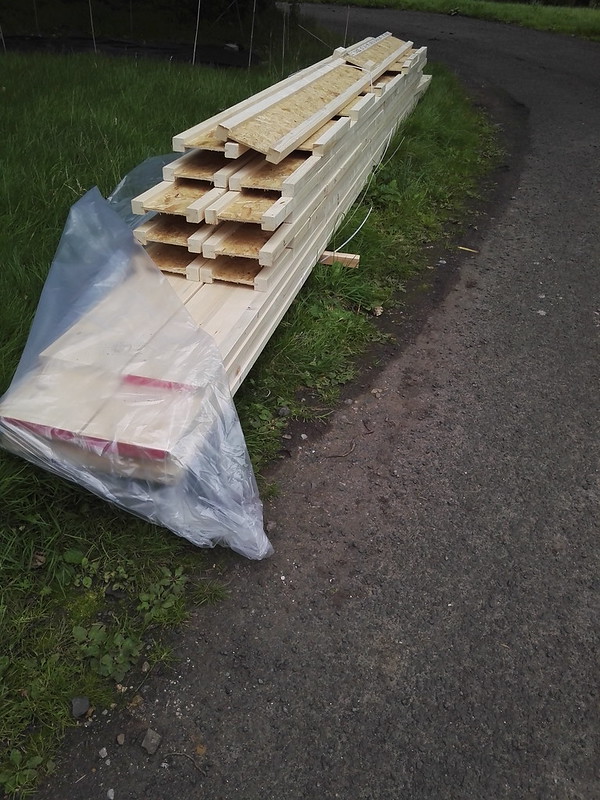
All nicely labelled up, as well. Only...
Only the first i-beam I took up looked to be short
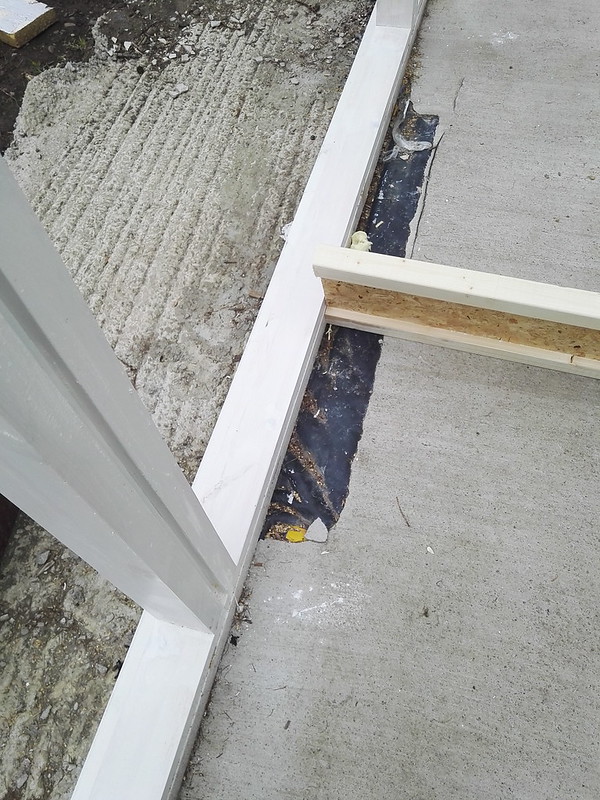
and t'other end
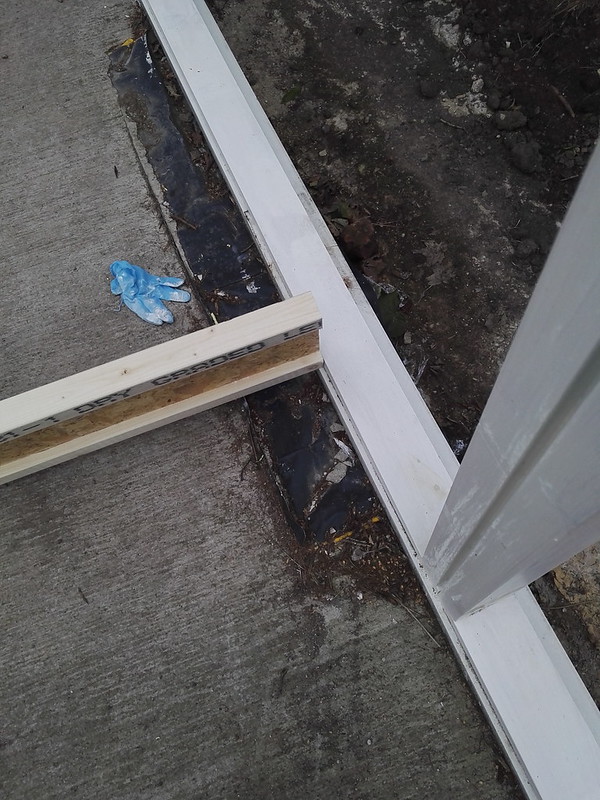
and I started to panic. But then looking at the Joint Requirements list there are a lot of i-beams labelled K1, K2 etc but they don't appear on the drawing.
Can anyone please tell me what/why/how they are supposed to be used as I've never made one of these things before.
The glulams are nothing like the over-engineered ones we had at the place pictured a few posts back.
All nicely labelled up, as well. Only...
Only the first i-beam I took up looked to be short
and t'other end
and I started to panic. But then looking at the Joint Requirements list there are a lot of i-beams labelled K1, K2 etc but they don't appear on the drawing.
Can anyone please tell me what/why/how they are supposed to be used as I've never made one of these things before.

Pinch
Old Oak
Damn good going Roger. 
Quite a structure, and all of those MT's and mitred corners are looking the dog's dingly-danglies.
:text-bravo:
Quite a structure, and all of those MT's and mitred corners are looking the dog's dingly-danglies.
:text-bravo:

Rod
Old Oak
Neither have I Roger but do they hang off hangers?
Rod
Rod
Coley
Sapling
- Joined
- Jul 26, 2014
- Messages
- 330
- Reaction score
- 0
Just looked at the drawing further up and from what I can make out there's a lot of hangers. Have you got a clearer drawing Roger? I can't pick out the writing.Rod":2mntckez said:Neither have I Roger but do they hang off hangers?
Rod
Sent from my SM-G900F using Tapatalk
- Joined
- Jul 21, 2014
- Messages
- 10,414
- Reaction score
- 165
Roger. I've printed off your drawing and the first thing that stikes me is you have 2 off at 4000mm long and 4 off at 4124mm I wonder if you have mixed these up on your trial fit?
There are also a pair of J3s at 4124mm long and these are only 2mm narrower at 45 mm wide instead of 47 for the others so another source of confusion.
HTH
Bob
There are also a pair of J3s at 4124mm long and these are only 2mm narrower at 45 mm wide instead of 47 for the others so another source of confusion.
HTH
Bob
The 4124 ones will sit on the bearers and then be nailed into the rim beams....no issues there. They have the J prefix.
It's the 4000 ones (and other smaller sizes) prefixed K that confuse me. There are hangers at the junction with the longest glulam. The other end of the joists sit on the bearers and nailed to the rim beam. Guess I'll have to wait until Monday
It's the 4000 ones (and other smaller sizes) prefixed K that confuse me. There are hangers at the junction with the longest glulam. The other end of the joists sit on the bearers and nailed to the rim beam. Guess I'll have to wait until Monday
- Joined
- Jul 21, 2014
- Messages
- 10,414
- Reaction score
- 165
Looks like the short k2s fit inbetween the j2s like a noggin along the ring beam as they are 47mm shorter than the j2 spacing
Bob
Bob
- Joined
- Jul 21, 2014
- Messages
- 10,414
- Reaction score
- 165
The other short k pieces are also noggin like I think but a bit stumped what the k1s are for at the moment.
Does not seem to be anything for upstand that the lantern has to sit on?
Bob
Does not seem to be anything for upstand that the lantern has to sit on?
Bob
Hi Bob
I think you've nailed it. When you know where to look you can see the shorter K's

TBH I don't see what added-value they give me since the rim beam is just alongside them and the ends of the shorter J's are fixed to that. In fact, given the positioning, they are a pain since I was proposing to tweak the spacing of those shorter J's to match the size of the OSB board that's coming - to minimise unnecessary cuts and wastage.
But, as you say, the longer ones don't feature anywhere.
I think you've nailed it. When you know where to look you can see the shorter K's
TBH I don't see what added-value they give me since the rim beam is just alongside them and the ends of the shorter J's are fixed to that. In fact, given the positioning, they are a pain since I was proposing to tweak the spacing of those shorter J's to match the size of the OSB board that's coming - to minimise unnecessary cuts and wastage.
But, as you say, the longer ones don't feature anywhere.
So - close of play yesterday - we got all the major sections roughly in place. The downside was that my helper is a superb stone-waller but not experienced in doing this sort of roofing-woodie stuff. My error in forgetting that and not double-checking. As a result the first double-glulam was put together with an offset between them and I spotted this too late before I glued'n'screwed them together. Need to investigate today to remedy. Dimensions of lantern opening are not critical and so cutting a little off the ends is not a problem. Actually finding a safe way to do it is !
Bought some of those ring-shank nails and gave up with them. Such a PITA to hammer in, so much effort. So I've used screws.
And then the rain came. Weather so unpredictable here. I need to slap on a coat of LOP (linseed oil paint) and to answer Coley...yup, still like it. I've been slopping it on every bare surface that I can find as protection. Mission impossible though with yesterdays work and timescale Today, if the weather holds, I can paint any exposed surfaces although I won't be able to paint the undersides of the rim beams.
Planning ahead, for fixing all those short J's and K's and given the weather, the job needs to be squared away ASAP.
CDA (Chief Design Authority) has said she prefers the glulams painted which has a lot of benefits not least of which is not having to keep trying to cover over the bare glulams at the end of each day to guard against rain. Once I can get some LOP on then that will protect them. The other is a financial benefit as I'd bought some hidden fixings as if the glulams were bare then I'd prefer not to see any metal fixings. Eye-wateringly expensive. Now they can be returned.
But speed is of the essence and I'm seriously considering going into town to buy a Paslode so I can get all the framing stuff up today. Monday is a washout. Tuesday the OSB arrives. I'd like to get the OSB up and fibre-glassed over by the end of the day.
Photos to come later.
Bought some of those ring-shank nails and gave up with them. Such a PITA to hammer in, so much effort. So I've used screws.
And then the rain came. Weather so unpredictable here. I need to slap on a coat of LOP (linseed oil paint) and to answer Coley...yup, still like it. I've been slopping it on every bare surface that I can find as protection. Mission impossible though with yesterdays work and timescale
Today, if the weather holds, I can paint any exposed surfaces although I won't be able to paint the undersides of the rim beams.Planning ahead, for fixing all those short J's and K's and given the weather, the job needs to be squared away ASAP.
CDA (Chief Design Authority) has said she prefers the glulams painted which has a lot of benefits not least of which is not having to keep trying to cover over the bare glulams at the end of each day to guard against rain. Once I can get some LOP on then that will protect them. The other is a financial benefit as I'd bought some hidden fixings as if the glulams were bare then I'd prefer not to see any metal fixings. Eye-wateringly expensive. Now they can be returned.
But speed is of the essence and I'm seriously considering going into town to buy a Paslode so I can get all the framing stuff up today. Monday is a washout. Tuesday the OSB arrives. I'd like to get the OSB up and fibre-glassed over by the end of the day.
Photos to come later.
So first job was to correct the overhang on one of the long glulam pairs. The problem was 'How'. Ideally I needed to lift the end of the 61kg glulam completely out of the hangar, keeping the other end secured, holding it vertically and then sawing off the overhang. A challenge for just me. But Necessity being the Mother.....
First put a reserve support at the other end in case the glulam popped out of the hanger. I didn't think it would as the amount of movement in an upward direction(resulting in the bottom moving away from the other glulam)as a result of lifting the other end would be negligible given the length of the glulam.
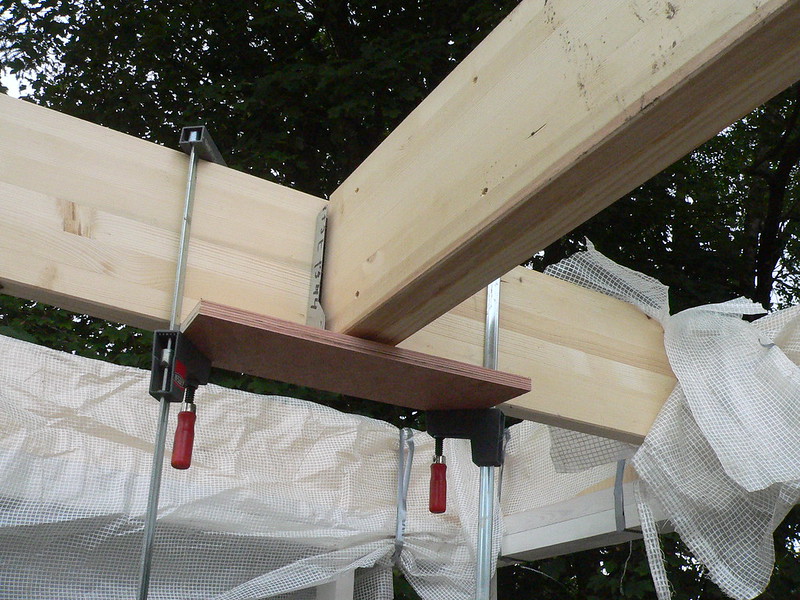
A similar support at the other end, a block of wood to give some initial lift (I'd decided to cut the overhang off little by little to minimise the amount of time the glulam would be out of the hanger) plus a lateral support at the top that would let me clamp the glulam to.
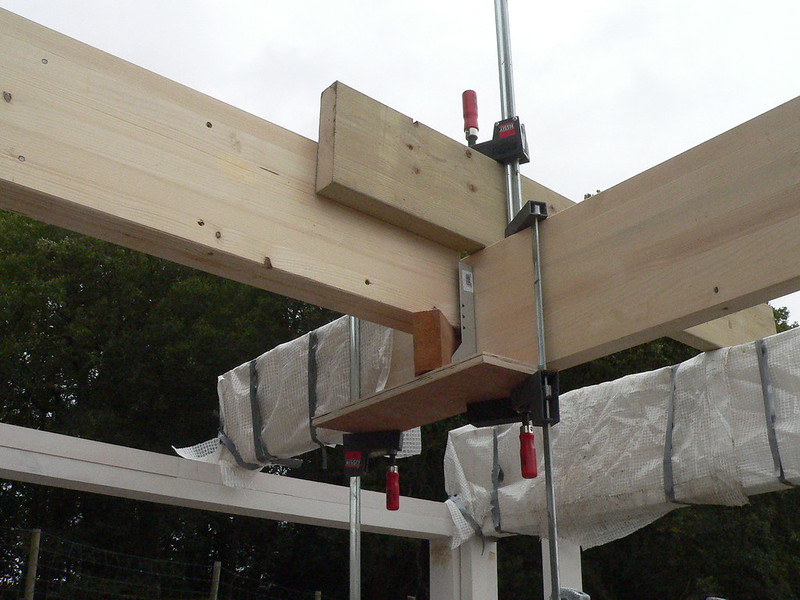
It was a struggle lifting the glulam that little bit and being able to slide the raiser block in, I can tell you. I then used the Fein to remove the topmost part of the overhang. But I knew that the raiser block was too dodgy to go any higher as trying to lift the glulam and slide in the block was difficult. So ....
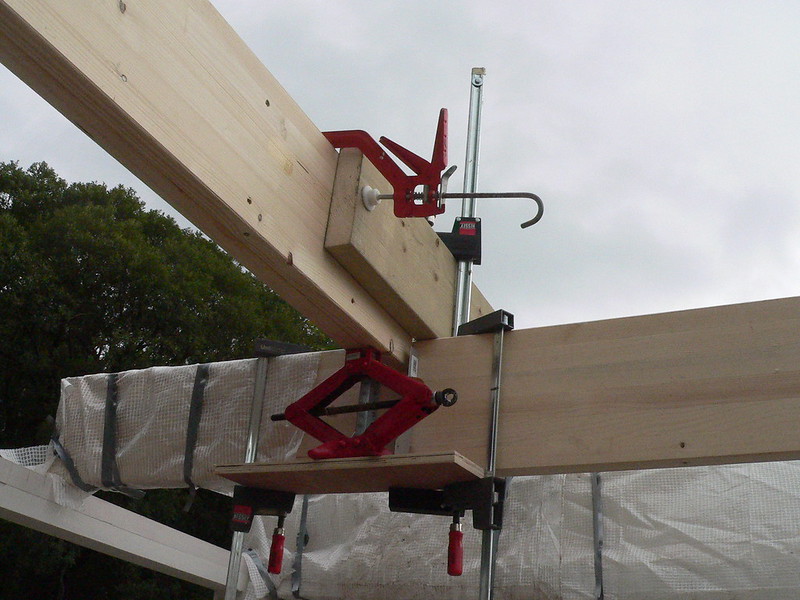
and that was as high as I needed to go. Yet another occasion when the Fein came into its own. That little tool has dug me out of so many holes.
Next up was adjusting the alignment of the glulams and the rim boards. This would entail removing the temporary screws holding the rim board and so I needed some vertical support to stop it falling off while I made the adjustments.
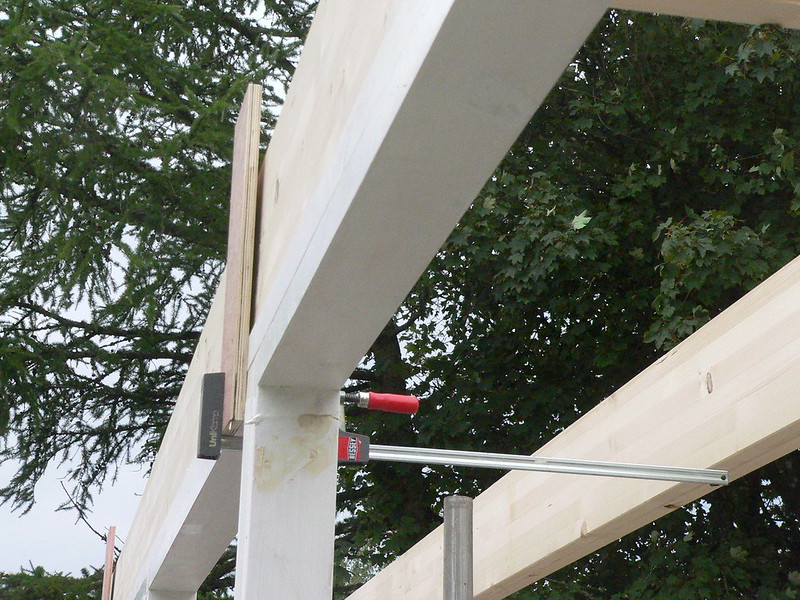
Once I'd got the rim beam in the right place, it was a question of raising the shorter glulam slightly and Acro'ing it over to once more touch the rim beam.
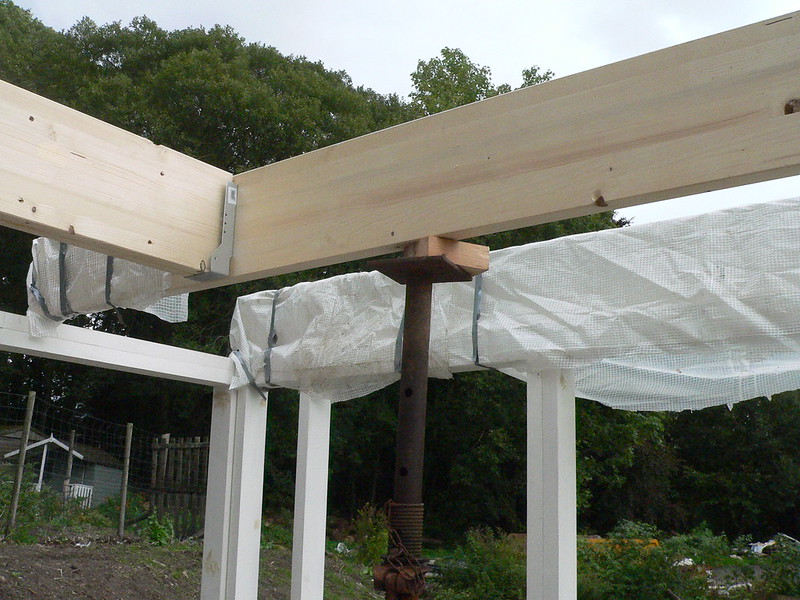
I also remembered that I had a 5m staging board which with the two towers and their platforms meant I could easily tackle almost the whole length of the rim beam and glulam. Because by this time I'd gone out and bought the Paslode. I'dforgotten what a great bit of kit itwas (once I'd put the nails in the right place ). So, so quick to bang in the nails every 150mm to secure the rim beam to the bearer, made even easier by the staging board.
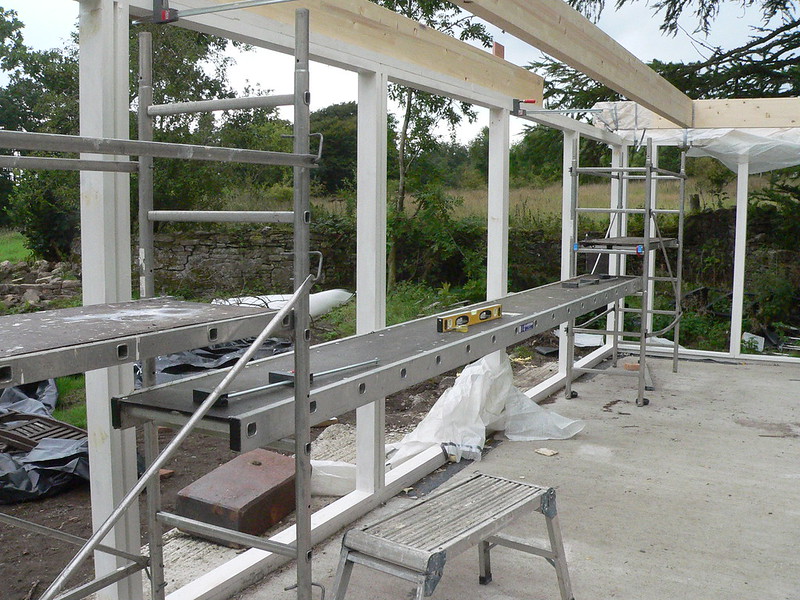
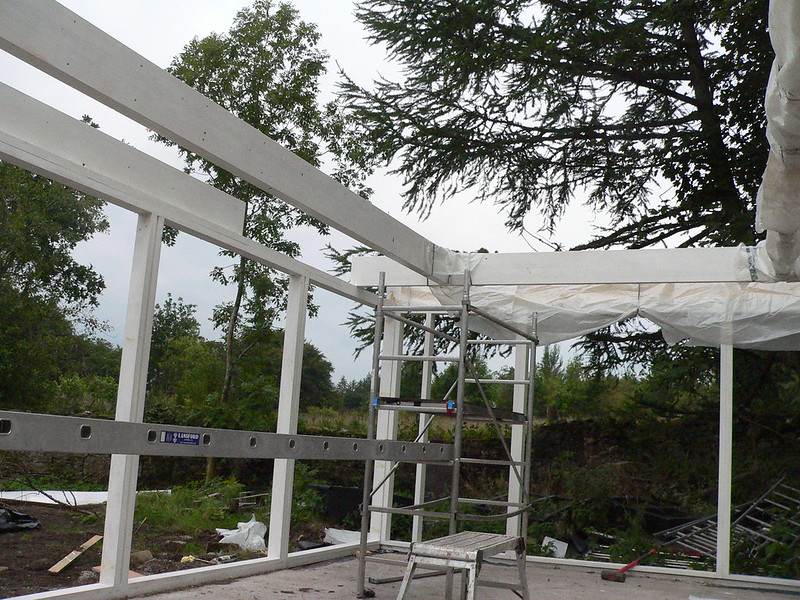
Then a coat of LOP on as much as I could as I was running out of paint.
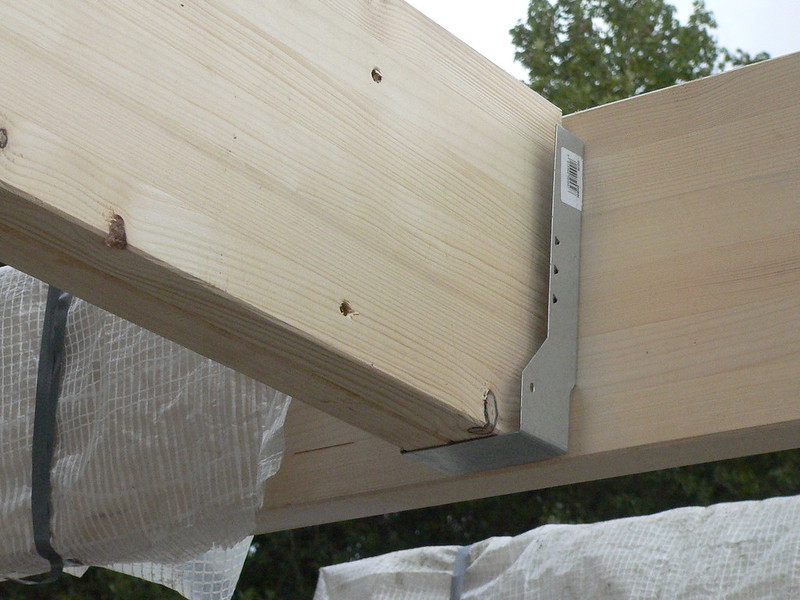
One SNAFU was that I didn't realise that the hanger was wider than the glulam. So I ended up putting it in the wrong place leaving this gap. I'll figure out some sort of cosmetic cover-up when I move 'inside' the orangerie.
Coley asked about LOP earlier on in the thread. I think it's still a great paint but it does have one drawback which I call 'transference'. LOP is great on bare wood and dries quickly. Subsequent coats need to be put on wafer thin if they are to dry in a reasonable timeframe. The trouble is all the other things that invariably get some paint on. Such as the outside of the tin. The paintbrush handle. I wear nitrile gloves when I paint. These get liberally covered in paint. Which never dries. So then you o to pick up your screwdriver to open another tin. Which results in paint on the screwdriver. Which never dries. So then you forget about the paint on the screwdriver and go to pick it up. Transferring wet paint to your hands. Which then gets transferred to the next tool you pick up.. and so on.
First put a reserve support at the other end in case the glulam popped out of the hanger. I didn't think it would as the amount of movement in an upward direction(resulting in the bottom moving away from the other glulam)as a result of lifting the other end would be negligible given the length of the glulam.
A similar support at the other end, a block of wood to give some initial lift (I'd decided to cut the overhang off little by little to minimise the amount of time the glulam would be out of the hanger) plus a lateral support at the top that would let me clamp the glulam to.
It was a struggle lifting the glulam that little bit and being able to slide the raiser block in, I can tell you. I then used the Fein to remove the topmost part of the overhang. But I knew that the raiser block was too dodgy to go any higher as trying to lift the glulam and slide in the block was difficult. So ....
and that was as high as I needed to go. Yet another occasion when the Fein came into its own. That little tool has dug me out of so many holes.
Next up was adjusting the alignment of the glulams and the rim boards. This would entail removing the temporary screws holding the rim board and so I needed some vertical support to stop it falling off while I made the adjustments.
Once I'd got the rim beam in the right place, it was a question of raising the shorter glulam slightly and Acro'ing it over to once more touch the rim beam.
I also remembered that I had a 5m staging board which with the two towers and their platforms meant I could easily tackle almost the whole length of the rim beam and glulam. Because by this time I'd gone out and bought the Paslode. I'dforgotten what a great bit of kit itwas (once I'd put the nails in the right place
). So, so quick to bang in the nails every 150mm to secure the rim beam to the bearer, made even easier by the staging board. Then a coat of LOP on as much as I could as I was running out of paint.
One SNAFU was that I didn't realise that the hanger was wider than the glulam. So I ended up putting it in the wrong place leaving this gap. I'll figure out some sort of cosmetic cover-up when I move 'inside' the orangerie.
Coley asked about LOP earlier on in the thread. I think it's still a great paint but it does have one drawback which I call 'transference'. LOP is great on bare wood and dries quickly. Subsequent coats need to be put on wafer thin if they are to dry in a reasonable timeframe. The trouble is all the other things that invariably get some paint on. Such as the outside of the tin. The paintbrush handle. I wear nitrile gloves when I paint. These get liberally covered in paint. Which never dries. So then you o to pick up your screwdriver to open another tin. Which results in paint on the screwdriver. Which never dries. So then you forget about the paint on the screwdriver and go to pick it up. Transferring wet paint to your hands. Which then gets transferred to the next tool you pick up.. and so on.
Confirmation that the K's are the noggins as suggested but they're not sure why they've been spec'd in this situation. The guy who designed the roof is away on holiday. The K1's are surplus to requirements and a glitch in the software.
So when he comes back I'll be having a wee chat to see about costings.
The one potential benefit of the K's along the top as noggins is that it gives a bearing surface for whatever I end up putting up as the ceiling. So will probably put them in but will adjust to suit aforementioned OSB3 spacings.
But nothing happening today because ......well, need I say more
So when he comes back I'll be having a wee chat to see about costings.
The one potential benefit of the K's along the top as noggins is that it gives a bearing surface for whatever I end up putting up as the ceiling. So will probably put them in but will adjust to suit aforementioned OSB3 spacings.
But nothing happening today because ......well, need I say more
- Joined
- Jul 21, 2014
- Messages
- 10,414
- Reaction score
- 165
RogerS":3gg23v4a said:Confirmation that the K's are the noggins as suggested but they're not sure why they've been spec'd in this situation. The guy who designed the roof is away on holiday. The K1's are surplus to requirements and a glitch in the software.
So when he comes back I'll be having a wee chat to see about costings.
The one potential benefit of the K's along the top as noggins is that it gives a bearing surface for whatever I end up putting up as the ceiling. So will probably put them in but will adjust to suit aforementioned OSB3 spacings.
But nothing happening today because ......well, need I say more
A further advantage that I see for the k1 noggins is ease of assembly to define the spacing of the short rafters. So once the first short rafter correct position is defined then it is simply fit one noggin, fit the rafter hard against it and so on. the hangers at the other end of the rafter left loose and then go back to fix them with a piece of scrap cut as a spacer.
I've not done a detailed analysis but I'd have thought that fitting your OSB from the centre towards each end that the 600 centres would be ideal and leaves any unusual cutting to the ends which are non standard pitch anyway.
Lovely sunny say down south again and no rain forecast for the next 2 weeks but I won't mention that. :lol:
Bob
9fingers":1y1bjaar said:.....
I've not done a detailed analysis but I'd have thought that fitting your OSB from the centre towards each end that the 600 centres would be ideal and leaves any unusual cutting to the ends which are non standard pitch anyway.
Lovely sunny say down south again and no rain forecast for the next 2 weeks but I won't mention that. :lol:
Bob
Not when your OSB is 1220 x 2440 !
- Joined
- Jul 21, 2014
- Messages
- 10,414
- Reaction score
- 165
RogerS":hallcpkn said:9fingers":hallcpkn said:.....
I've not done a detailed analysis but I'd have thought that fitting your OSB from the centre towards each end that the 600 centres would be ideal and leaves any unusual cutting to the ends which are non standard pitch anyway.
Lovely sunny say down south again and no rain forecast for the next 2 weeks but I won't mention that. :lol:
Bob
Not when your OSB is 1220 x 2440 !
The waste is only going to be 40 mm or 1.6% per sheet

Bob
9fingers":on9h64ra said:RogerS":on9h64ra said:9fingers":on9h64ra said:.....
I've not done a detailed analysis but I'd have thought that fitting your OSB from the centre towards each end that the 600 centres would be ideal and leaves any unusual cutting to the ends which are non standard pitch anyway.
Lovely sunny say down south again and no rain forecast for the next 2 weeks but I won't mention that. :lol:
Bob
Not when your OSB is 1220 x 2440 !
The waste is only going to be 40 mm or 1.6% per sheet
Bob
It's the time that's the issue. I hate working with OSB at the best of times. Now I've got to make a lot more extra cuts. Grovelling about on the ground. Faffing about getting the track lined up correctly.

will1983
New Shoots
Clamp a scrap timber to the bottom of your saw and use it as a fence against the edge of the OSB board.
If you stack a few sheets together you can cut them all together and no tracks required.
If you stack a few sheets together you can cut them all together and no tracks required.
will1983":1ftiaxpb said:Clamp a scrap timber to the bottom of your saw and use it as a fence against the edge of the OSB board.
If you stack a few sheets together you can cut them all together and no tracks required.
Cracking idea, thanks :eusa-clap:
 bscene-drinkingcheers:
9fingers":14g6bdzb said:RogerS":14g6bdzb said:9fingers":14g6bdzb said:.....
I've not done a detailed analysis but I'd have thought that fitting your OSB from the centre towards each end that the 600 centres would be ideal and leaves any unusual cutting to the ends which are non standard pitch anyway.
Lovely sunny say down south again and no rain forecast for the next 2 weeks but I won't mention that. :lol:
Bob
Not when your OSB is 1220 x 2440 !
The waste is only going to be 40 mm or 1.6% per sheet
Bob
I do like the idea though
The roof joists are now in place despite cock-ups.
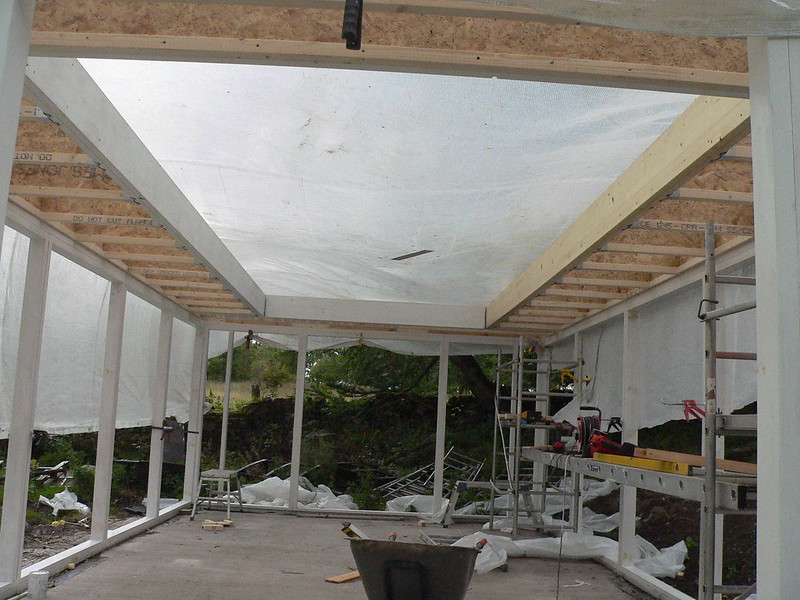
I didn't look closely enough at the drawing and should have worked outwards from the centres of the long glulams. Instead, I just started at one end and spaced out 600mm from there. Wrong ! But at the end of the day, it's all hidden and I can finesse any issues of OSB cutting.
The ring shank nails turned out to be a proverbial PITA...possibly because they are cheap c**p from Toolstation. Impossible to bang in without bending and so they are now in the skip. Screws and the Paslode. Only wee problem is that I think the Paslode nails might be a bit on the short side and so I've got some longer ones on order and it will take all of 20 minutes to whack them in all over the structure.
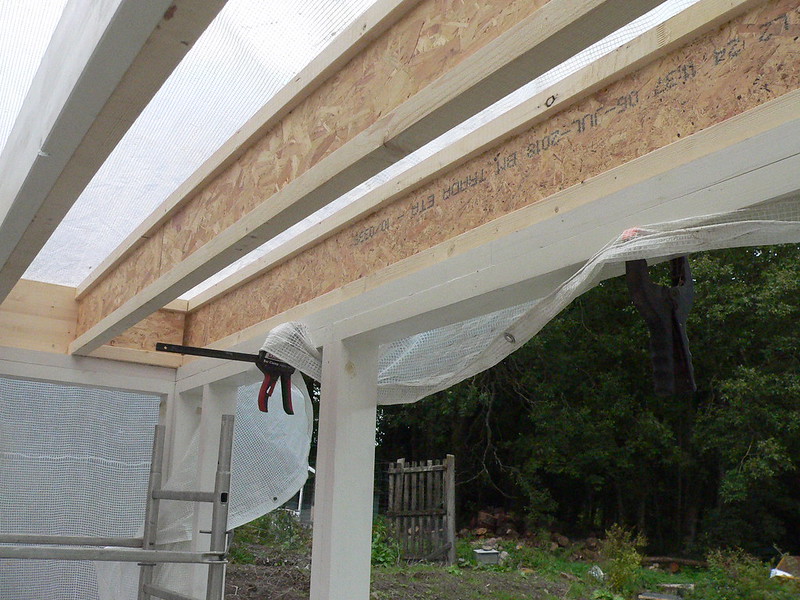
This was only a slight cockup - even if it was as bad as that. The drawing says to stick in two long i-beams at either end. They are supposed to overhang the timber bearer to give whatever the ceiling is made from something to fix to. But I went ahead and fixed them tightly against the rim-beam. Ergo no support. It's easily fixed by ripping down a long length and fixing that to the bearer to provide the missing support. However, if I'd put the i-beam where they suggested I would still have had to rip down some timber to give it a good fixing at the top to the rim beam. So..swings and roundabouts.
Now....I need your advice, chaps. In hindsight I would have fitted the two longest glulams slightly higher than the outside bearers to give me a little fall away from the lantern opening. Not that there should be any problem with puddling since it's going to be glass-fibred but in principle it's good to get rid of the water regardless. But I didn't and as it stand there is a fall but towards the lantern area. I could lift the ends of the short i-beams at the hanger end (lantern end) by packing out the hangers. Then cut some timber to bring the level of the top of the glulams to meet the elevated i-beams.
But is it worth it ?
I'd really like to crack on, get the OSB in and fibre-glassed as (a) the weather isn't brilliant and (b)there's loads more to do.
Any thoughts ?
I didn't look closely enough at the drawing and should have worked outwards from the centres of the long glulams. Instead, I just started at one end and spaced out 600mm from there. Wrong ! But at the end of the day, it's all hidden and I can finesse any issues of OSB cutting.
The ring shank nails turned out to be a proverbial PITA...possibly because they are cheap c**p from Toolstation. Impossible to bang in without bending and so they are now in the skip. Screws and the Paslode. Only wee problem is that I think the Paslode nails might be a bit on the short side and so I've got some longer ones on order and it will take all of 20 minutes to whack them in all over the structure.
This was only a slight cockup - even if it was as bad as that. The drawing says to stick in two long i-beams at either end. They are supposed to overhang the timber bearer to give whatever the ceiling is made from something to fix to. But I went ahead and fixed them tightly against the rim-beam. Ergo no support. It's easily fixed by ripping down a long length and fixing that to the bearer to provide the missing support. However, if I'd put the i-beam where they suggested I would still have had to rip down some timber to give it a good fixing at the top to the rim beam. So..swings and roundabouts.
Now....I need your advice, chaps. In hindsight I would have fitted the two longest glulams slightly higher than the outside bearers to give me a little fall away from the lantern opening. Not that there should be any problem with puddling since it's going to be glass-fibred but in principle it's good to get rid of the water regardless. But I didn't and as it stand there is a fall but towards the lantern area. I could lift the ends of the short i-beams at the hanger end (lantern end) by packing out the hangers. Then cut some timber to bring the level of the top of the glulams to meet the elevated i-beams.
But is it worth it ?
I'd really like to crack on, get the OSB in and fibre-glassed as (a) the weather isn't brilliant and (b)there's loads more to do.
Any thoughts ?
Mike G
Petrified Pine
You'll only move the problem to the ceiling if you do that, Roger. There must be an over-all fall in the roof, so does this mean that there is a fall towards the long back section of the lantern?
Any fall has, I'm afraid, been a bit of a moveable feast. I've been aware of having a fall but over the sort of distance I'm working on (and possibly the method of construction) it's gone this way and that. I'm no too worried about the ceiling (still to decide what that will be) but I'm more concerned with getting the roof finished and water-tight.
The forecast for the next week is rain on every day which precludes me doing much.
The forecast for the next week is rain on every day which precludes me doing much.
Mike G
Petrified Pine
Well you need falls, Roger, so I would cut some firrings. It's not a big job.
I have to say I am worried about fibreglass on this design. I would expect to see cracking around the corners of the lantern opening in years to come, as expansion and contraction take their toll on an inflexible product. Are you still planning to sell up and head for a sunnier part of the country?
I have to say I am worried about fibreglass on this design. I would expect to see cracking around the corners of the lantern opening in years to come, as expansion and contraction take their toll on an inflexible product. Are you still planning to sell up and head for a sunnier part of the country?