• Hi all and welcome to TheWoodHaven2 brought into the 21st Century, kicking and screaming! We all have Alasdair to thank for the vast bulk of the heavy lifting to get us here, no more so than me because he's taken away a huge burden of responsibility from my shoulders and brought us to this new shiny home, with all your previous content (hopefully) still intact! Please peruse and feed back. There is still plenty to do, like changing the colour scheme, adding the banner graphic, tweaking the odd setting here and there so I have added a new thread in the 'Technical Issues, Bugs and Feature Requests' forum for you to add any issues you find, any missing settings or just anything you'd like to see added/removed from the feature set that Xenforo offers. We will get to everything over the coming weeks so please be patient, but add anything at all to the thread I mention above and we promise to get to them over the next few days/weeks/months. In the meantime, please enjoy!

Dreadnought SS Guitar (Demo Time)

Malc2098

Sequoia
Joined
Jul 3, 2016
Messages
8,335
Reaction score
1,388
Location
Tiverton
Name
Malcolm
So while Instrument Nos 6 and 7 are cosy in the house, I can now get stuff prepared in the workshop for the next project, Nos 8 and 9.
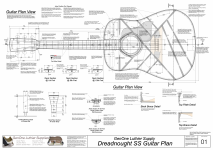
01 dreadnoughtssplan.png

This is plan 1 of 7 :) for two guitars, one symmetrical and one cutaway, Venetian, this time. The previous cutaway on the ukulele was a Florentine. If you look at the position of the cutaway on this plan, you will see that it comprises two opposing arcs, as opposed the the sharp horn of the Florentine. This will stretch my skills further because those arcs are bent from the same pice of wood.

The first thing I have been doing is CAD drawing templates, forms and moulds. They're not all complete yet, but the bulk of them are.

So having got my table saw back in use, I've sawn up the stock for a number of them as well as for a jig to cut the neck scarf angle accurately.
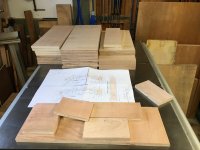
FF910D56-AC27-4DF7-99ED-E192BF1D0814.jpeg

Given the small space of my workshop and its storage, I decided a while ago that I would only build two types of instrument; the Concert Ukulele and the Dreadnought Guitar. I have all the forms, moulds and templates for the ukulele, and once I've finished making all the guitar versions, I need not make any more.

From then on I can build either of the instruments and concentrate of improving my skills and experimenting with the blingy parts of the instruments, like the purfling and inlays.

But that won't be happening any time soon, because I've still got to rewire and service the CNC machine.

No peace for the retired wicked. ;)
 
This will be interesting Mr Luthier. A couple of notches up the skill ladder.
 
Some manufacturers construct their necks, including the heel and the angled headstock, from one piece of wood. For the home builder this would be expensive to get the right piece of timber with the right grain of quarter sawn. This is also wasteful of the timber cut away from the whole neck shape. So some manufacturers CNC cut several neck shapes from one larger piece of timber. Again this would be outside the scope of a home builder.

The preferred method of some commercial builders intent on reducing waste, and so also suitable for the home builder, is to use one length of about 900 x 75 x ~22mm of the timber of choice and cut several short pieces from one end to build up the heel, and to cut a scarf joint at the other end to angle the headstock back.

This method also allows the maker to laminate the neck along its length to neutralise as much as possible the risk of the neck twisting. You may remember I used lengths of Padauk and Maple along the middle of the last two ukuleles necks.

Cutting and gluing a scarf joint can be tricky to get the stock perfectly aligned, and gluing the pieces of the heel requires the neck to heel corner to be, in this design, perfectly 90 degrees.

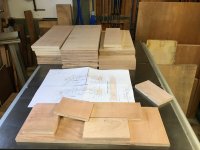
So I have bought a design of assembly jig, run off the stock of ply on the table saw, using Cutlist Optimiser to reduce the waste and set about fixing it together.

FF910D56-AC27-4DF7-99ED-E192BF1D0814.jpeg

The jig pieces are in the foreground with one of the plans.

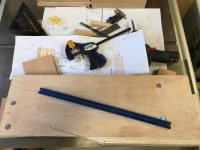
The underside of the jig has a rail screwed to it at the scarf angle and the rail fits in the mitre slot of the table saw.

1E34886F-AD15-45C5-978C-2665D816DE21.jpeg

The 3 dimensional corner at the far end of the jig has to be perfectly 90 degrees in each axis.

FA424CA0-2AC6-4ACC-A31A-5AAAF22E466F.jpeg

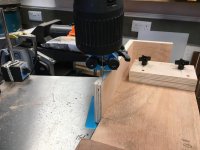
Pushing the jig slowly forward, locked at an angle by the mitre slot, the saw cuts the angle for the scarf joint.

53EF8F84-D79E-4E64-8275-14FB4CBB42F6.jpeg

I cut into the jig base across the area where the scarf will be cut from the stock. Also, by using DST to stick the angled caul to the base, I was able to cut exactly the same angles for the caul.

2C15D3BE-3DAF-446D-98DA-EB134123E466_1_201_a.jpeg

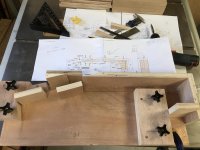
I know there's no stock in the jig, but hopefully you can get the idea where each of the pieces go and how the cauls keep the stock square while gluing. (Except the caul right under the scarf joint, I placed at the wrong angle, if you look at the drawing :oops: ).
 
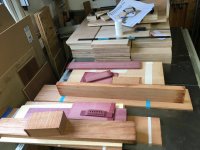
Tonewoods chosen from my stash.

79EE2158-6CD1-40FD-A413-7EC7EE131280.jpeg

Spruce for the soundboards, African Mahogany for the sides, back, internal blocks and necks, Purpleheart for the fretboard, head veneer and bridge, and I have some Purpleheart veneer that I'll try and make up into some binding and purfling.
 
Trying very hard to plan this build efficiently. Making sure I finish all the table saw work before I lower the CNC Machine onto it.

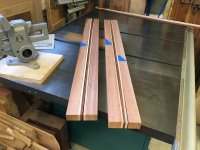
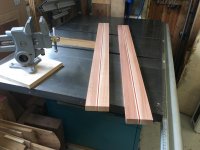
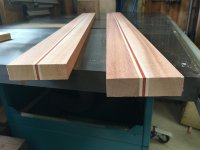
Two A grade (AA and AAA are better grades, but I'm laminating these) African Mahogany neck blanks, face side and face edge planed. Then ripped in half and width planed equal. Then strips of Maple and Padauk ripped for the centre laminations.

6FF7EF97-7C13-488F-8F1E-B56B9489249C.jpeg

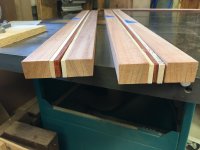
The AM blanks are just off quarter sawn, so I've highlighted the end grain in pencil, and after ripping in half, I turn one side end over end and the grain almost mirrors the other half. This tends to reduce the risk of the neck twisting over time.

AF173650-E0B0-4CB0-8167-5FE536D459A0.jpeg

Got to make sure I do the same to the Maple strips.

Next task is to reduce the thickness of the strips on the drum sander.
 
Two finished guitar neck blanks.

8D899780-7A7A-4AB6-9549-5D69B51EA2A5.jpeg

Almost symmetrical end grain.

B0CD571A-FC19-4DE3-BB68-359015B76D0C.jpeg
 
Andyp":1pb06j64 said:
Methinks that the finished guitars are going to look gorgeous.


Thanks, Andy.

Delays due to visiting family, seeing new grandchildren, seeing expectant daughter, seeing older grandchildren.

And I'm going to rewire the cnc before starting any more on the instruments.
 
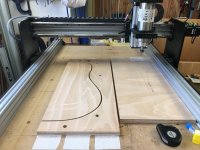
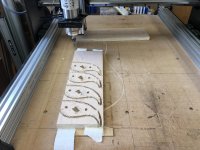
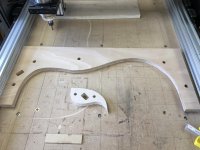
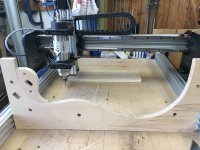
Back in the saddle, slowly. Started machining the outer forms.

The CUF popped in for a visit today. Spot the difference.

343165B5-A391-42D5-9CDF-7E32A83B3B24.jpegE603290A-0019-4A26-B5C1-71F03DF4392A.jpeg

Ages ago, when setting up the spindle, I wanted to get as much height as I could (although plans have changed and I don't need so much height now).

The result is the bottom of the collet chuck was not lower than the Z lead screw sticking out the bottom of the Z gantry. And as I was using a 4mm end mill cutter with a 12mm spiral through 18mm ply, I set the cutter in the collet/chuck just over the 18 mm so as to reduce side load and didn't notice the lead screw stick out lower than the chuck. It scraped over the stock, slightly lifting the z gantry and not cutting fully through the stock.
:oops: :eusa-doh:
 
Can you see what it is yet?

F92F704F-EBFD-4E03-B44A-EAB79945E088.jpeg

Should have used a down cutter. Never mind, the flat side of the sanding dish soon sorted them out.

4A68396A-E763-45CB-825B-5A0BA3408504.jpeg

Worked it out?

42E67546-DF10-41C4-975D-E9803A3DD285_1_201_a.jpeg

35429E31-5C52-4CF1-85B2-220E55AD41C0.jpeg

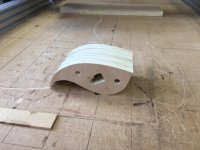
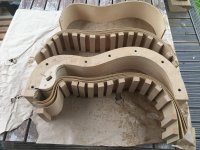
I shall be making two instruments side by side. One will be symmetrical, the other will have a Venetian cutaway. Rather than fabricate two different forms, these are the inserts that will convert the symmetrical form into a cutaway.

The ukulele I recently made had a Florentine cutaway with a sharp horn. The Venetian cutaway has a round horn.
 
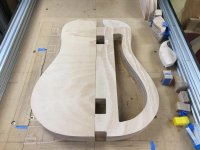
Outer form now together, including a fillet for the cutaway model.

0712ACA2-A6CF-4FB7-8A01-E1A223DF5A7E.jpeg

I don't believe I could have made the initial shapes by hand from a drawing stuck to the plywood as accurate as the CNC router has. That says more about my hand skills rather than all about the CNC. But, the CNC will make the the same, time after time, and that's what I bought it for.

There are so many other hand skills required in the making of instruments that I can demonstrate my level to be not bad.
 
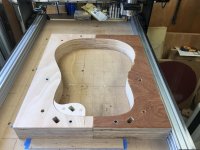
Three layer cake.

C340BDF6-453F-4845-B6AD-0E5D498F2C49.jpeg

I had already milled the main profile of half a body in the previous post, and by using a 4mm diameter cutter, The outside form is exact to the plans for the guitar. The remainder is now 4mm offset inwards which is the shape/dimension for the inside form.

I designed each of the apertures and the cutaway in my CAD/CAM software and milled the first. Then by securing the second on top, and locating Z/0 on top, it was in exactly the same position. That was milled, and so on with the third.

93A0F341-DB68-4B98-9998-A9D71EF24047.jpeg

Tomorrow I'll mill the apertures in the non cutaway sides.
 
Finishing off the internal form, including a fillet that can be removed for the Venetian cutaway model and included for the symmetrical model.

E56D3546-F051-4A75-9FB6-FC0C80D4CE8B.jpeg

Heel and neck block apertures enable them to be fitted, and then the bent sides glued to them.
 
L-R
Symmetrical half for side bending machine - Inside form - Side lamination caul - Outside form - Cutaway half for side bending machine.


A6CEE385-A7E0-4FD3-ABB8-F20B3D83ADB3.jpeg
Just for this one design of instrument.
 
Fascinating stuff mate, looks excellent. I'll be following this intently as my guitar journey is just starting its embryonic stage... Playing that is, not making, yet...
 
You are doing a great job with those very well made formers. This is small scale production quality.

I am hoping you are going to mitre the cutaway pint this time :? Tricky to get right, especially if you have decorative binding as well - but looks high end when done.
 
TrimTheKing":dbdonslt said:
Fascinating stuff mate, looks excellent. I'll be following this intently as my guitar journey is just starting its embryonic stage... Playing that is, not making, yet...

Cheers, Mark. My journey started in an embryonic stage and in recent years my woodworking skills over took my playing skills! (Which says more about my playing skills!! :D )
 
AJB Temple":22u5r8yv said:
You are doing a great job with those very well made formers. This is small scale production quality.

I am hoping you are going to mitre the cutaway pint this time :? Tricky to get right, especially if you have decorative binding as well - but looks high end when done.

Cheers, Adrian. No point on the horn this time. It's a Venetian cutaway. Going to be fun bending it, though.
 
of course. I allowed myself to be distracted by the point on the clamp former.
 
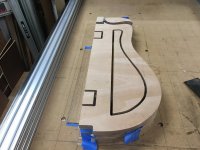
Having milled the outer laminating caul on the CNC machine and built up to thickness, I now have to fabricate the inner laminating caul which necessitates laminating sheets of hardboard.

3F8CFABE-E475-476E-815D-9FC59D94E816_1_201_a.jpeg

Clearly, standard thickness hardboard isn't going to go round the curves of the bouts without cracking, so I put it through the drum sander till I got it down to 1.8 mm. Then it bends nicely. Time for a dry fit.

6FF9E8FC-CC16-4F30-B407-D55CFE06B093.jpeg

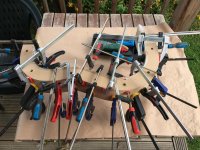
Works a treat. Time to glue up, wrapped in clingfilm to avoid sticking to the outer caul.

DEDB63F5-65EF-42AA-A320-12ED8A29A894.jpeg

You can never have too many clamps. I always say. ;)
 
I messed up! I thinned out those pieces of hardboard and glued them together. That can't be right, because the outside of that caul then becomes the same shape and size of the outside of the workpiece.

They need to be separate, so they can move around while squeezing the laminations together and assume the shape of the inner lamination.

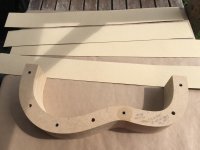
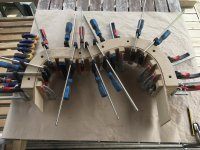
So start again. Cut the strips, run them through the drum sander to about 1.75mm, then glue the clamping cauls to the innermost of the four leaves.
5F080A45-9465-4042-8A8C-74C2E415DC64_1_201_a.jpeg

Next, fix the cutaway insert into the outer caul and thin a load more strips, this time down to 1.25 ish mm so that they can curve round the cutaway shape. I also gave the strips a bit of a soaking to help with the bending and left them in there for a day to dry in the shape.
4E095274-B90B-4F8D-A674-92EF7355FF56_1_201_a.jpeg

All the parts together, including the erroneous one.
3DBA014A-9B81-4934-9830-CE7103D14ACA.jpeg

It just goes to show, that top piece of strips of thinned hardboard is so rigid. That rigidity is what I am trying to achieve with the sides of the instruments, so they absorb even less energy from the strings when played.
 
As ever, I'm a bit confused. I've only ever made a handful of acoustic guitars (donkey's ago) and only ever used solid Brazilian rosewood sides and backs as far as I recall. Had to steam them. Laminated parts were not a thing then.

Are you actually using hardboard for the sides? Or are you making a former or mould of some sort out of the laminated hardboard? Or is the hardboard a practice?

What seems to make a difference in acoustic guitars is maple back and sides versus rosewood. Maple seems to create a much brighter sound (this is based on a sample of two maple Taylors vs ny rosewood one so not even slightly scientific 8-) ).

Very interesting build and good photos. Thanks for taking the effort.
 
I apologise if I have confused any of the members out there.

I am using the hardboard for the cauls to laminate the sides of my instruments. If I had a vacuum press, that would be ideal, but as I don't, I have to simulate how the clamping pressure is applied the curved surfaces of the inner and outer laminations.

I am advised, via the inter web, that stiffness and weight have an effect on the sound an instrument produces.

Traditionally, solid wood has been used for the sides and backs of instruments. These comprise the 'soundbox' or body of the instrument. The top, or soundboard, is what translates the sound created by a vibrating string. It does so because both ends of the string are connected to it via the bridge and the neck.

Therefore, it is in the interests of not deteriorating this sound by having other parts of the instrument, like the back and sides, not absorb the energy created by the strings.

In recent times, again I am advised by the inter web, some luthiers have found that by laminating the sides of an instrument, but still using the decorative timber on the outer lamination, and even sometimes inner leaves of the lamination, too, that they can be created thinner, therefore with less weight and mass, and stiffer, thus reducing the potential to absorb string vibration energy and leaving the soundboard to create the instrument's sound.

I now learn, that even though the back of the instruments are always braced to increase their stiffness, these are now sometimes laminated as well for the same reasons.

I'm sure the major manufacturers will find economies of scale in the lamination process and probably be able to make the instruments cheaper with this method, but for the small luthier this is more work, therefore increasing the cost of his instruments.

But there will be musicians who will only want their instruments made the traditional way with solid sides, just are there will be those that prefer the sound of instruments made with laminated parts.

Me, I'm just enjoying trying to learn new processes with wood, and ending up with something beautiful at the end of it. I only wish I could play them well.
 
I was catching up just before your last post and yes i was more confused before refreshing the page than i am now :)

I'm sure any remaining confusion will be cleared up in subsequent postings.

Just thinking looking at your pile of formers - you must have got through a fair bit of sheet materials so far.

Another great thread. thanks Malc.
 
Interesting Malcolm.

Times may have changed. But when I was an active guitar collector and live player, laminated was always regarded as second rate. The top, premium hand made guitars were always solid. However, Brazilian and Indian rosewood of suitable quality became ever harder to obtain and commensurately expensive. Volume manufacturers went laminated at around this time....

As a player there are so many variables in a guitar anyway, that most people, me included, would not be able to say which is laminated and which is solid if playing two guitars of same shape and bracing, with same strings etc. But I definitely could tell you the difference between cheap factory made and hand made high end.

I think the lighter sides and back argument is hogwash personally (I know you are just quoting others). An acoustic guitar, even something massive like a jumbo Gibson hummingbird or Dove, does not weigh much and is a great deal lighter than a solid body such as say a Les Paul. My Hummer weighs four and a half pounds and the lightest LP I have ever owned was over 10 pounds and some are much heavier. Thinner acoustic sides and back might save 200 grams? Might be relevant in the Tour de France, but not in a guitar I reckon.

I've never been convinced by the stiffness argument either. Mainly this is because whenever I've played super stiff carbon fibre bodied guitars, they always sound brittle to me. The early Ovations (bowl back) were allegedly very rigid but very few players liked the sound much. In contrast, if you look at grand piano rims, where the spruce or carbon fibre soundboard on a concert instrument is huge, some of the top end manufacturers (eg Boesendorfer, now owned by Yamaha) have incredibly thick rims (getting on for 2").

Guitars are super subjective things and probably defy research as preference is not always rational. To me an acoustic (sound wise) lives or dies by the quality of the top (inc bracing) and the bridge join. It will be very interesting to see what you think when you have made your laminated instrument and compare it with a similar solid one.

Instrument design is no doubt well ahead of my knowledge now.
 
The last time I used the side bender it was for Ukulele sides.

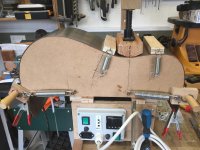
So the mould for the Dreadnought SS you saw in earlier photos here has been set up for the machine and this time I've used springs instead of bungee cord and there's good contact all the way round under spring tension.
019B6834-F7C1-4C93-9CB5-4C3E5B1D32DE.jpeg

The shim steel for this mould is too thick to bend round the Venetian cutaway version, so I ordered a roll almost half the thickness of this one; 0.010".
 
Hi Malc

Really interesting thread, thanks for this.

Just a thought, assuming all your laminated sides will be the same thickness, is a combination of your original glued lamination caul for the inner caul, but glued up with a mock 'side' in between, not get you to where you need to be?

If that doesn't make sense, what I mean is put an additional step in between laminating and gluing the inner caul to shape, of sticking in the number of laminations that would make up a side, and putting them in between. That way you would end up with your solid caul/former, with the correct inner profile. :eusa-think:
 
TrimTheKing":1kjqcozk said:
Hi Malc

Really interesting thread, thanks for this.

Just a thought, assuming all your laminated sides will be the same thickness, is a combination of your original glued lamination caul for the inner caul, but glued up with a mock 'side' in between, not get you to where you need to be?

If that doesn't make sense, what I mean is put an additional step in between laminating and gluing the inner caul to shape, of sticking in the number of laminations that would make up a side, and putting them in between. That way you would end up with your solid caul/former, with the correct inner profile. :eusa-think:

If I’ve followed you correctly, the problem then might be that the two end sections are roughly straight and parallel and not so easy to fit the outer mould over the laminations.
Must say that whenever I’ve done laminating I’ve used an inner and outer moulds but mine haven’t been anything like as wide as a guitar body, that’s a whole lot more difficult.
Ian
 
Thank you for taking notice chaps! Good to see you're trying to keep up. Never fear, I have trouble keeping up with myself sometimes! :D

The process goes like this -

* The decorative tone wood goes in the bending machine and gets bent. But wood being wood because of, (is it the cellulose in it?), the cellulose, then, keeps springing back out of shape. Some of the industry suggests that that spring is sufficient to absorb some of the strings' energy when the instrument is built and detracts from the overall sound potential.

* Next, the decorative tone wood side goes first inside the outer caul followed by one or two veneer sheets. I shall be using Swiss Pear for economy and cosmetic reasons. Both veneer leaves are 0.6mm thick.

* This is the tricky bit to explain, but each leaf is 'concentric' to the previous leaf, and so the inner cauls also all have to be 'concentric' to each other, too, otherwise the whole wouldn't fit in the outer caul, and I think Ian is right in that certainly the two ends will be too fat to fit.

If I could afford a vacuum press setup, I wouldn't't need to do all this. But that would be too easy, and my brain gets a good workout solving these problems. :)
 
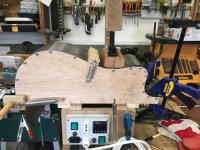
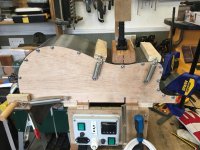
Started on the Venetian cutaway version.

Clamping the 0.010mm 'sandwich' in place, and waist clamped.
7F248C77-0A78-4E24-9365-37D992952AB9.jpeg

Lower bout clamped with springs.
411EF6D7-455D-43F4-988C-12C3162AE6D8.jpeg

Bottom of the upper bout clamped with springs.
80F772F5-4520-4311-8218-AE98FD942653.jpeg

Now I've got to fashion a a screw adjustable caul like the waist caul to exactly fit the radius of the cutaway, but minus the thickness of the guitar side and the heating 'sandwich'. ;)

But I think I'm logistics manager for a shopping trip tomorrow. ;)
 
Thanks, Gents.

Well, here's a way of achieving the required radius minus a couple of mm.

E2FAF452-F0EA-4686-91FC-49720EA84351.jpeg
You might notice I'm not used to working with metal.

This is how it will fit.

99A4992D-5EEE-4025-96A6-75ADE8FA0E56.jpeg

Now I've got to make a veneer screw press contraption to be able to screw it in slowly at 22.5 degrees (angle) when the wood is cooking in the sandwich.
 
the purpleheart bridge is a nice touch malc, love seeing the jigs as well.
 
You may recall from the photos a couple of posts back that I needed a way to press the steel shims/heated mat and guitar side wood into the cutaway curve somehow, while the wood was hot on the bender machine. Well, using scrap and hardware from the workshop, I came up with this.


[youtubessl]K7F-mi2g6I4[/youtubessl]

It has to rotate around the outer curve and then press into the inner curve. So far, as you can see, it works with just the steel shims. I've yet to try it with the heating mat and then maybe some trial wood, like ash from my stash.

It's not pretty and I only have to use it once this year.
 
Before I stow the CNC machine away in the rafters to use the TS top as a workbench, I've got a few more jobs for it.

Today I machined a pair of fretboards. there were four main parts of the milling process.

1) drilling the marker dot holes for the Mother of Pearl dot markers - 6mm 2 flute spiral up cutter
2) profiling the board to a 16" (406.4mm) radius - 16mm two blade cove bit
3) cutting the fret slots - 0.6mm 2 flute up spiral cutter
4) cutting the outline profile - 6mm 2 flute spiral up cutter.

The YT video has sped up and time-lapse videos.

[youtubessl]5tPiXX7XLLI[/youtubessl]
 
Back
Top