• Hi all and welcome to TheWoodHaven2 brought into the 21st Century, kicking and screaming! We all have Alasdair to thank for the vast bulk of the heavy lifting to get us here, no more so than me because he's taken away a huge burden of responsibility from my shoulders and brought us to this new shiny home, with all your previous content (hopefully) still intact! Please peruse and feed back. There is still plenty to do, like changing the colour scheme, adding the banner graphic, tweaking the odd setting here and there so I have added a new thread in the 'Technical Issues, Bugs and Feature Requests' forum for you to add any issues you find, any missing settings or just anything you'd like to see added/removed from the feature set that Xenforo offers. We will get to everything over the coming weeks so please be patient, but add anything at all to the thread I mention above and we promise to get to them over the next few days/weeks/months. In the meantime, please enjoy!

Dreadnought SS Guitar (Demo Time)

Cabinetman":2nrdvme0 said:
Seems a strange way of going on, you put carbon fibre rods in to stop it bending and then apply a steel rod to bend it, but I’m sure you know what you’re doing.

I know, it does seem counterintuitive.

Historically, un-reinforced necks have had truss rods of various types, single-action, dual action, fitted to counteract the tension created by the strings. I seem to recall posting in my 12 String thread that the force created by the strings was something in the region of 250lbs. I can't recall exactly, but it's substantial.

This causes the neck to bend, or rather curve, close to the nut end, which to a certain extent is desirable, because the strings need to vibrate unimpeded. Although they may look like they're vibrating side to side, I believe they vibrate round and round. So they need to be a certain distance from the fretboard, so they don't buzz against the frets.

The necks being wood respond to changes in temperature and humidity, and so the truss rod was used to adjust the curve in the neck.

As modern materials become available, luthiers try different materials to see what improvement can be made to the issue with bending necks. So the CF is used to stabilise the neck, and the truss rod is used to fine tune that curve to let the stings vibrate unimpeded as close to the fretboard as possible, so the player uses less effort in his fingers fretting the strings.

The design and construction of necks is a big subject. I choose to laminate my necks, because the one piece combination of headstock, neck and heel is expensive wasteful of timber. Also, I rip the primary timber in two and flip one piece and insert decorative, but stabilising, strips in between, balancing out the angle of the grain. As you have seen, I also create the heel from the offcuts of the laminated slab. Unless perfectly quarter sawn, any slab can have a tendency to twist with changes in humidity and temperature and combine that with the string tension, some instruments can become unplayable.

 
One huge omission I made in the above post was that the carbon fibre also resists twisting of the neck.

The rods completely fill their channel and are epoxied in them, so they replace the wood and are in fact stronger.
 
It’s a weird thing with guitars Ian. I must have owned over a hundred guitars in my life, repaired quite a few too. I think it has only been. Necessary to adjust a truss rod a couple of times. Usually it is set and forget.

Biggest neck issue is twist and truss rods don’t help. Necks can bow if players switch from very light gauge strings to very heavy, but few people do that and the fashion these days is mainly for light gauge strings as a player.


Sent from my iPhone using Tapatalk
 
Malc got there first[emoji3]


Sent from my iPhone using Tapatalk
 
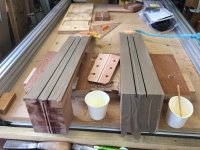
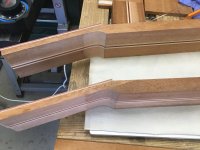
Two neck blanks channeled using a Trend T5 with 2mm upcut bit and dry fitted with carbon fibre reinforcement rods and truss rods.

DBC2596C-31CD-4EA9-990D-26B0F82C5537.jpeg

F8A4B4EA-EFB4-4D5E-BAA0-C0FD79321183.jpeg

The carbon fibre rods will be epoxied in replacing the wood removed by routing. The dual action truss rods are fitted dry, but with some vibration absorbent silcone, so that under the glued fretboard, when adjusted one way for the other by the hex socket visible at the heel they can slightly bend the neck.
 
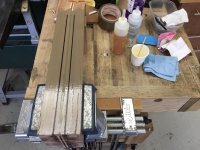
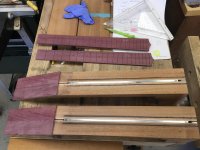
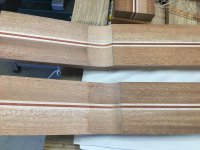
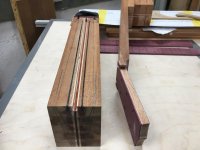
Two neck blanks with carbon fibre reinforcement rods epoxied in their channels.

Parcel tape is ideal for protecting the workpiece from glue.
FD81B9BD-3B18-4FB5-A796-A995937DCBD7.jpeg

First neck completed.
B96BFC3E-F44E-4A43-B0DA-3A8083E88A7A_1_201_a.jpeg

The mixing cups are left by their workpiece so that when the cups contents are cured, then so is the workpiece.

963D2293-D278-45AB-BD1C-B9CA832F64C2.jpeg
 
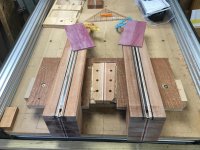
Both necks' reinforcement epoxied into their channels and necks awaiting the headstock veneers which have to be angled at their ends 90 degrees to the neck body to provide one edge for the nut to abut.

3A41FF20-24CB-41A1-8E8E-9B9FDE1E506C.jpeg
 
nice tip with the parcel tape, I'm going to do the same on my upcoming guitar build, I might rout it 0.5-1mm deeper and just make some custom fillet pieces to cover them and plane it down.
 
thetyreman":brrkrqcu said:
nice tip with the parcel tape, I'm going to do the same on my upcoming guitar build, I might rout it 0.5-1mm deeper and just make some custom fillet pieces to cover them and plane it down.

Thanks, Ben. Mine are 10mm high, so if I went much deeper, they could show through the neck profile. 0.5 to 1mm might be OK, but I'd have to be very careful with my neck carving.
 
9fingers":1h58jxpe said:
Just to add, make sure your parcel tape is “fresh”. After a period of storage the adhesive can deteriorate and stick to the wood more than it sticks to the backing film and the goo can be a s0d to remove.
Bob

Good advice, Bob. But we get through quite a bit of the stuff, so it never really gets that old.
What is a mess is the thin film of epoxy which crazes and cracks on the tape as you pull it off, and those little bits go everywhere. The CTL midi was working overtime while I was removing the tape. :)
 
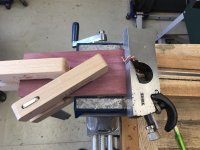
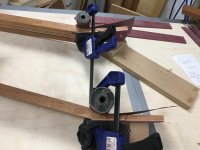
Time to prepare the headstock veneer. Because it provides the backstop to the nut, the nut end of it has to be planed 90 degrees to the neck, not the headstock.

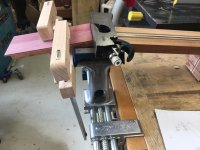
So, clamping it square to the neck (centre line registration not quite necessary yet) and protruding it beyond the break angle, I can plane the 90 degree angle with a shoulder plane on its side.

FA4B48B2-8B79-4FC9-B286-3A5AE747C739.jpeg

7EB53F39-DA5C-4D19-95B3-1BE7C510C437_1_201_a.jpeg

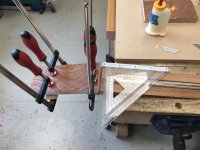
Here's where centre line registration begins. Dry run of clamping the veneer to the headstock. the ends and underside of the veneer have a pencil centre line on them based on the bookmatch join of the Purpleheart. The headstock and neck have pencil centre lines.

95FDE239-B7B7-4CD4-9E81-CC4AE058BB1C.jpeg


This tip may be obvious to many of you, but I only learned it on my luthiery course. I now use a spongy wallpaper roller to spread glue and it creates the most even layer that I've ever been able to achieve.

D0655A90-24C7-49E7-8233-AEABB4FE2801_1_201_a.jpeg

Of course trying to stop the veneer spinning off the centre line is tricky, but I got there.

E26F5AF2-633E-424A-A51C-9C72B93751D9.jpeg

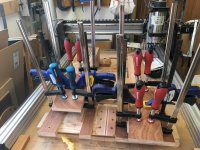
Those Lidl and Aldi clamps are incredible value for money for stuff like this.

E588FF89-185B-499D-82C4-BA513E3CB585_1_201_a.jpeg
 
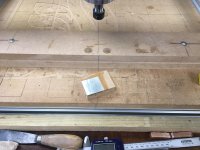
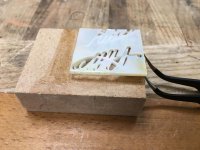
Before I can CNC shape the headstock and mill the logo pocket, I need to mill the Mother of Pearl signature logos first.

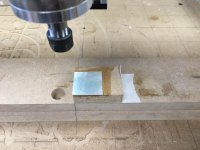
Using hide glue, I stick the 35 x 35 x 2mm MoP blank to a mini spoilboard.

2463B57F-B76C-4F5F-9E9E-686CC0574DD0.jpeg

That in turn gets fixed to a plinth on the machine's spoilboard.

EB37DE76-69E9-465C-8FCE-A093781D224D.jpeg

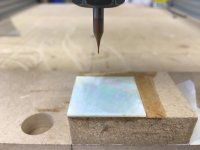
The cutter is a 0.6mm diameter by 2mm 2 flute cutter.

D2AF2B2B-9B75-479E-9944-0E87485BF974.jpeg

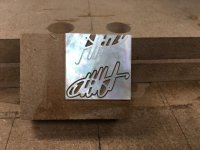
However that little devil of a CuF visited again. I completely messed up my job zeros on the x and Y axes, so the job started in mid air! On top of that I messed up the feed speed, which broke the cutter. I have a couple of spares.

89476BDF-AE50-41F1-AEFB-FD06A1D9C612.jpeg

Using a heat gun to reactivate the glue, I separated the waste from the board…

A4CBF276-0C3C-4EA3-83CE-BC916FF6305D.jpeg

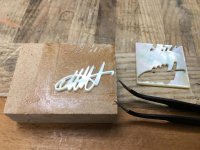
…then the signature.

F4373823-9668-4534-9198-55B3932E34E5.jpeg

CuF - 1 : Malcolm - 1 - Score draw. ;)

9E4244A2-36E7-4216-A454-FAC1FDCC2778.jpeg
 
Before I can secure the headstock in to its milling jig, I have one more job to do using the face sides and edges for registration.

I have to carve a curve from the finished thickness of the headstock to the finished thickness of the neck at the nut.

So, marking the finished neck thickness line, I used a 25mm diameter drum on the oscillating sander to carve the curve then finish off sanding by hand. This all takes place at one end of the scarf joint. If I hadn't matched them centrally in the glue-up jig, it will show up here!

005839FC-B99F-4A4C-B478-54666B00F180.jpeg

It seems I got it right. Yay! :)

A51EB4BD-0ABD-4BC9-B159-8FED19C07325.jpeg

I haven't decided yet if I want to create a volute at the nut, but if I do, this curve can be one end of it.
 
That mother of pearl signature has to be my favourite part of the build process. That sounds a bit crass considering all the work and skill involved elsewhere but the fact that the CNC machine can make something so fine and delicate enthrals me.
 
Andyp":1edyi6j5 said:
That mother of pearl signature has to be my favourite part of the build process. That sounds a bit crass considering all the work and skill involved elsewhere but the fact that the CNC machine can make something so fine and delicate enthrals me.

Thanks, Andy. Me, too.

But I also find it nerve-racking, too. Not confident enough in my own abilities.
 
Milling the tuner ferrule and post holes, the headstock shape and inlaying the signature logo.

Sped up a bit. Turn the volume down if you haven't been to the dentist lately. ;)

[youtubessl]u7P2ZjcmCqc[/youtubessl]
 
looking good malc, I tried the parcel tape trick today and it worked a treat.
 

Attachments

  • carbonrods_glueup-4.jpg
    carbonrods_glueup-4.jpg
    1.7 MB · Views: 43,633
thetyreman":3k0uplko said:
looking good malc, I tried the parcel tape trick today and it worked a treat.

Glad to be of help, Ben.

Having a break with the guitars while I do some family stuff. But back in a couple of weeks.
 
I've finished CNC milling for a while, so it's now stowed in the rafters. That leaves the bench clear to continue with the build.

Today, I'm using the bending iron to create the curve of the headstock rear veneer to fit the headstock volute curve.

17E556FA-6AD4-4096-B556-0C919A2713BB.jpeg

That surprised me. I thought the Purple heart veneer being so thin would bend dry. It didn't like it, so I spritzed some water on the bend area and it worked.

74354FA6-A633-44AE-82A4-9987C9EE65F1.jpeg

The sanding bobbins come in handy as cauls to keep the bend in the veneer's memory.

5ACE0431-E656-4184-9FDF-07BB58B9B2EC.jpeg
 
Dr.Al":3tfq0idq said:
Nice to see you posting again Malc. All this guitar stuff is way over my head, but I'm enjoying the ride nonetheless.


Me, too. :D
 
9fingers":1auv4ezc said:
Dr.Al":1auv4ezc said:
Nice to see you posting again Malc. All this guitar stuff is way over my head, but I'm enjoying the ride nonetheless.

+1
Not an artistic or musical bone in my body but following with great interest in your innovative methods used to achieve such fantastic results.


Bob


Thanks, Bob. Not sure about innovative. These necks, for example, I started with cut to overall length. Then plane face side, plane face edge, thickness and width, all before those laminations.

Only about now am I changing the referencing from the face side and edge to the centre line.

As for artistic, my older sisters are the artistic ones in our family. I'm just a bit of mangler. :)
 
You can never have too many clamps!

BF03310B-2B8F-4F8B-A49E-C18595CC7B0F.jpeg

I squeezed a bit of white dyed veneer under the Purpleheart to to reflect the veneers on the face of the headstock.

BEE243C6-D84F-4FF7-A9AB-81921322CF19.jpeg

297CF92F-48E4-473B-8714-A412522E8944.jpeg

I'm not sure how the veneer will look where I carve the volute, but that's a while yet.
 
Thanks, Gents.

More stuff, so back in the saddle in a week or so.
 
CNC is stowed in the rafters, Mission Control and I have had a break away, the binding routing jig is finished, so back to building these instruments.

The last thing I did was to glue the headstock back veneers to reflect the face veneers, and this included the curve for the volute.

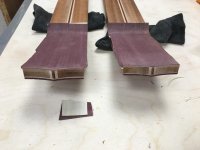
So both necks had their headstocks cleaned of veneer overhang.

82E14B1D-430F-4C1F-A74A-71C5A8D8739B.jpeg

I then drew on the shapes of the necks from the templates made on the CNC. It was a while back, but you can see the pretty ropey job I made of the truss rod channel.


IMG_2865.jpeg

I find a pair of socks to be a good cover to prevent dings and dents to the headstocks while moving them around the bench.

(Mods if you'd be so kind to rotate the last image. In a moment of forgetfulness, I took it as portrait.)
 
The wood combinations are going to look great in these. It's such a involved process - Do you keep track of time spent Malc, how many hours do you think there is in one of your guitars?
 
MattS":1a28yi8t said:
The wood combinations are going to look great in these. It's such a involved process - Do you keep track of time spent Malc, how many hours do you think there is in one of your guitars?


Thanks, Matt.

I don't keep track of time, because I only spend a few hours ( 2, 3 or 4) in the workshop, and none some days. I average 2 instruments a year, and because I don't have a spraybooth, I spray outside under the verandah roof. Because the lacquer and object have to be at least room temperature, I can only do that earliest around June.

Also, it's my hobby, not a business. The pro I worked with on my internship suggested 45 hours for a ukulele and 60 hours for a guitar, but that was at his rate of work with his experience, and he has all his templates, forms and moulds already made. I had to make all mine earlier this year for these two instruments.
 
Well, new to me. And new to me making guitars, because I already tried this method with the previous two ukuleles.

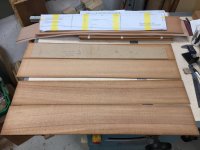
I've prepared my two pairs of instrument sides and straightened one edge by sticking them to a sled and running them through the bandsaw. Then checking they're big enough, especially the Venetian cutaway side which will need to be 35 mm longer than a standard symmetrical side.

252A6D22-CD46-4E8A-9AF8-CBE7E08F8E2C.jpeg

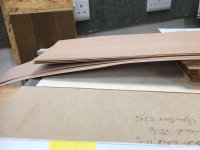
In the background you can see the paper template for a symmetrical side on top of a pile of veneers. This is the new construction method. I will be laminating the sides. The template shows that one edges is contoured. When the side is bent to shape, that contour should be the finished radius of the back. But I shall be using the sanding dish to finalise that contour.

45EB7FC2-6FF7-4280-A9FA-770EFBD75E96.jpeg

The veneer I've chose for the laminations is Swiss Pear. I'm told it's sourced from all over Europe. It is a very tight grained smooth, plain textured veneer, which will look plain inside the instrument body. I also read that the logs are generally steamed to give a warm reddish brown which will compliment the African Mahogany I'm using for the sides and back.

746713D8-4182-4EF6-BA70-E6AB2418FB09.jpeg

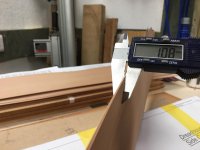
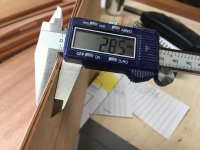
The supplier quotes 0.6mm as the thickness, but as you can see, these two come to 1.08mm. But I suppose by the time you add a couple of thicknesses of glue, they'll come to about that. I shall be aiming for a final total thickness of 2.5mm. (give or take)
 
The supplied African Mahogany sides came at about 5mm thick.

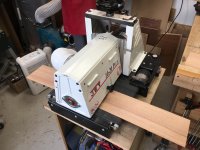
83C214C2-EA52-4425-A954-63AEF34803FD.jpeg

Half an hour and millions of passes at 80 grit.

615C0014-081B-424B-A05B-92DDC32BC4FE.jpeg

(OK, OK, I know it's posed!)

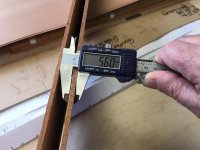
I get them down to about 1.7mm

BFD53F03-12DE-4069-950D-D216A9F4DE6C_1_201_a.jpeg

And when added to the 2 Swiss Pear veneers…

43BB6E60-0A34-4D86-83BE-E35F8454E139.jpeg

…well near 2.75. And with the glue, it'll still be under 3mm.

The next stage of the process (apart from rinse and repeat for the second instrument) will be to individually bend the Mahogany and the Pear leaves to the shape of the instruments before gluing the laminations.
 
Back
Top