• Hi all and welcome to TheWoodHaven2 brought into the 21st Century, kicking and screaming! We all have Alasdair to thank for the vast bulk of the heavy lifting to get us here, no more so than me because he's taken away a huge burden of responsibility from my shoulders and brought us to this new shiny home, with all your previous content (hopefully) still intact! Please peruse and feed back. There is still plenty to do, like changing the colour scheme, adding the banner graphic, tweaking the odd setting here and there so I have added a new thread in the 'Technical Issues, Bugs and Feature Requests' forum for you to add any issues you find, any missing settings or just anything you'd like to see added/removed from the feature set that Xenforo offers. We will get to everything over the coming weeks so please be patient, but add anything at all to the thread I mention above and we promise to get to them over the next few days/weeks/months. In the meantime, please enjoy!

Mike's ext'n & renovation (solar panels)

fiveeyes":3dtezkb7 said:
Temporary glass you say...will you replace with stained glass then? ;)

Leaded lights, but not stained. I'm going to buy a powerful soldering iron and do the leadwork myself. How hard can it be?

 
Mike G":4h5kyj4t said:
fiveeyes":4h5kyj4t said:
Temporary glass you say...will you replace with stained glass then? ;)

Leaded lights, but not stained. I'm going to buy a powerful soldering iron and do the leadwork myself. How hard can it be?

Not hard as such but unlike other soldering, the solder is a thin strip of lead with the same melting point as the lead you are soldering instead of being an eutectic mix with a reduced melting point.

It is a case of looking for visual clues as the heat is applied and stop before it turns into a puddle.
Bit like gas welding aluminium alloy if you have ever done that.

Bob
 
fiveeyes":ospxprz5 said:
Mike..seeing what you have already done, methinks that you will get done!

I may not have mentioned it before, but our youngest daughter is getting married next July, and the reception is going to be in a tent in our garden. I no longer have an open ended schedule. I MUST be finished (or some variation on the theme "finished") by then.
 
I've always fancied doing some stained glass work, nothing looks particularly hard when you watch it being done. I find a dead line is better for me, makes me more focused, not that you need it. Your work ethic is astounding. I've been doing a simple face frame kitchen for the last 4 months at a snails pace
 
Mike G":2rod0wdb said:
fiveeyes":2rod0wdb said:
Temporary glass you say...will you replace with stained glass then? ;)

Leaded lights, but not stained. I'm going to buy a powerful soldering iron and do the leadwork myself. How hard can it be?

Hi Mike,

House looks great. I don't often contribute but use your posts as inspiration to crack on with my own house.

I've worked with leaded lights for many years. I have a weller 101d soldering iron that I use which is spot on. You can buy all you need from pearsons or creative

https://www.pearsons-glass.co.uk/
http://www.creativeglassguild.co.uk

Pearsons are my personal choice and they deliver every two weeks by van if your buying a few hundred quids worth. You'll want 1/2 flat came for the edges and maybe 1/4 inch H sections for joints. You can buy its in rounded or flat depending on how you want it to look. Rounded looks a little more dressy but flat is traditional for much older properties.

Draw out your window on lining paper in pencil. Go over the drawing with a new sharpie as the nib is the ideal size to leave a gap which measures the same as the core of the H section.

Cut out your glass up to the black lines you've made. set your glass aside.

Make a board up by using chipboard and attached some timber strips on the bottom and left hand edge of the board (also useful as a cutting board for glass). Cut the bottom and left hand side of the drawing and pin it square to the board tight to the corner you've made. Remember the 1/2 flat on the edges when cutting the drawing.

Use horse shoes nails to pin the drawing.

Set you 1/2 flat out on the bottom and left hand side then start inserting your glass. Work tight to the lines and keep it pinned in using horse shoe nails.

Run your lead across the edges of the glass keeping it all tight and square to the drawing.

Cap off the edges with 1/2inch flat and keep it tight with horse shoe nails.

Scrub the lead came with a small wire brush then solder it up. I'd highly recommend traditional flux which comes in candle size sticks. Rub the flux over each joint. Get your iron up to temperature and get it all soldered up. Don't mess about rubbing the solder around just dab it on, get it flat and leave it.

Once soldered let it go off for 5 minutes then flip the panel and repeat the process.

Once done you've need to cement the panel. Dpon't be shy with the leaded light cement, smear it in all joints using a srcubbing brush. Put whiting on the panel (cures the cement) and rub it around the joints. Go easy with whiting just enough to make the cement a little solid. Scrub it into all the joints and vigorously go over the whole panel. The whiting cures the cement and also cleans up the glass and lead.

Flip the panel and repeat.

Leave it to go off over night then use a plastic fid tool to go over all edges and clean the cement back. Don't leave the panel more than overnight or the cement will go rock hard and be a pig to get off and clean up.

once you've removed the thick of it scrub the panel with a brush then repeat with the fid until you're happy its clean.

To finish off and make it shine use black grate polish across the came and polish alot to bring up a nice shine, it will dull over time.

Cleanliness in the final cleaning stage is important, keep the dust down and get it as clean as you can.

Give me a short if you need any help. For those size windows I wouldn't both with any rebar across the panels, they'll need replacing before they sag in 50-100 years.

Keep up the good work!
 
That's fantastic, bb. Many thanks. I have sat and watched a couple of Youtube clips showing precisely what you described, but having a written reference is going to be very handy.

Couple of things. Does the edge came butt up to, or overlap, the "H" section stuff? I imagine the former. Secondly, and more importantly, I am going to have some quite chunky stops behind the panels, and beads on the outside, including a drip on the bottom one, making it also quite chunky. This rather complicates the question of what the size of the glazed panel should be. Would you expect to see any of the "U" shaped edging came after the pane is fixed in place, or is it buried? OK, I know that it would normally be putty, but it can't be for me.
 
For fun, let's start at the end (latest) and work backwards. I've just been plodding on with the render carrier boarding:

GU3EAM4.png

8lIpNix.png

I don't even have planning permission for a conservatory, nor any sort of drawing, but we want one, and so I had to make allowances for it. I fixed a whole lot of 6x1 to the house so that I've got something firm to make the connections to if and when it happens:

0nyu0Xu.png

Then window surrounds and battens:

VYVx0VL.png

As a record of where the conservatory 6x1s are, I took these:

eGsTDkB.png

CPRLvqH.png

That half gable in the second picture took an awful lot of work, because there is a lead flashing and a drip bead detail, and with rounded corners and small clearance under the window I spent an hour or three lying down on my home-made scaffold platform. You can see now why I haven't slated that roof yet!

The plasterer dropped by to check on progress, and told me he can't come until next Monday. So I have a comfortable week to be fully ready for him, with scaffolding up.
 
Mike G":q7gpgna7 said:
That's fantastic, bb. Many thanks. I have sat and watched a couple of Youtube clips showing precisely what you described, but having a written reference is going to be very handy.

Couple of things. Does the edge came butt up to, or overlap, the "H" section stuff? I imagine the former. Secondly, and more importantly, I am going to have some quite chunky stops behind the panels, and beads on the outside, including a drip on the bottom one, making it also quite chunky. This rather complicates the question of what the size of the glazed panel should be. Would you expect to see any of the "U" shaped edging came after the pane is fixed in place, or is it buried? OK, I know that it would normally be putty, but it can't be for me.

Hi Mike,

It butts up to it.

Just trial fit a bead take the measurement. Ideally you want 6mm of the 12mm (1/2) flat came sandwiched between the beads.

You can make a panel to fit the size of your beads then use off cuts of lead came to pack it up at the bottom and get it level.

Beads always look much neater, apply silcone in the gap between the void in the bead and frame/lead,
 
I'm a Dutchman. I apologise in advance if my language is strange.

I'm fifty years old. I would break in half if I tried to do what you do. It took me forty hours to read this thread.


I registered here for the sole purpose of telling you that I have never seen a man so dedicated, so driven, almost single handedly build such a beautiful set of buildings while, almost as an aside, create a garden and put a few sheds and a pond in it. The sheds are made of bricks on a concrete floor. Self-taught. Done from a set of Autocad drawings. Yes, made by the same man. That is, if he wasn't having 'procedures done' to his back.

You, Sir, are a magician.


/ Rob

 
I find it amazing that a foreigner can articulately express in my own language the words that I can't!

I should have read more in English at school!!

Thanks, Rob.

:text-+1:
 
Hi Rob, and welcome to the forum.

Mike somehow finds time to work for his living too.

Now that you have found us how about telling us if you do any sort of woodwork or creative hobbies yourself. Suggest you use the Welcome board if you do feel willing to share more with us.
 
RAF":1h0xt53u said:
I'm a Dutchman. I apologise in advance if my language is strange.

I'm fifty years old. I would break in half if I tried to do what you do. It took me forty hours to read this thread.


I registered here for the sole purpose of telling you that I have never seen a man so dedicated, so driven, almost single handedly build such a beautiful set of buildings while, almost as an aside, create a garden and put a few sheds and a pond in it. The sheds are made of bricks on a concrete floor. Self-taught. Done from a set of Autocad drawings. Yes, made by the same man. That is, if he wasn't having 'procedures done' to his back.

You, Sir, are a magician.


/ Rob

That's a lovely post, Rob. Thank you so much. I really do appreciate your kind words.

Now that you've joined I hope you stick around. This is a gentle and pleasant little corner of the internet.
 
This is all about getting ready for rendering: getting Savolit boards up everywhere, getting scaffolding up, and getting guttering done. The guttering is important because lime render doesn't set as quickly as sand and cement, and would be vulnerable to rain for a few days after going up (in the case of putty lime, make that a few weeks). So, let's start with the guttering.

Because I have no fascias, the gutters have to fix to the side of the rafter feet, or in my case sprockets. Naturally, the brackets were all too long, so I had to cut them to length. I put the end two brackets in place (one at each end of the roof) and string a line between them so that the guttering doesn't wave in and out or up and down. We'll come to falls in a minute:

iGW9WHB.png

HpyxzKV.png

On the rear of the house, the new part, all went well. The roof is 10 metres long, and I laid it to fall 50mm in that distance. No problem. On the front of the house, the old part, it wasn't so straight forward. I wanted all of the water to end up at the north end of the roof, and set up a bracket at either end as before, then strung a line. I put the line 60mm lower down the bracket at the north end, but happened to notice that it lined through perfectly with the window head. I grabbed a spirit level and checked, and lo and behold, the string was absolutely level. In other words, the roof sloped 60mm the wrong way. To achieve the falls I wanted the gutter would have to fall 120mm from the eaves line, which would mean it would foul the windows, preventing them open. My 3 year old plan of taking all the water from this roof into the pond had come to nothing.

All I could do was put the outlet half way along the roof, and then I'll take the downpipe into the porch gutter. There is no other drain connection I can get onto:

7MXr4zw.png

As an aside, the long "tail" to the gutter brackets fouled the 3 front windows, unless it was fixed to a rafter foot directly above the middle of the window. In a lovely little piece of fortune, for no reason at all each window had a rafter bang in the middle! Sometimes luck is on your side.

So, that's the guttering up. Next, I needed to put up a proper gable scaffold. I had most of the stuff, but had to go and buy a bit more. In the yard I was stunned when the guy helping me picked up three 13 foot (4m) scaffold boards at once and popped them nonchalantly on the roof of my van! Three!! I didn't even try and compete, and just did one at a time. Anyway, the scaffold:

JrM3Vat.png

I finished all the Savolit boarding except for part of the back wall:

FtJGF9p.png

EPzzzUs.png

efW2RIg.png

05QqkHF.png

uNZeiZE.png

I'll take a close up of the leadwork over the future conservatory roof next time.

So, finally I was ready!! I had half a ton of lime render in the van:

fkWgQVw.png

GEMeEcD.png

Mr Reliable turned up exactly when he said he would, and apart from a funeral tomorrow will stay with me until the job is done. We experimented a little with the mixing of the render:

This shows all the fibre in the mix:

LLGh8KZ.png

There is no sand in it at all. This is exactly what I found with the plaster I took off both inside and out on the old part of the house. No sand, but lime, horsehair and chalk. The modern equivalent is lime, poly-something fibre, chalk, and bobbly insulating something or other. It will dry just as flexible and vapour permeable as the original.

I could have lost a lot of money betting where the first float-full of render would go. I'd have said bottom right hand corner of the wall, as the plasterer is left handed. No, it was right at the very apex of the gable:

sbtAkIJ.png

It went fantastically well! The boards were a perfect background for rendering, meaning a relatively thin single coat was all that was necessary, saving time and lots of money. You stop putting the stuff on the walls about 2pm, because you are then spending the rest of the day trowelling up, and working the surface as it dries, before finally, I went around with a damp sponge just rubbing up the surface a little. It brings the grains to the surface, leaving a slightly roughened rather than smooth texture. When I finish typing this I'll be going out to do the stuff that was put on later, which is still too wet. Plastering isn't hugely skillful, but is all about timing. Anyway, I couldn't be more thrilled with the result (remember, this will be limewashed in the spring, so the bright colour will disappear).

YGv17ve.png

aOGZFKl.png

cvUgUI9.png

RLV50U6.png

Because of the rounded corners, there is no natural stopping point on the main elevation of the house. I screwed a temporary batten in place to stop against, and the plasterer embedded some scrim in the plaster as he came up to it:

ZNWU4BC.png

jGQdDk9.png

I "dubbed out" the bottom of the walls where there is a splay, using a drier mix. nonetheless, because of the thickness, the render at this location, and the corners, is still very wet and I'm likely to be sponging them up using a head-torch at bed-time this evening!

E5nhkRB.png

I took as much of the scaffold down as I could, to move it to the other end of the house tomorrow:

1KAzTmn.png

Now, I've got to go out and sponge away the last of the toolmarks.........
 
Tusses":1h1r026w said:
yes Mike .. I like that much better than the grey buttoned look you tried 1st :-)

:lol: :lol:

Malc2098":1h1r026w said:

Thanks Malc. Makes a huge difference, doesn't it.

ScotlandtheDave":1h1r026w said:
Those corners! [emoji16] lovely work Mike.

I've just sponged them up. Caught them just right I think (we'll see in the light, tomorrow). I've done them before, and I love them!

TrimTheKing":1h1r026w said:
Wow!! That looks beautiful Mike!! [emoji1376][emoji1376]

I love the colour as it is tbh. ....

Thanks Mark. I was expecting it a little more bone/ ivory coloured, but I guess the chalk makes it quite white.
 
Well, I did help him. I got a few square metres "on", and did quite a bit of trowelling up, and all the sponging (plus the mixing and cleaning). But yeah, I'm very pleased with progress.
 
It is a vast improvement, Mike.

I was reading the bit about your gutters and although the extra drop would be unsightly I was wondering what you meant about fouling the windows. Then I remembered--your windows swing out because you don't have screens. D'oh!

The end may not be in sight, but at least you won't be living in an obvious construction zone. :)

Kirk
 
Yeah, you're right, Kirk & Andy. This feels like a big step.

Predictably, I've already had one driver stop and say "great to see your house nearly finished".
 
Same sentiments as above - Wow!

I especially like the transition between the brick plinth and the render.

My dad rebuilt our house when I was a little un and I remember it was about 8 months after the outside looked finished before we moved out the caravan and into the house. Even then we were essentially camping in the bedrooms upstairs!
 
ScotlandtheDave":3lqz445t said:
Those corners! [emoji16] lovely work Mike.


This. :text-bravo:

And I'll also echo what Rob said above. I joined this forum quite a while back with an idea about doing some woodworking. In that time period I have done a (very) little green wood carving but that is it. Yet I can't stop coming back and watching how Mikes house and workshop is getting on. I am staggered at both the sheer volume of the work you achieve, and the quality. Chapeau indeed. :eusa-clap:
 
Thanks FFTC, & HJ. I do enjoy posting this stuff, and I'm glad people seem to appreciate it.

Lots of preparation today, as the plasterer was away at a funeral. I took down the gable scaffold and rebuilt it on the north gable/s (complete one side, just to first lift on the other side). Finished the lead and guttering on the back wall, and did some more boarding (all-but finished now), and then "dubbed out" the thicker bits (bottom edge and corner) ready for tomorrow. Finally, I set up 3 scaffold towers at the front. Ready for another full day tomorrow, when we'll do the rendering of the front.
 
Amazing Mike, it looks so good with the tender on, you must be so pleased!!!

Once finished you’d hardly know all the work that’s gone into the oak, from the outside anyway.
 
Thanks very much guys. I knew it would transform the place, but it really is so dramatic that it catches me by surprise still when I turn the corner.

We'll be doing the front today.
 
I had to take the scaffold down from the gable, and the final part of that process always involves leaning the last 2 poles and first-lift cross-member back against the building. I didn't want to damage the new render, so I strapped a couple of big pieces of foam (old chair cushions) to the top first :

zBk7qhF.png

S6o5oFD.png

I also cleaned up the brickwork from Monday's rendering:

bvxbyxo.png

Then I chased around all day labouring for the plasterer, and we got an awful lot done. The first photo still has the scaffold in place:

Z9n1TgX.png

9RU5OGT.png

Ppt7hX4.png

As I write, at 7.30 and pitch black outside, it looks as though the bottom corner will be ready to "trowel up" in a couple of hours, by torchlight, as it is still very wet. It isn't impossible that I'll be working on it first thing tomorrow morning.

Oh, and here is a close-up of the render meeting the porch roof, scratched ready to take a 45 degree fillet of tile and mortar:

hXIKbCK.png
 
Still awesome
Ref the cleaning the bricks, does it come off easy or require a brick acid? My builder has just used some to get some old plaster off some face bricks as we knock down my utility/conservatory and rebuild the old corner of the house and I was amazed how much difference it made.
I recon the rendering will be done by Friday?
Mark
 
No pictures for me on my phone or computer :(

(all through chrome)

Mod edit: PM sent requesting post in technical issues board if problems still persist.
 
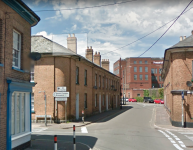
Oh, lovely. I absolutely love the curvey corners.


In the side of Tiverton where I live, many of the late geo/early vict house have curved corners and roofs.

It makes the street scene much less harsh.

Screen Shot 2017-10-04 at 19.37.26.png
 
Back
Top