• Hi all and welcome to TheWoodHaven2 brought into the 21st Century, kicking and screaming! We all have Alasdair to thank for the vast bulk of the heavy lifting to get us here, no more so than me because he's taken away a huge burden of responsibility from my shoulders and brought us to this new shiny home, with all your previous content (hopefully) still intact! Please peruse and feed back. There is still plenty to do, like changing the colour scheme, adding the banner graphic, tweaking the odd setting here and there so I have added a new thread in the 'Technical Issues, Bugs and Feature Requests' forum for you to add any issues you find, any missing settings or just anything you'd like to see added/removed from the feature set that Xenforo offers. We will get to everything over the coming weeks so please be patient, but add anything at all to the thread I mention above and we promise to get to them over the next few days/weeks/months. In the meantime, please enjoy!

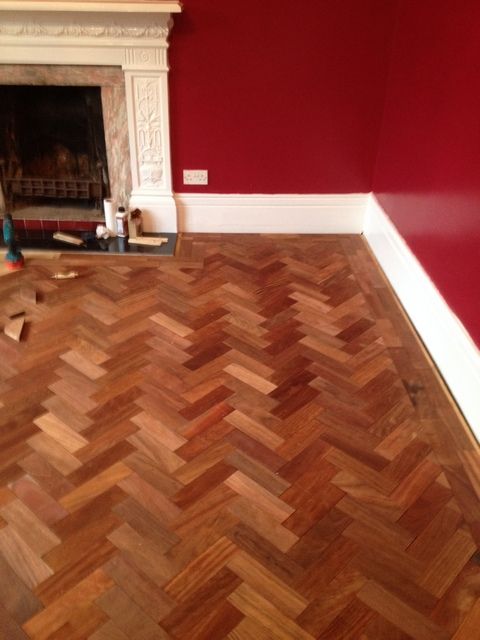
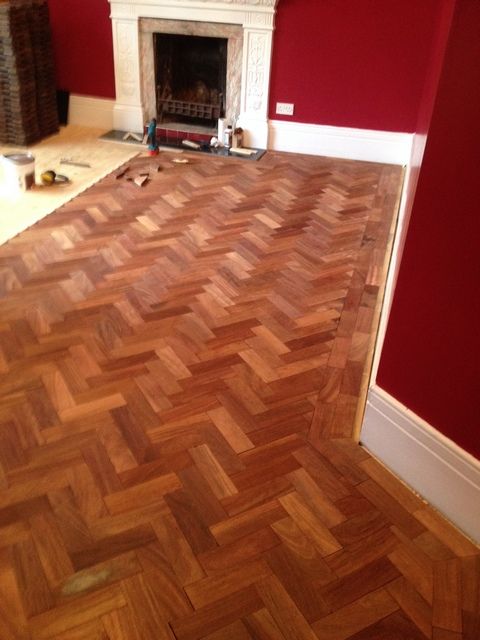
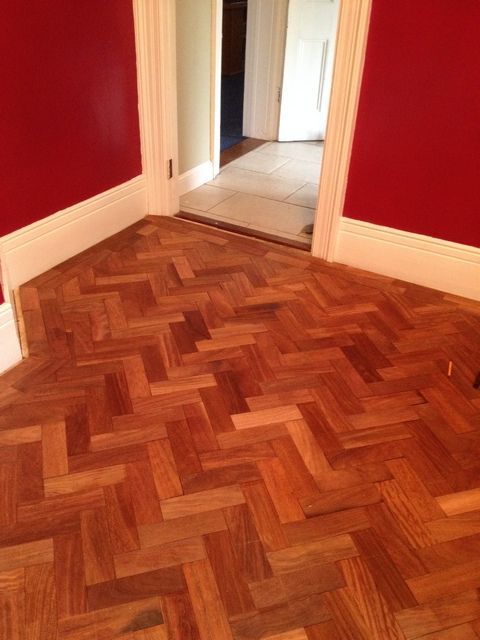
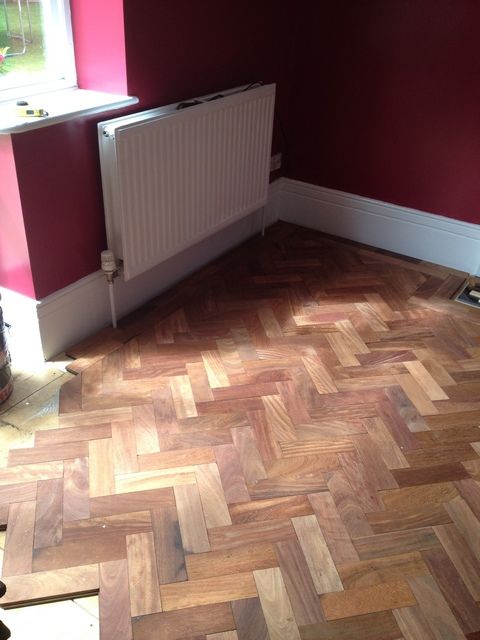
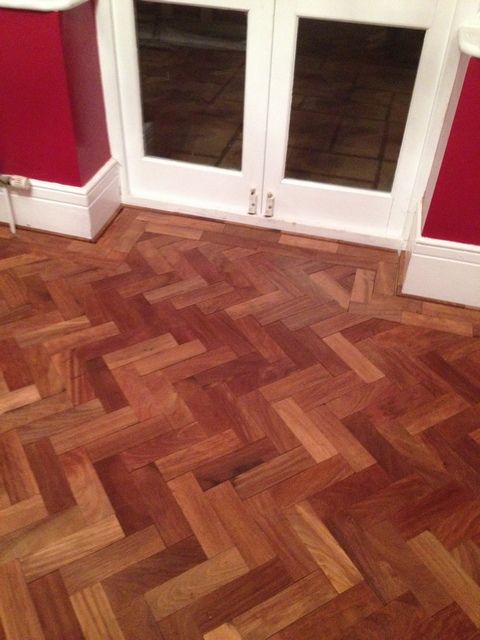
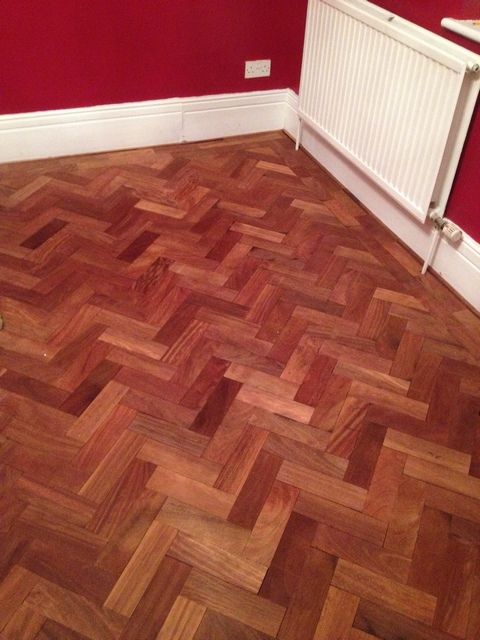
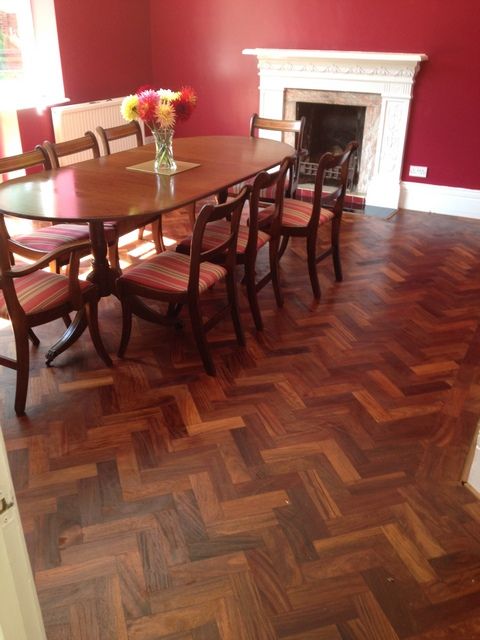
Parquet progress (finished)

Looking great so far!

I think I used an adhesive from soudal which came in the usual silicone sealer type cartridge which helped keep things clean. I would have gotten in a right guddle if I used a spread type adhesive!

H.
 
What finish are you using once completed? I used rustins 2 part stuff because it was the hallway which gets a lot of traffic and gets mopped regularly.
 
Good question Wallace, good question! I will go for Lecol7500 and dust as a gap filler, but then am still undecided as to whether an oil or a varnish will be a better finish. I am tending towards oil at the moment, with Osmo PolyX getting good reviews. My only concern is how often it will need reapplying to look good. It is a dining room so chairs scraping over the floor etc are a possible issue, hence my reluctance to go for a varnish that will sit on the wood rather than an oil that will soak into it.

Finishing is not my strong suit however, so any advice appreciated!

Steve
 
StevieB":2s047kvl said:
Thanks Roger - did you go for matt, satin or gloss? I fancy gloss personally but have yet to ask SWMBO what we will actually have ;)

Steve

We went for satin (CD's decision)

CD - Chief Designer aka LOML
 
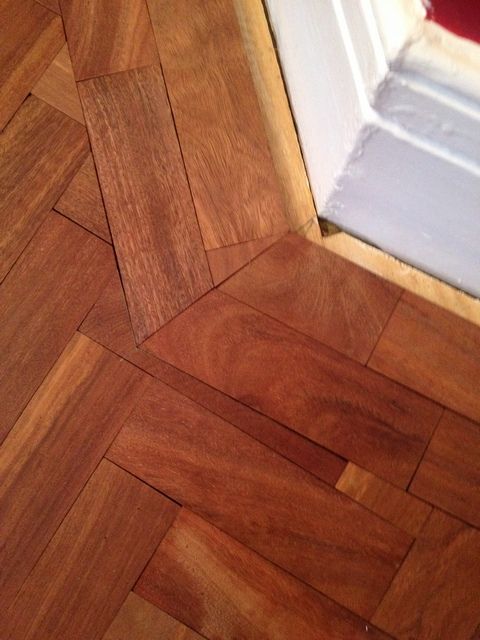
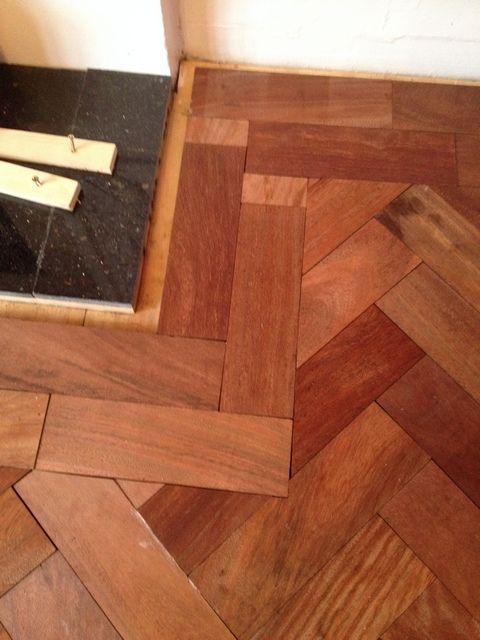
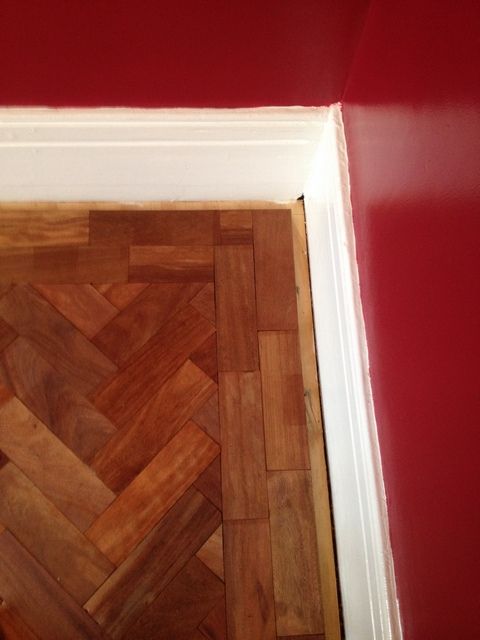
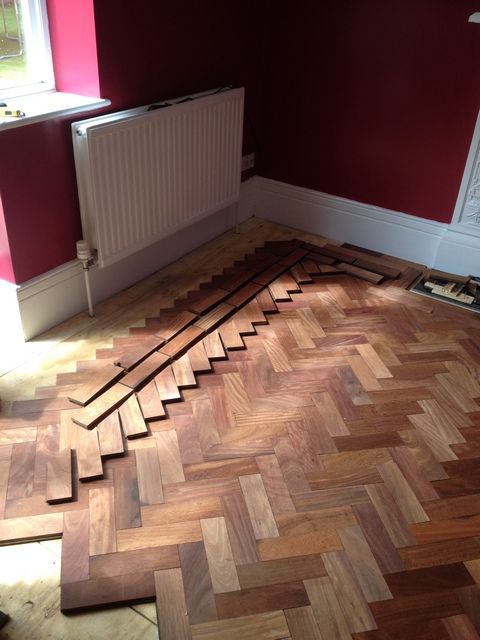
Sorry for the lack of updates, but it is slow going! Now up to 50% laid. done the border but still need to do the edge trim - I think I will do this after filling and sanding the main floor so it still looks a little unfinished at the moment. Very please with it however so far. Been a right faff being reclaimed blocks however - every so often I have found I have had to trim approx 1mm off the long edge of a block to get it to fit. This then means trimming the tongue off the previous block and there is a knock on effect for the next row and so on! I don't think this is where blocks have swelled due to moisture but rather is simply a slight size discrepancy between blocks and/or me not laying them exactly square...

parquet24_zpsiifqx1fw.jpg


parquet25_zpsuvl5efmq.jpg


parquet26_zpsltmmtskz.jpg


parquet27_zpsezf0g7wk.jpg


parquet28_zpsdzxexthm.jpg


parquet29_zpsfiazioww.jpg


Just another 600 odd blocks to go.....

Steve
 
Steve, I think they look fantastic, and against the red and white on the walls the iroko/mahogany (whatever it is) looks perfect. Once filled and polished that room will be lovely. Excellent work. :eusa-clap:
 
Impressive floor and even more impressive patience level doing it all!

My back and legs ache if I have to lay something like laminate flooring - getting down, measuring, up again, cutting, test fit, trim, repeat as required. couldn't imagine what you are tackling.
 
MattS":3sohtv7i said:
Looks amazing and I admire your patience and skill!

:text-+1:

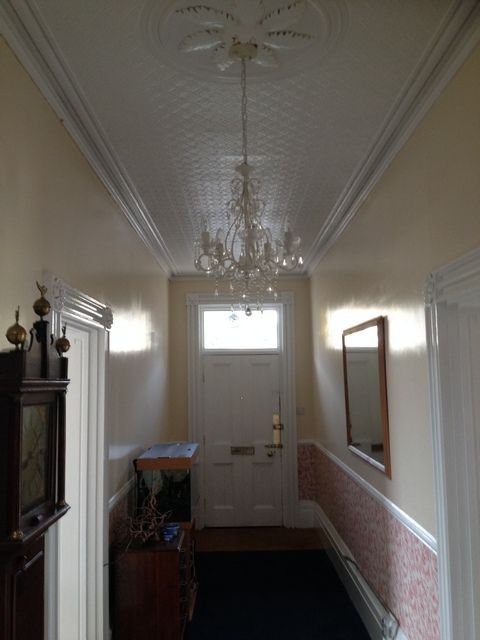
Looking at the architraves, skirting and fireplace it looks a nice period property.
 
Excellent work Steve! The room is looking superb. Top banana!

I'm pretty sure the blocks aren't iroko. Could be from the mahogany family.

:obscene-drinkingcheers:
 
I hat to repeat what everyone else has said but could not let this go without further admiration. You have the patience of a saint.
 
Thanks for all the kind comments chaps!

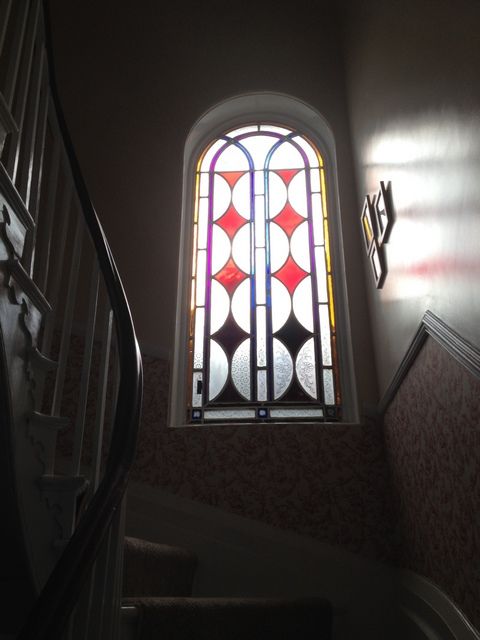
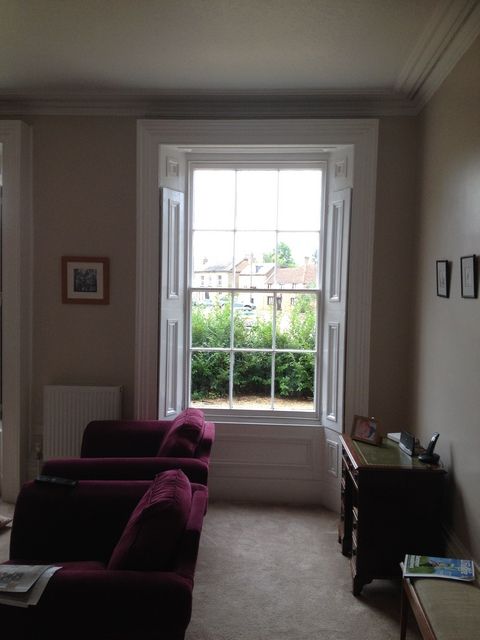
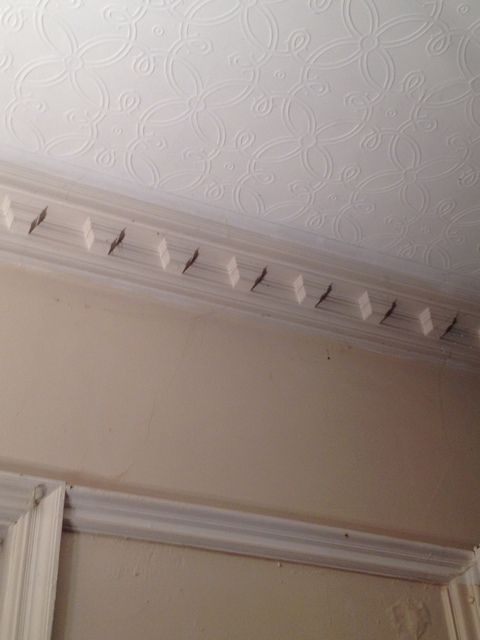
Roger - yes, it is an 1850's Georgian town house. I think the skirtings are original but the fireplace probably isn't. It is metal and painted and the raised hearth is just a bit of poured concrete. The house has been bashed about a bit in places over the years and very little original remains. I have repaired the internal shutters to the front of the house on the ground floor and the sash windows are original - I will try and take some pics over the weekend of anything that looks interesting. I have a large stained glass window on the stairs that I need to do something with but it is incredibly fragile looking so I am leaving it for now!

Pinch - I am still not sure. I am getting a lot of sneezing when cutting/thicknessing/sanding the blocks. No allergic reaction to touching them. There does seem to be a high silica content in some of the blocks (the paler ones) and some wicked gnarly/swirly grain in some others. The former chip out terribly and the latter plane up beautifully. I particularly like the mix of contrasts in the floor when laid. Whatever timber it is I am well pleased with it!

Hopefully more progress over the weekend and next week - I have a week off work to do 'jobs' and finishing this is high on the list.

Cheers,

Steve
 
Just to follow up on the 'features' of the house for you Roger, a rather bad shot of the stained glass window I need to repair at some point (it leaks!)

features1_zps1zk9u2iq.jpg


Original internal shutters to the downstairs front sash windows

features4_zpsrlagremu.jpg


Tall ceilings in the hallway

features2_zpsdii1suvx.jpg


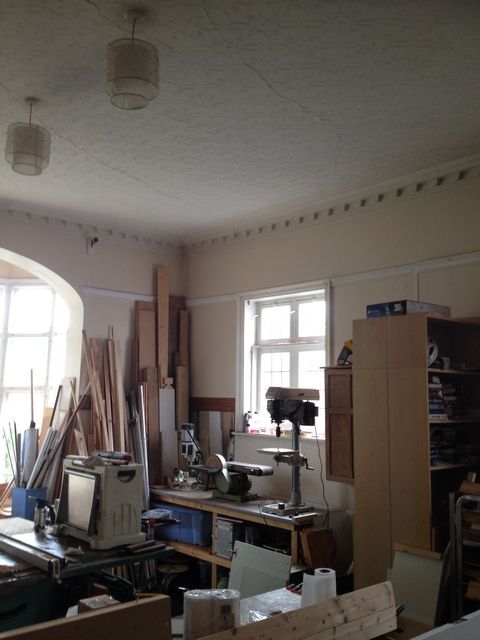
some fancy cornice

features2a_zps4xovts7e.jpg


What - you mean you don't have fancy cornice in your workshop? :D

features3_zpsoev7j4wi.jpg


Anyway on with the floor - a lot more dry fit and lift before applying adhesive....

parquet30_zpsitdhat5f.jpg


Then fit and stick.....

parquet31_zpsmrwyipq0.jpg


Repeat until done!

parquet32_zpsti8rhdsh.jpg


parquet33_zpsmy3rpooo.jpg


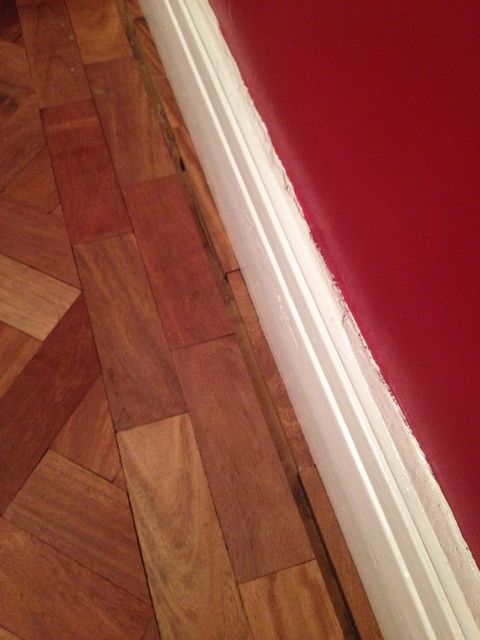
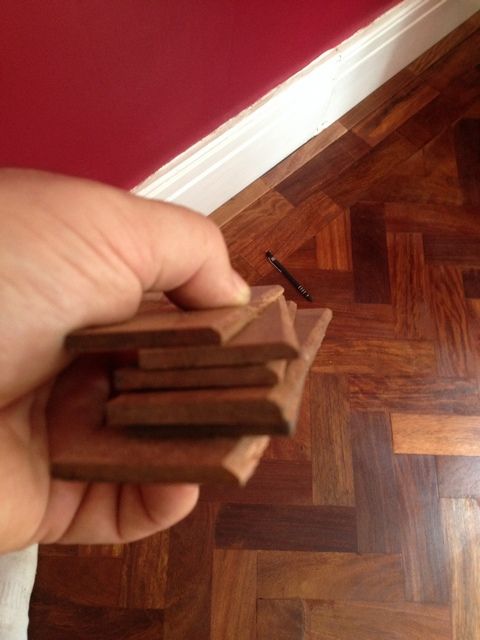
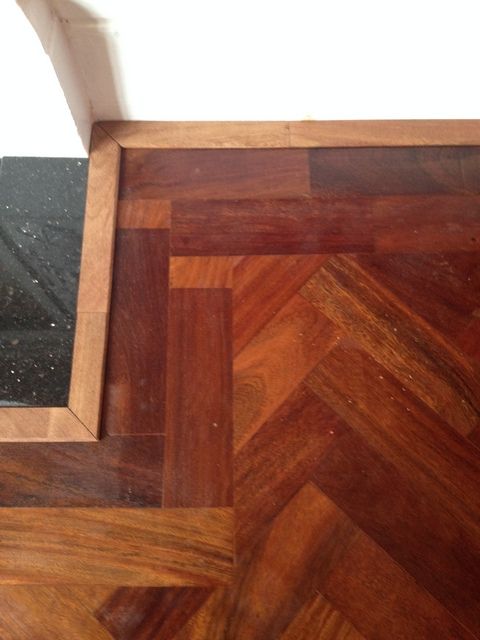
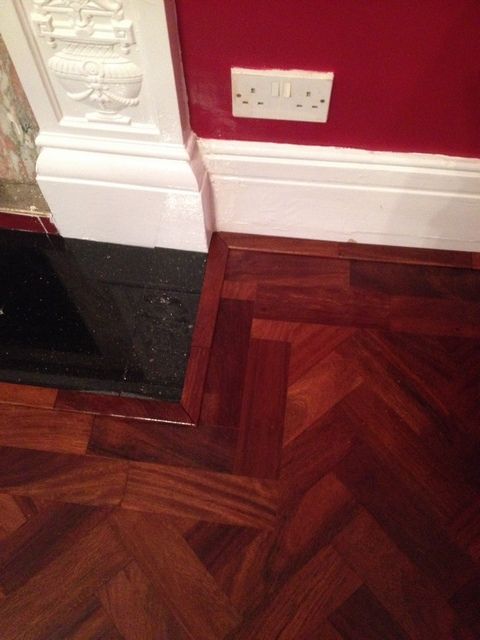
For the expansion gap I left 30mm at the edge, then cut 18mm strips to go against the wall and leave a 12mm gap. I will then be cutting some 5mm thick x 40mm slices of parquet blocks to go on the top - stick down at the back on the strip and leave the front unglued so the floor can move underneath

parquet34_zps7ugcdc1l.jpg


Next job is to sand flat and apply resin filler (lecol 7500) sand again and then oil- hoping to be done by the weekend so long as I can hire a sander.

Steve
 
Steve the floor looks amazing. Can I say that I am not convinced by the way you have covered the expansion gap. Those blocks on the skirting look a tad heavy. Is this the usual way of covering the gaps on parquet floors. Would it not have been worth trying to shape them a little?
 
Not sure what you mean Andy? The thin strips are glued to the floor, not the skirting board. What do you mean by heavy and shaped? I am going to put a thin 'cap piece' to cover the strip and the gap, but stick this only to the top of the strip and leave the floor to float underneath - might be easier to show than explain, I will take a photo when I do it!

The usual way to lay parquet is to remove the skirting and leave an expansion gap at the edge which the replaced skirting then hides. This was not an option here. For laminate and similar floors a quadrant moulding can be nailed to the skirting, but I a) didn't like the idea of a foil wrapped MDF moulding over solid timber flooring, b) wouldn't have got a good colour match anyway and c) this doesn't help round architraves etc. The strips I plan to lay will be slices or parquet so will match colour wise and give me enough width to go round architrave.

It works in my head anyway!

Steve
 
Steve, sorry it is my eyes and the way they saw the perspective in the last photo. Having studied it more closely what I thought were large blocks of wood against the skirting are actually an optical illusion (to me anyway). The penultimate photo is much clearer.
 
That's one posh workshop! I assume that's temporary?! :shock:

No criticism meant but I've never understood the expansion gap if the flooring is fixed with adhesive? How can it expand and move?
 
MattS":1qayrkjw said:
That's one posh workshop! I assume that's temporary?! :shock:

No criticism meant but I've never understood the expansion gap if the flooring is fixed with adhesive? How can it expand and move?

It's one of those 'We always did it this way' myths IMO. There's a thread here http://www.ukworkshop.co.uk/forums/fixi ... 84766.html

No-one ever explained to me satisfactorily how, if you screw down each T&G board, it's going to need an expansion gap. Even Steve's being stuck down personally I'd not bother. If you think about it, the argument is that the boards expand. So let's say that they expand by only 1%. The one in the middle will expand by 1% and nudge the two on either side to make room. But they also are expanding by 1% and so they need their bit of expansion room. So are they going to move 2% ? And the next one 3% ? I don't think so.
 
Steve, when you go for the sander try and get a Sand Glider. Review here
 
MattS":33yetln2 said:
That's one posh workshop! I assume that's temporary?! :shock:

No criticism meant but I've never understood the expansion gap if the flooring is fixed with adhesive? How can it expand and move?
Hopefully not - this is an annex on the side of the house - I would far rather it was full of timber and dust than elderly Mother-in-law! I have battled with SWMBO and won as there is not room for a workshop in the garden, I am therefore keeping quiet on future use of the room!

Expansion gaps - I have seen laminate expand and lift and have no wish for this to do the same. These blocks are glued on the base but like any timber they can still move above this - think of a jelly on a plate - it can still wobble even though the base is fixed to the plate. I see no reason why timber above a fixed plane cannot move - the adhesive only stops the base moving. From laying this I know moving one block throws others out along the line - expansion would do the same. We know timber moves and can twist, think breadboard edges on a table for example - if leaving a gap round the edge stops this kind of movement I am all for leaving it in. If I am wrong I have lost nothing, if I don't and I am wrong then I have a ruined floor. For me its not worth the risk.

Steve
 
Thanks Roger, will bear them in mind. I quite fancy having a go myself to be honest, but SWMBO is starting to get impatient so may have to go the 'bought in' route.

Flooring is coming along - now sanded, filled, sanded again and 1 coat of finish applied. Went for Osmo in the end but it is taking an absolute age to dry - said 8-10 hours on the tin but still tacky in places after 24 hours. I think the wood might be quite dense and therefore not absorbent, but I need to do a second coat to get an even finish so currently sitting waiting. Got some more pics to post but difficult to see much difference to be honest - will try and upload over the weekend.

Also waiting on a new bandsaw blade from tuffsaws to split the blocks for the edging strip - the blocks have quickly blunted my existing blade so have gone for an M42 blade this time on Ian's recommendation. Think it must be the high silica content in the timber that is dulling the blade :eusa-think:

Steve
 
Watching a few of the Hairy Builder programmes there's been several stain glass and leaded light repairs carried out.
I never realised they sealed the glass and lead with a cement - have you tried resealing?

Rod
 
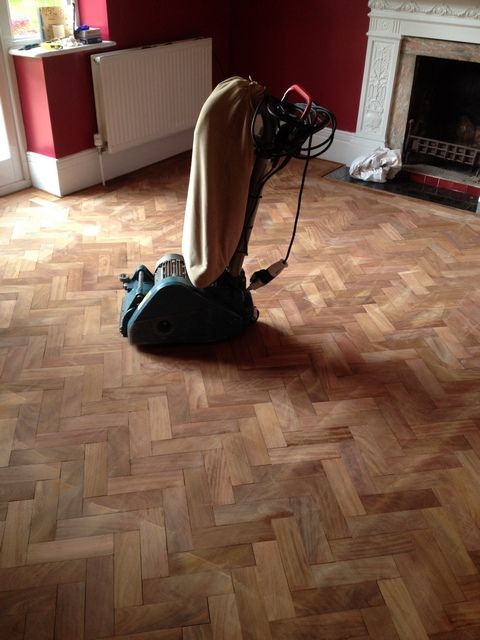
So a bit of a delay on this, but finally finished! First thing to do was to sand it level - easier said than done, although the sander didn't seem that vicious, where you pull it back and then push it forward again if you are not careful it leaves a ridge where it has spent fractionally longer in one place. With care however, got a fairly flat finish

parquet35_zpseuzmhzcr.jpg


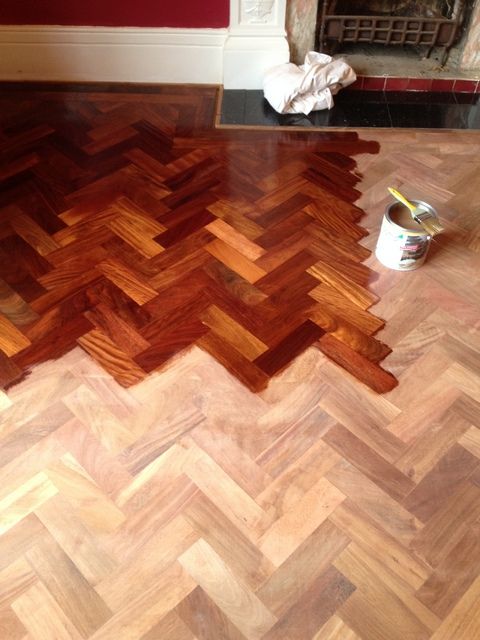
Once sanded and gaps filled (no pics of this, the resin sets so fast I didn't have time!) it was on with the finish - at least I could tell where I had been!

parquet36_zpsfrxhkhqk.jpg


parquet37_zpsn2fx6ksw.jpg


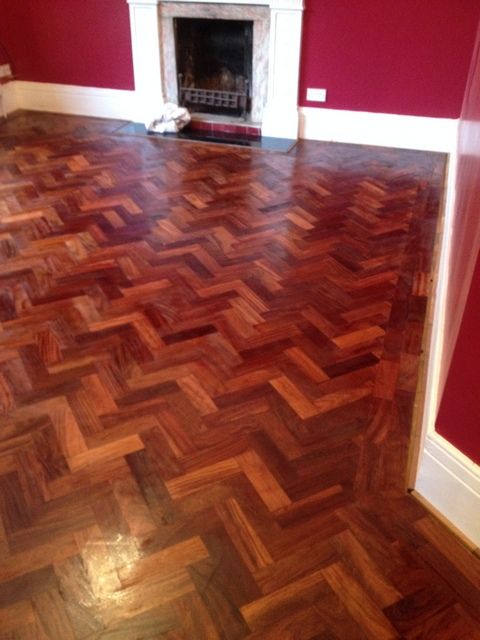
Then slightly out of order, SWMBO decided we need the table in for a visit from the outlaws, so edge strip not done but room looking mostly finished

parquet38_zpsf2wuule7.jpg


For the edge, I split some blocks in half and then took a 5mm slice on the bandsaw. Rounded the edge with a round over bit - a bit larger round over than I would have liked but it was all I had - to form the cap strips for the edge. These were then glued down at the back and left to float at the front

parquet39_zpsiaetgryk.jpg


parquet40_zpsrlks9aas.jpg


Bit of finish and jobs a good 'un!

parquet41_zps1l138dww.jpg


Steve
 
Sorry Rod - missed your post on the window somehow - it leaks because some of the glass is cracked/holed - I haven't yet tried to dig a bit out so don't know how it is packed in, and I am hoping it will last until next year - so many jobs to do, so little time!

Steve
 
Hey, Mr Stevie B - cracking job chap! I could not have done better myself. Your dining room looks very classy.

:text-bravo:
 
Back
Top