• Hi all and welcome to TheWoodHaven2 brought into the 21st Century, kicking and screaming! We all have Alasdair to thank for the vast bulk of the heavy lifting to get us here, no more so than me because he's taken away a huge burden of responsibility from my shoulders and brought us to this new shiny home, with all your previous content (hopefully) still intact! Please peruse and feed back. There is still plenty to do, like changing the colour scheme, adding the banner graphic, tweaking the odd setting here and there so I have added a new thread in the 'Technical Issues, Bugs and Feature Requests' forum for you to add any issues you find, any missing settings or just anything you'd like to see added/removed from the feature set that Xenforo offers. We will get to everything over the coming weeks so please be patient, but add anything at all to the thread I mention above and we promise to get to them over the next few days/weeks/months. In the meantime, please enjoy!

Self Build Orangery

Norty Raskel

New Shoots
Joined
Jan 11, 2016
Messages
86
Reaction score
1
Location
Stoney Stanton, Leics
Some of you may remember, but around this time last year, I posted a topic asking for advice on seeking an architect that would assist me in a self build extension. I had trouble finding someone locally, that a) wasn't going to just supply simple drawings to aid with a planning submission, or b) someone who wanted to project manage the build and deal directly with contractors etc. Looking back now I think the problem lay in my expectations of what I was going to receive in the way of drawings and also poor communication between the architect and me during the initial discussions.

When I started the topic on the Haven, I was hoping Mike would chime in as he had impressed me with his willingness to advise others with their workshop builds. Well Mike did pick up the batten and agreed to work with me on the project.

I originally wanted to build a green oak structure, primarily because I like them and also because I wanted to try my hand at working large chunks of green oak. My partner, Rebecca, wasn't keen, and Mike, unknowingly, sided with her. Oak was not only out of character with the house, but also of the architecture of the surrounding villages.

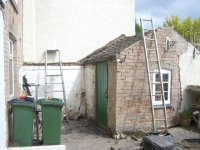
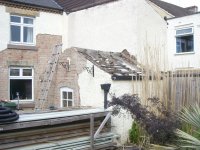
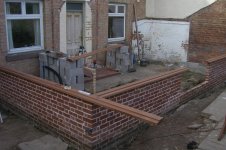
So first off here's what greeted Mike on his site visit

DSCN9463.JPG
DSCN9462.JPG

The outbuilding contains a large collection of bicycles, which I originally wanted rebuilt and incorporated into the design of the extension so that the only entrance to it would have been from inside the house to aid security and prevent potential theft. However, Mike convinced me it was better to start from a clean slate and to build a new bike shed elsewhere in the garden.

Given that clean slate, this is the design that Mike came up with, along with some internal changes to the original part of the house to make better us of the space.
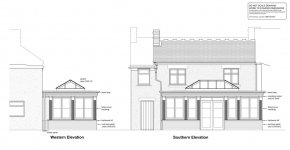
6105%2020%20Elevs.JPG


The design allows it to be built under permitted development rights, making full use of the governments temporary relaxing of the rules relating to size, allowing me extend to 3.9m from the back of the house. However, anything extending beyond 3m up the temporary limit of 6m needs to go through a Neighbour Consultation scheme, whereby my neighbours are contacted by the local council and asked whether the proposed design will affect the amenity of their property. I have a good relationship with both neighbours so have already discussed the plans with them and they have already stated they will not object, I still have to wait for the process to run it's course though. I have also had to draw up some Party Wall agreements for constructing a wall adjacent to the boundary and for excavating within 3m of my neighbours footings (the tall wall behind the outbuilding is my neighbours kitchen/bathroom). These have been duly signed.

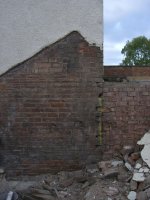
So whilst I wait for the neighbour consultation to complete, I've started to remove the render from the wall
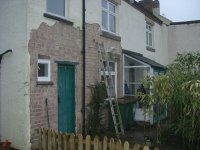
CIMG1233.JPG

Next I'll be demolishing the old bike shed and the little firewood store, the porch is rotten and will collapse with very little persuasion, before I level the site and start marking out.

Jon
 
Oooh, I recognise that place!

Have you dealt with that little flat roof over the bathroom yet Jon?
 
Hi Mike,
I have a builder lined up for the flat roof, he was supposed to do it last August but cancelled it due to a back injury (a genuine one). it's been rescheduled for May/June this year, once we're into the drier weather (supposedly).

Once I received the plans though, I realised the removal of the flat roof needn't hold up the orangery, although the removal of the chimney and internal wall will have to be done in conjunction with the flat roof work.


However..............

I'm now wondering whether I have the skills to do it myself, it would be rewarding, educational and save a shed load of money (£13k inc Vat was the quote). My biggest concern is removing the concrete and getting it water tight in an acceptable timescale, bearing in mind I'll be working by myself.

Jon
 
Hi Erich,

Yes I can't wait, it's very tempting to start now, but I really need to wait until I get formal approval, which at it's quickest could be 21 days, or at the very latest 29th March.

When Mike emailed me the final detailed drawings, a big smile came over my face, the drawings made me realise just how achievable this could be where as previously it had been a step into the unknown.

I actually have a couple of big projects that need finishing off before I start the orangery so the little delay in waiting for approval will enable me to get those ticked off. :eusa-clap:

Jon
 
With decent access and a bit of foresight I can't see why you couldn't tackle that, Jon. Bear in mind the devastation it will likely cause in the room below.
 
Oh that looks like fun. Looking forward to seeing it go up.

Just out of curiosity is there something in the design that makes it an Orangery rather than just an extension or posh conservatory?
 
I think twitchers have an expression "Just is". :D

Conservatories tend to have an entirely glass roof. Orangeries have an appearance of having a flat roof with parapets or large heavily-moulded fascias, and usually a glazed lantern. In elevation, conservatories tend to have an all-glazed appearance, whereas orangeries appear to be walls heavily pierced by windows. You can have a stone built or brick built orangery, but not a conservatory (above the plinth). So it's a matter of style.....which also means there is going to be a certain amount of grey area where a building might fit into either category.
 
Mike,

I'm not concerned with trashing the bathroom as we remove the roof, the bathroom floor is at a lower level than all the other floors upstairs because of the limited headroom due the concrete floor. This in turn means the ceiling in the utility room is lower than the current kitchen/dining room.

Once the supporting wall/chimney is removed this change in height will be very obvious so I'll be raising the floor of the bathroom to match all the other levels.

If I'm going to be tackling the roof as well, I may well rethink my order of attack. Certainly removing the chimney in it's entirety will allow me to insert the RSJ.

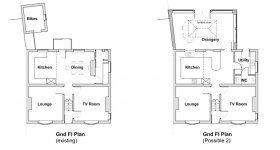
For the benefit of other readers here's what Mike has planned for the internal modifications.
6105%20Stoney_Stanton%20SK1A-3.JPG

There's a supporting wall and chimney currently dividing the kitchen/diner from the small utility room, there's also an outside toilet (also accessible from the utility room). The supporting wall and chimney will be removed and new internal walls constructed to provide a larger utility room and to bring the toilet fully into the house. The main entrance into the house from the rear (we rarely use the front door) will eventually be through what is currently the outside toilet which will lead us into the utility room. The doors in the orangery will be for occasional use, on nice days to lead out on the patio.

Jon
 
Wow, Jon! Really exciting. Looking forward to reading its progress.
 
Wow, I see the last post was February, how time flies.

Time for an update, I've finally made a start on the orangery this week having booked a weeks holiday expressly to kick this project off. It's been delayed by months by a large koi pond build which has not only ran over in terms of time but also ran over budget eating into the funds available for the orangery, so things might progress a little slower than Mike speed........

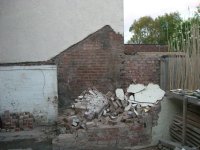
So first of all, I had to clear the site, there was an old outhouse, which you'll see later I suspect was the old wash house, and a wooden structure which I had been using to store wood for the wood burner but has been previously used as a coal store going by the colour of the soil it was built on. Both the outhouse and log store were in a very poor state, so would not take too much to flatten.

CIMG1265.JPG

This was a crack right through one corner of the outhouse

fullsizeoutput_33.jpeg

There were a lot of loose slates on the roof but I carefully removed the others as I'll be reusing some of them to patch the roof on the main house roof when it comes to removing the chimney breast.

CIMG1266.JPG

Most of the outhouse was built using lime mortar (as is the house) so most of the bricks have cleaned up nicely to either use elsewhere on the house where I need to match the existing imperial sized bricks, or eventually sell on once the house is finished.

CIMG1268.JPG

With everything cleared out of the way I was able to lay out some lines and for the first time get a proper idea of the size of the extension. The yellow paint mark on the wall indicating the position of the new back wall.

CIMG1269.JPG

Unfortunately the quality of brick work of the neighbours extension is very poor so we'll have to devise a way of hiding this from view.
 
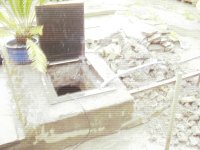
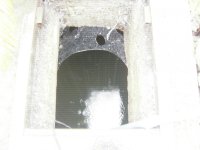
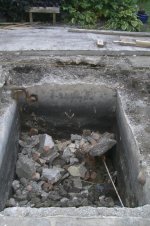
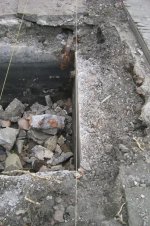
Ok, next step was to take off the top of the "well" which sits right outside the back door. To call this a well is really stretching things a bit far, it's a concrete box in the ground which used to fill with rain water from one of the downpipes (this has long been diverted), but also nowadays fills with ground water due to the state of the concrete which is disintegrating in places. Excuse the poor first two photos, the camera developed a fault which I didn't notice early enough.

The "well" as viewed directly from my back door.
CIMG1287.JPG
CIMG1288.JPG

The roof of the well was made up of a mixture very poor concrete and brick, but boy was the arched roof strong, it took me maybe half a day on one of the hottest days of the year to smash through this with a sledgehammer. (I've since gone out and bought a demolition breaker which would have saved me a fair bit of work).
CIMG1299.JPG

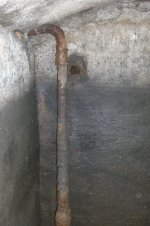
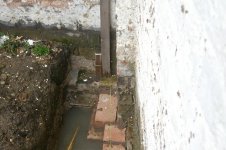
Now I said previously I thought the old outbuilding would have been the wash house and here's why, there was a cast iron pipe that ran from the well into the outbuilding which probably connected to a hand pump at the time, you can also see the tide mark which was no more than 300mm below floor level.
fullsizeoutput_35.jpeg


I originally thought the well might cause me problems with the construction but Mike assured me not, just fill it with hardcore and cap it off with concrete having made allowances for the depth of the floor construction, so I filled it with abandon, feeling smug that I wasn't paying for skip to get rid of my waste
fullsizeoutput_37.jpeg

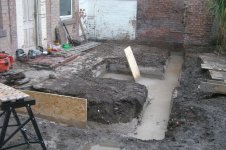
That smug feeling didn't last long. I strung out my lines again to start marking out my footings only to see this
fullsizeoutput_3a.jpeg

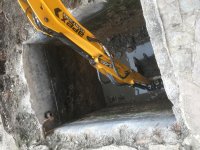
That's right my footings run right through the back edge of the recently filled well. I started emptying it my hand which I soon realised was futile, so the next morning I got a digger in and an hour later had it emptied again.

IMG_0286.JPG

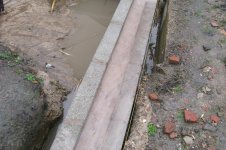
I had the building inspector out the next morning and he agreed I could shutter off a 450mm section (the width of the footing), lay some reinforcing mesh across the well reaching into the the footings either side and then fill the footings to the full depth of the well.

We had a way forward, but as you'll soon see this is not the end of the well.
 
So having cleared the site, it was time to dig the footings, and here was my next cock-up.

My poured foundations will finish 550mm below the finished floor level, add to the this the 1metre footing and had a did depth of 1550mm, time to get started. So I dug a 300mm wide trench alongside the boundary with my neighbour.
fullsizeoutput_5c.jpeg

I had expected this trench to be the hardest as I expected to come across his concrete footings which I thought might make excavating difficult but no, the neighbours house is built straight onto clay with only a single course of bricks to form a foundation.

Anyway, this looked like a mighty big trench for a single storey extension, so I went back to read Mikes build thread, there were the three words I had failed to read previously, "below ground level", my footings should only be 1metre below the existing ground level. Oh well, I'll have to explain that cockup to the building inspector.

Next I wanted to move onto the trench for the back wall, but the more I looked at it, I couldn't see a way to manoeuvre the digger to give me access to dig the whole trench without having to dig a fairly large section by hand. I rang my digger friend that evening and he offered to pop round the next day to give me some advise. Mulling it over at night stopped me from getting much sleep, I had one solution, but I didn't like it.

Next day, Dick, my digger friend popped round and could see the predicament and eventually decided the only way forward was the same idea I had the night before. I'd need to fill the well in again so I could sit the digger over the top to enable me to dig a complete trench :eusa-doh: :( so I preceded to fill the well a second time, knowing full well that I would have the empty it (at least partially) again to enable me to get my shuttering in, this well was beginning to get to me.

Anyway, at the end of the day, the plan had worked and I had got a nice trench dug (at the right depth :oops: ) with slots cut out of the well walls.
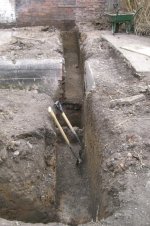

fullsizeoutput_5b.jpeg
The trench is straight, the photo seems to make them look offset.

Maybe I had finally conquered the well :eusa-clap:

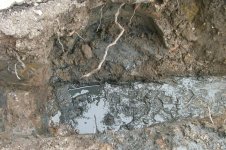
So this brings us to today, all I had to do was dig the final trench, access was no problem so should be done in a jiffy right? Wrong. Digging away for the house just under the surface I start pulling up bricks. I stopped to investigate and I've taken the side out of another "well" that I had no idea about. This was no fresh water well, it's full of the most horrendous black smelly sludge I've ever come across. The well was not built with mortar, it's simply a circle of bricks dry fitted together topped of with a slab of stone. I suspect it's a old cesspit/soakaway, a really nice thought as I was getting covered in the black sludge. I've gone down over a metre in the hope of finding solid ground but to no avail, there is one area which offers no resistance to a spade, it's just sinks into the runny sludge.
CIMG1311.JPG
CIMG1312.JPG

It's official - I hate wells.

I'll ring the building inspector in the morning, get him out to inspect and see what he wants me to do to overcome it.
 
A well like that is what we used for our water supply at the bungalow when I was a child. It was still in use when mum and dad were CPed out of it just before Christmas 1975. Dad had dug the original one when they bought the place in the early 50's and I helped with doing a second in the mid 60's when we built another bedroom on to the bungalow. There was a concrete filter box dad had made with sections that had big stones, small stones, sand and finally charcoal that the water past though before dropping into the well. One of my jobs was the pump water up into a metal jug and walk it round into the kitchen, filling the electric copper. In the late 60's dad set up a hot and cold tank and the pump had an electric motor attached but you had the watch the full light (switched by a float) and turn the motor off.
Seems odd now but we were so pleased when we got the taps on the sink and bath. [emoji97]
 
Ooo nasty. I had the same experience last summer getting the power and waste out to the barn. I ended up with a 50 meter long trench that went from 1.2 meters at the house end to about 1.7 at the barn. Right in the middle I went through one of the the old triple tank cesspit jobbies they have here. Nasty nasty nasty. I have discovered another one right where we plan to build our orangery which took off from the cow stalls. I dread to think what is down there.
Looking great so far, hope you have a sensible building inspector :)
 
As I've said directly to Jon by email, these shouldn't be a big issue. There are two ways around it: firstly, reinforce the foundation such that it forms a bridge across the non-supporting ground, or, secondly, stop the foundation either side of the obstacle and span across with a series of pre-cast concrete lintels. We took the latter approach quite recently on another job of mine where we came across a beautiful brick built well, and didn't want to fill it in or destroy it.
 
Jon, I'm impressed with your digger skills.

Digging your founds so close to your neighbours wall...isn't there a risk of his wall settling/subsiding now ?
 
DaveL":25n2yfpv said:
Seems odd now but we were so pleased when we got the taps on the sink and bath. [emoji97]

Dave,

Whilst digging the foundations I had a visit from Severn Trent, they were looking for the stop-cock for a neighbours house and needed to quiz me about my stop-cock and which properties it serviced. When the guy saw the big concrete hole in the ground he asked what I was doing so I described how the well stored rain water for use in the wash hot house. His young assistant showed up at this appoint with a totally confused look on his face. He had never considered that houses may not have had running water in the not too distant past.

Another more modern case in point, whilst digging the foundations I deliberately severed the drain from the kitchen sink and the dishwasher, I had warned my partner Rebecca that this would happen and that she should use the utility sink until further notice, that evening we asked the kids to wash and dry the plates up, the look on their faces, we almost had to instruct them on how to do it, they've always known dirty pots went in a washer and came out clean, whereas I grew with it being a daily chore to do my bit for the household.

Jon
 
I'm also concerned about that boundary footing. Unfortunately I had to go back to work today and had to run a test for a demanding but totally disorganised customer, true to form his test ran over and so I got back just before 7pm.

I had just enough daylight left to clean out the corners of the foundation, which 1500mm down a 300mm wide trench was no easy feat, I couldn't get my shoulders down the trench so had to work sideways and lift out the soil with my bare hand. Serves me right for going so deep.

I need to get the building inspector to approve the depth of footings which I hope to arrange for the morning, but I suspect I'm looking at Wednesday at the earliest for the pour.

Jon
 
If it shows any sign of collapsing, Jon, take a few photos (with a tape measure showing the depth), grab a bag or two of soil from various depths as samples, and chuck some concrete in the ground along that wall pronto, with or without inspection. The inspector will understand.
 
Thanks Mike,

If I remember correctly that foundation was dug on Friday, there appears to be no movement so far, but it's a constant worry that I don't need. Also the bottom is filling with groundwater which is not helpful so the sooner it's filled the better all round.

Jon
 
Brings back memories of doing the footings to my house. Dug and then poured all in one go. Started on a Monday and poured pretty much all day Wednesday. Absolutely tipped it down Wednesday night. The relief knowing the concrete was in !!! :D

I know if it was me the concrete would be going into that trench as soon as I could say ready mix ! Ive never had a problem with building inspectors and im sure a phone call to him will have him understanding and as Mike says just get some photos first.

Do a know a builder tho who poured his new bungalow footings before approval and was made to gun/dig them all out again !!
 
Well I can relax now, concrete is in, the torrential rain I could have done without though, everywhere is a disgusting mud bath.
CIMG1315.JPG

Unfortunately, the shuttering collapsed in the well, but I had rounded my quantities up to ensure I didn't run out so I had enough despite the collapse.

A quick clean up outside and then an evening off to recover
 
Hi Andy,

Yes that's pretty much it, I took a weeks holiday last week to get things started, but yes predominantly evenings and weekends and I'm likely to lose the evenings soon now the nights are drawing in.

I'd like to get the roof on before the worse of the winter hits and I've several more weeks holiday to use up to try and achieve this.

Jon
 
Hi Rod,
Yes it does, I had to get two agreements in place with my neighbour, one to cover the building of a structure against his wall and the second to cover the excavation of footings within close proximity (3m I believe) of his building.

He's a pretty chilled out chap, so signed the agreements without any issues, he might not I have been quite so quick to sign if he had known there were very little to no footings on his building :shock:

Jon
 
Happy New Year to everyone.

Well I'm embarrassed to say 3 months have passed since the last update, and so little progress in that time.

To bring you up to date, I left the foundations around a week to harden up and then did my best to clean off the slime that had formed on top. It was quite thick in places. I then strung out my lines again and tranfered the corners down to the foundation. It became obvious I hadn't been too accurate with my digging of the trenches as one of the walls sits along the edge of the foundation and not 75mm from the edge as I had planned. I'm pretty sure the error has come about because the digger wasn't sitting level as I dug, so although I broke the surface bang on the line, the further I dug down the more I moved away from the line.

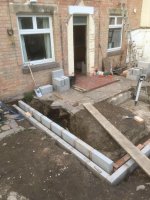
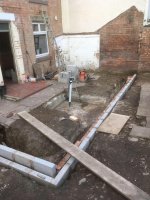
Anyway, I used Mike's method of cheap frogged LBC bricks for the first coarse so I could i chip the frog down if my levels weren't spot on. In reality, I think only two bricks need thinning down and the rest were laid conventionally, albeit a few with quite a thick mortar bed beneath them. Once I was happy with the levels of the first courses (inner and outer walls) I moved onto bringing up the levels with dense concrete blocks.

B72CC8EC-5F83-4B87-B0FE-E6E91DD9DC1B.jpeg
364A5F69-93E7-4352-A70F-2BA6AB9AC331.jpeg


Once I reached the point where I needed to move to facing bricks, I back filled between the blocks with a lean mix of concrete and angled the surface to direct any moisture in the cavity down and out towards the outside wall. This was strangely quite satisfying as it gave a very neat and tidy appearance to the wall - well for a short period anyway.
CIMG1322.JPG

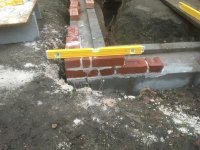
I was then ready to move onto the facing brick, so I started building a corner.
fullsizeoutput_69.jpeg

The above picture though doesn't tell the full story, that must have been the 6th or 7th time that corner was built. It really tested my patience and I admit the air was blue at times. Initially I was finding the mortar was firming up literally the instant I put the brick down, there was no way I could tap the brick in position, it was like working with exhaust gum. I was working with a combination of things I'd never used before, all because I wanted to use a light coloured mortar. I was using silver sand, instead of my usual building sand, snowcrete instead of the normal Portland cement and Lime which I'd never used before.

My first mistake was not to use plasticiser, I thought the lime aided the workability of the mortar so left out my usual liquid admix. A quick e-mail to Mike and he pointed out my error, so I knocked up a new mix, this time with plasticiser and before laying the brick I dunked them in a bucket of water. This seemed to help so a built up a corner 3 or 4 courses and went to bed feeling slightly better. The following morning though the lightest of touches and the brick came free, it was also clean of mortar so they had been no "suction" to the brick. Back to the drawing board then. I suspected the silver sand, despite the fact that it's marketed as a light mortar alternative so I mixed a batch using my regular dark red building sand, but although the mortar felt better in the hand/trowel, it felt "fatter", ultimately it didn't result in a stronger bond.

Feeling pretty dejected by now, I spent an evening researching on the internet and came across an article highlighting the issues with clay bricks and their water absorbency. It stated it was necessary to soak the bricks in a tub for a long period (overnight) and actually gave examples of brick layers doing to this onsite (which I found hard to believe). So with nothing to lose, I tried it, and with a little refinement it worked!! :eusa-clap: The first courses of bricks were still too wait when laid, which caused the mortar to run and stain the bricks so I Ieft them long after removing them from the tank (kiddies paddling pool) so the surfaces were dry and that solved that problem. So my technique now is the night before I load the tank with bricks, 1st thing in the morning I take them all out and place on a wooden pallet while I go and mix mortar and get my tools ready etc and about an hour or so later I'm ready to lay bricks. It's a bit of a faff but it's working for me, I'm not a quick brick layer so I'm working with small batches of bricks each time anyway.

So this is where I am at now, the short wall is up to DPC level, the long wall just needs finishing up to the same level, unfortunately recent weather here at the weekends as either been too cold to lay brick or torrential rain of biblical nature, so more frustration.
CIMG1316.JPG
CIMG1317.JPG

The wall adjacent to the neighbours will be block work, but I'm going to have to be a little creative with the bolster chisel and the angle grinder to get round the step in the wall.
CIMG1320.JPG
CIMG1319.JPG

I did say earlier on in the thread that I wanted to have the roof on by Xmas, well...................... I just didn't state which Xmas :eusa-liar:

The forecast for this weekend is for slightly milder weather so I'm hoping I get all walls up to DPC by the end of the weekend.

Jon

PS Sorry for the first two sideways photos, I tried everything to get them the right way but gave up in the end.
 
I was wondering how you were getting on, Jon. Thanks for the update.

You've done well to get face brickwork done through the winter, and I'm glad you've sorted the mortar/ brick moisture level issue out. As I say so often, brick laying is really easy once the mortar is right. You'll be really grateful when you can get an oversite poured: no more mud!
 
Great progress, all things considered, and we are well used to Christmas completion dates around here. ;)

First two photos turned around.

When using an Apple device to take photos try to make sure the volume buttons are at the bottom of the device, landscape mode.
 
Thanks Mike, Malc and Andy for getting my pictures facing the right way :eusa-clap:

The weather is really frustrating at the moment, we're having so much rain, the garden/lawn is a mudbath and I'm trying avoid walking on it as much as possible, but we have two young dogs now and we have to let them out regularly. The interior of the house is just as much a building site as the outside, as you've seen Mike, so we're not yet house proud, but yes mopping muddy floors is a daily chore.

It was because of the dogs I left as much of the patio down as possible but now I've seen the height that door will sit, it's going to be quite an effort to dig out the floor and barrow it out after the walls are complete.

On a different note, I spent some time today trying to source some Sapele for the window cills, the 4m single length I require is proving difficult to find, but one supplier has offered me oak for slightly more, although I have no direct experience I've read in several places oak doesn't take paint too well so how suitable is oak for an exterior painted window cil, or should I pursue the Sapele route. I'd be interested in others views.

Jon
 
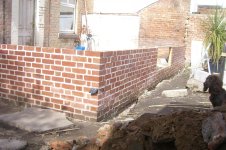
Well after a seemingly never ending winter, I've lost count of how many days have been lost to torrential rain, or near sub zero temperatures, I've finally reached the milestone of finishing the facing bricks.

CIMG1339.JPG

The DPC gave me a little trouble, I had problems with water seeping from the mortar and staining the brick face because the DPC was preventing the brick below from absorbing any moisture, this was nothing a bit of brick acid wouldn't solve later on, and, having never laid a DPC before, I hadn't appreciated the importance of getting the front edge of the DPC lined up perfectly with the brick face, below you can see where the DPC protrudes slightly, not only is it unsightly but it also makes a neat pointed joint impossible. I'll have to carefully trim the DPC back and then repoint in a few places.

CIMG1343.JPG

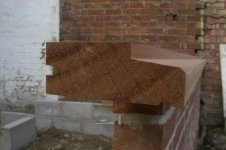
With the facing bricks complete, I could move on to the cill sections. As the cill will be bolted to the rear of the facing bricks with heavy steel straps, I cannot start the internal block work until the cills are permanently fitted.

I contemplated machining my own cill profiles, but because of long lengths and weight of the cills I decided there was a high risk of me messing things up in my workshop, so they were outsourced to a local timber merchant. I later found out that the spindle moulder operator sneezed whilst moulding the drip groove on a 5m length and gouged a chunk out of the front of the cill. The piece was replaced at their cost so my initial decision seemed justified!!

CIMG1345.JPG
CIMG1344.JPG

Once the cills are fitted, I can complete the internal block work and then move onto the roof structure and some woodwork :eusa-dance:

However, before I can bolt the main rafter to the back wall I'm going to have to deal with this, especially as the window frame will eventually be removed. I'll replace it with a concrete lintel.

CIMG1340.JPG

I'll probably also remove the door lintel so I can reuse it over the new back door, if I can successfully clean off the old paint

CIMG1341.JPG

I think it was the weekend of the Beast from the East 2, but faced with another weekend of sub-zero temperatures and therefore no brick laying, I changed tack. I decided to remove the chimney stack below roof level, this would then provide me with internal work, removing the chimney breast to ground floor level, should I be faced with more bad weather weekends.

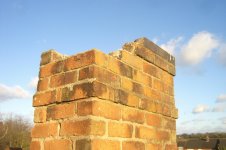
The chimney has had remedial work at some point, the top 3 courses had been rebuilt using rock hard mortar, I couldn't budge them with a bolster and chisel and resorted to a chisel in a SDS drill, even this was hard work.

CIMG1323.JPG
CIMG1329.JPG

Once below the top 3 courses, I was back to the original lime mortar which was very crumbly and the bricks could be simply lifted off by hand, in fact movement could be felt in the whole gable end wall.

fullsizeoutput_73.jpeg
CIMG1335.JPG

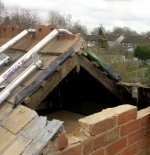
In this rear aspect shot, you can see the chimney stack that was removed (second chimney from the left) but also the flat roof of the bathroom that enabled me to access the chimney without scaffolding. The flat roof is at least 18" thick concrete which causes us terrible condensation problems in the winter, and also restricts us with things like ceiling extraction and lighting, so eventually the flat roof will be removed and the pitch roof continued across, which is why I'm not rectifying the weak gable wall.

DSCN9462.JPG

The house has dual pitched rooves (Mike's approved spelling :obscene-drinkingcheers: ) and the box gutter between leaks so again this will rebuilt and covered in EPDM, when the roof work is carried out.

fullsizeoutput_6d.jpeg

Looking at the state of some of the slates I suspect both rooves will be re-slated at the same time
CIMG1326.JPG

Already the lighter nights are making a positive impact on how much progress can be made so I'm hopeful that things will really start motoring now.

Jon
 
Back
Top