• Hi all and welcome to TheWoodHaven2 brought into the 21st Century, kicking and screaming! We all have Alasdair to thank for the vast bulk of the heavy lifting to get us here, no more so than me because he's taken away a huge burden of responsibility from my shoulders and brought us to this new shiny home, with all your previous content (hopefully) still intact! Please peruse and feed back. There is still plenty to do, like changing the colour scheme, adding the banner graphic, tweaking the odd setting here and there so I have added a new thread in the 'Technical Issues, Bugs and Feature Requests' forum for you to add any issues you find, any missing settings or just anything you'd like to see added/removed from the feature set that Xenforo offers. We will get to everything over the coming weeks so please be patient, but add anything at all to the thread I mention above and we promise to get to them over the next few days/weeks/months. In the meantime, please enjoy!

Parquet progress (finished)

StevieB

Nordic Pine
Joined
Jul 21, 2014
Messages
944
Reaction score
59
Location
Chatteris, Cambridgeshire
So I have an interesting little project coming up shortly - laying approx 20m2 of reclaimed teak parquet flooring in our dining room. Photos to follow, but first I have a question! I understand about leaving an expansion gap for the parquet itself and as removing the skirting was not an option I am resigned to fudging this. 12-15mm seems to be the recommended gap and I have a solution for this that while not perfect will suffice I hope.

My question relates to the ply sub-floor. Wooden floorboards with a void underneath and I am putting down 12mm ply as a base for the parquet - do I need to leave an expansion gap between the ply sheets themselves and between the ply sheets and the walls/skirting? I would prefer not to for logistical reasons, but if that is the recommendation how big a gap is necessary? Ply is bog standard spruce (not quite shuttering ply but not hardwood faced either - it is going to be fully covered so didn't see the need at twice the price) and will be screwed into wooden floorboards at very regular intervals but not glued.

Assuming this goes well, I have enough reclaimed flooring to do our hallway as well (approx 15m x 2m) so want to get it right if I can. It has been sitting on the back drive for over a year however, so some indoor acclimatisation also likely to be required - any indication of how long this will need to be indoors before laying? It has been covered with a tarp/groundsheet but I doubt this is fully waterproof.

Steve
 
Steve

You might find this thread of interest.

Is all your reclaimed timber outside? How long depends on how wet they are as you say that they might not be fully watertight. Also do you have ch pipes underneath anywhere? If the boards are wet then I'd go for at least three months.

Re the expansion gap...treat yourself to a Fein with a wide blade (well, several!). Lay the teak parquet alongside the skirting board, and Fein your way along. Remove the fillet from the bottom of the skirting board and slide the parquet in. Voila....no visible gap.
 
Thanks Roger.

No central heating under the floor, 2 small rads in the room in the normal manner.

Fein - yes, I considered this, but is still leaves the problem of the door threshold, fireplace, French doors and the fact that if this doesn't go well and SWMBO reverts to carpet or similar my skirting is then starting 30mm up the wall!

Best,

Steve
 
A few years back I did a small room using cork compression/expansion strip around the edges then hid that with lengths of quadrant tacked/glued to skirting board.
Lasted ok with no problems but since replaced with carpets.

Rod
 
You'll have a problem with your door threshold whether you have an expansion gap or not!

Are your floorboards that moveable/uneven etc that you need the ply?
 
Yup, definitely need the ply!

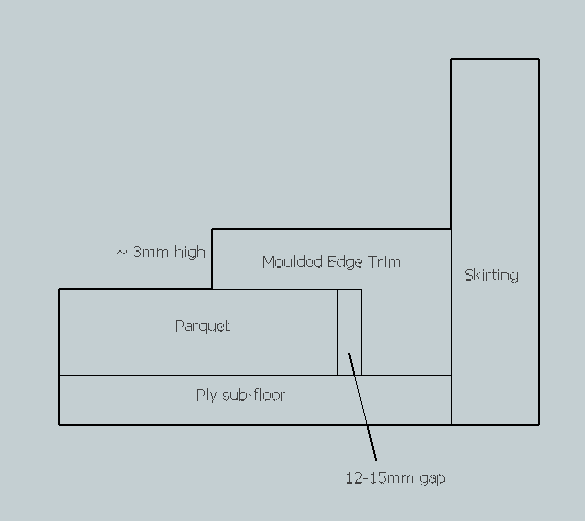
This image (in no shape or form to scale!) shows my solution I hope - I will cut the 'moulding' from parquet blocks to match, and sit them on a 3-4mm piece of ply strip (not shown). In this way the expansion gap is hidden, the threshold shouldn't be a problem and the timber will match throughout. Quadrant moulding from veneered MDF is not going to look good on solid teak flooring I suspect!

parquet_zpshgqrkckn.png


Steve
 
What sort of length are you after, Steve, for your quadrant moulding and what wood, ideally. If you tell me the profile and it's doable then I could knock some off for you although getting longish lengths to you might be tricky.
 
Roger - very kind offer, but I can make quadrant if it comes to that. Thanks though.

Bob - I can up the thickness but didn't want the strip to be too obtrusive. Perhaps making it thicker and rounding it over might be a better approach :eusa-think: I will knock up some test pieces when I have laid the sub-floor and see what they look like.

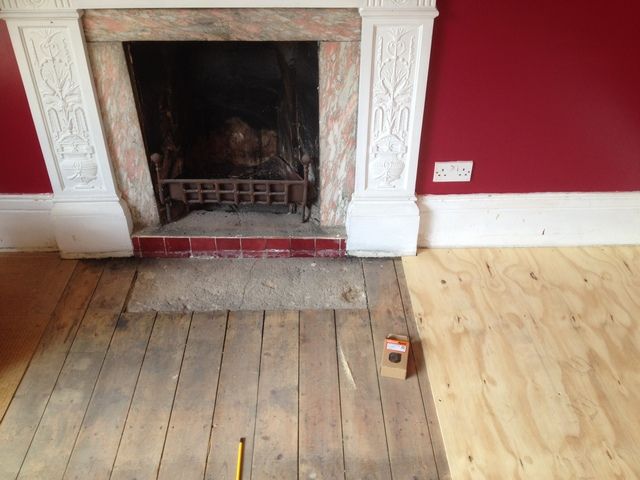
Took up the carpet this afternoon and found a hardboard overlay on the floorboards already. Not thick enough to level for parquet and it didn't run up to the fireplace anyway so it is coming up!

Steve
 
StevieB":mot8hnci said:
Bob - I can up the thickness but didn't want the strip to be too obtrusive. Perhaps making it thicker and rounding it over might be a better approach :eusa-think: I will knock up some test pieces when I have laid the sub-floor and see what they look like.


Steve

I can understand the compromise. I just thought that 3mm could easily split away from the main section and that legs from furniture, chairs etc could take lumps out of the 3mm edge.
Maybe 6mm with a chamfer to make it less obtrusive perhaps.

Bob
 
If the love of your life ever suggests you lay reclaimed parquet flooring, run a mile! If running is not your thing, read on.....

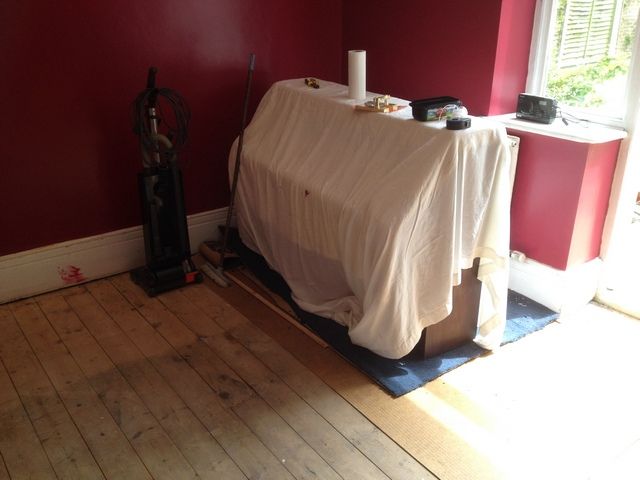
This job would have been slightly easier if I was not working around SWMBOs piano - having nowhere else to store it however, its a case of work round it but don't, whatever you do, use it to store paint on, cups of coffee, chisels or tiny screws you needed to put somewhere safe where nobody will move them.... inevitably somebody will - probably while swearing about the piano being used as a shelf for paint, cups of coffee and chisels :?

parquet1_zpsytvztjxe.jpg


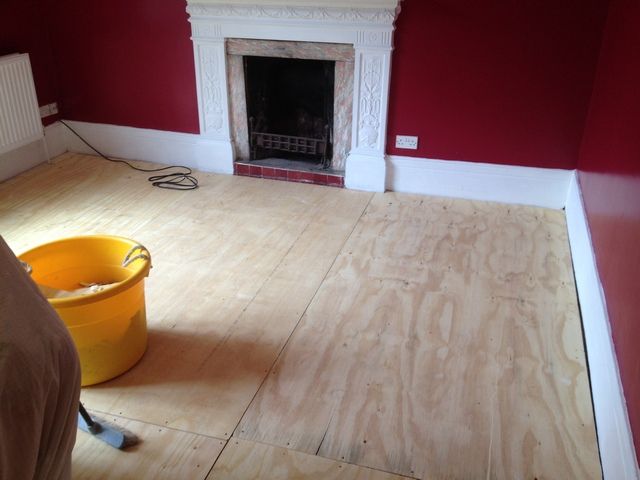
Once we had sorted that little issue it was time to lift the old carpet, and the hardboard that had mapped to the contours of the underlying floorboards and start again with something a bit more substantial - 12mm ply in this case.

parquet2_zpswgxfmmma.jpg


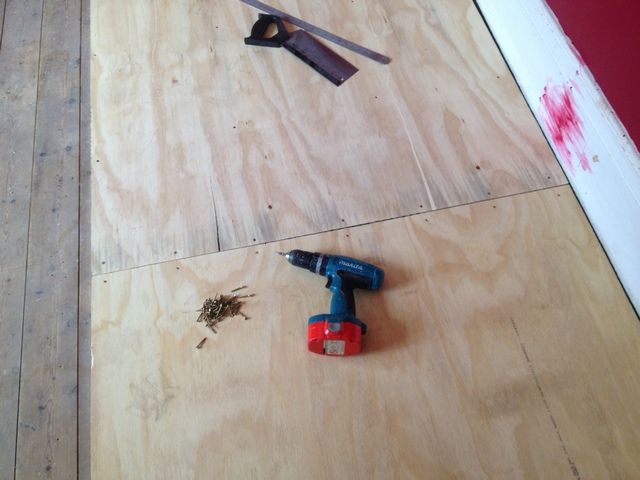
Spent ages trying to decide on whether to leave expansion gaps for the subfloor and if so how large, went for a couple of mm in the end as ply should be fairly stable I hope

parquet3_zps4vtwdy1s.jpg


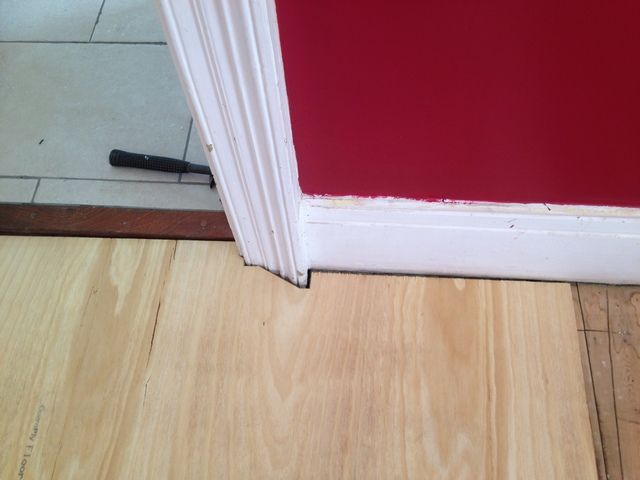
Careful notching round the door frames...

parquet4_zpsa8txvgd2.jpg


And done with the subfloor (note the painted skirting as well!)

parquet5_zpsaevx8acb.jpg


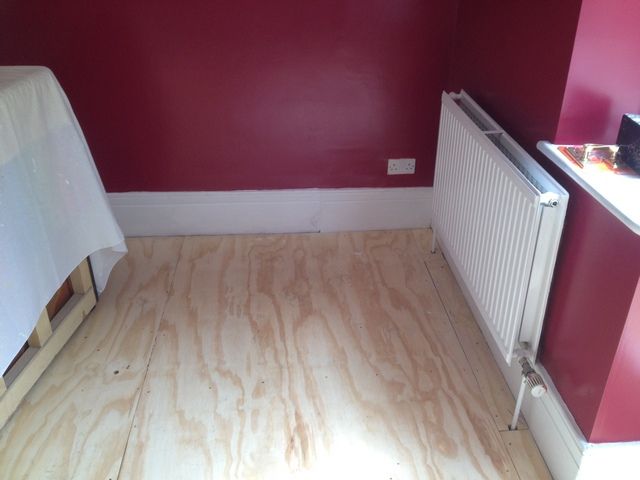
Even managed to go under the piano!

parquet6_zpsysjqmpks.jpg


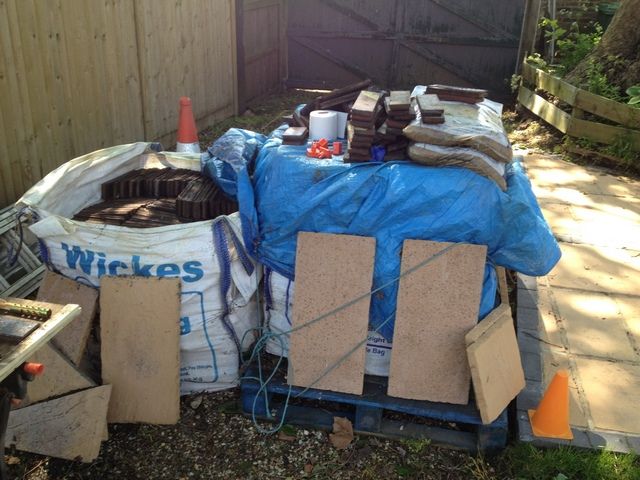
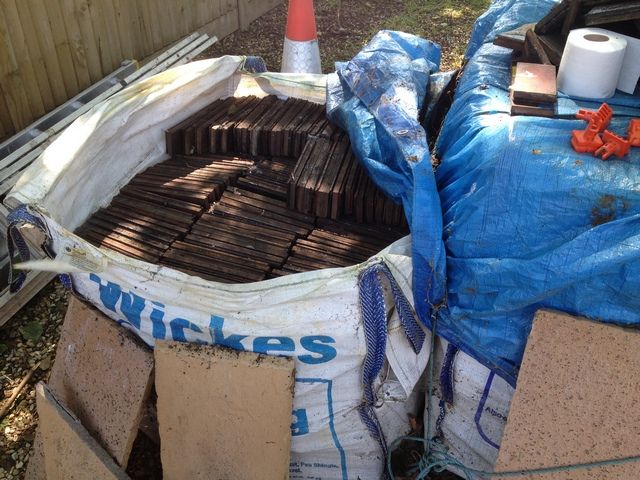
So with the subfloor laid, time to get on with the parquet itself. An e-bay bargain, I bought this a year or so ago with a view to starting rather sooner than I actually managed to. It has therefore been sitting on the drive under a tarp for 12 months or so....

parquet7_zpsw1cpavdi.jpg


parquet8_zpsdnmlgyov.jpg


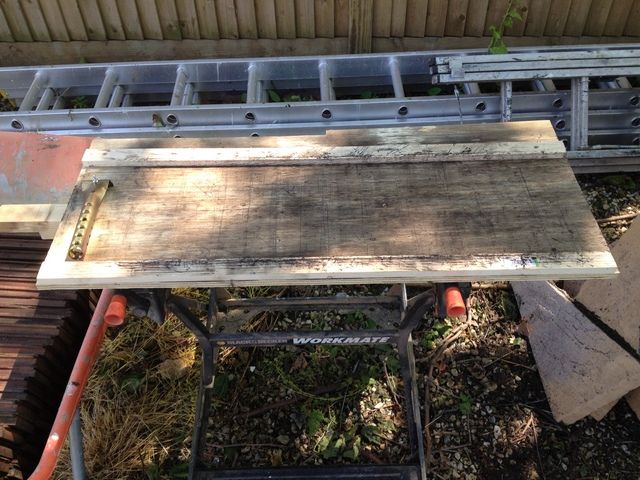
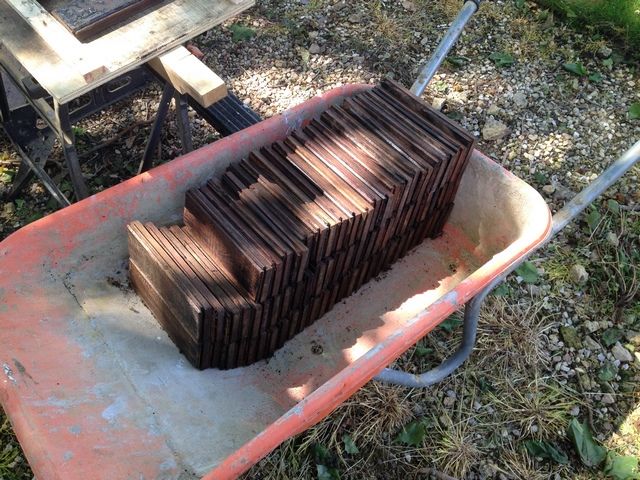
I bought 5 ton bags of this with the flooring just thrown in. I then stacked it neatly into 3 bags but my word is it messy. The bitumen on the back seems to get everywhere and it smells strongly as well. My stock with SWMBO is definitely at a low point by now. I looked like a coal miner just from moving the stuff around. Anyhow, time to deal with the bitumen. A bit of reading suggested that the best way was simply to scrape it so I set up a couple of battens to hold the blocks and got to it (ooh look - a use for a workmate!)

parquet9_zpsdcdc8p7o.jpg


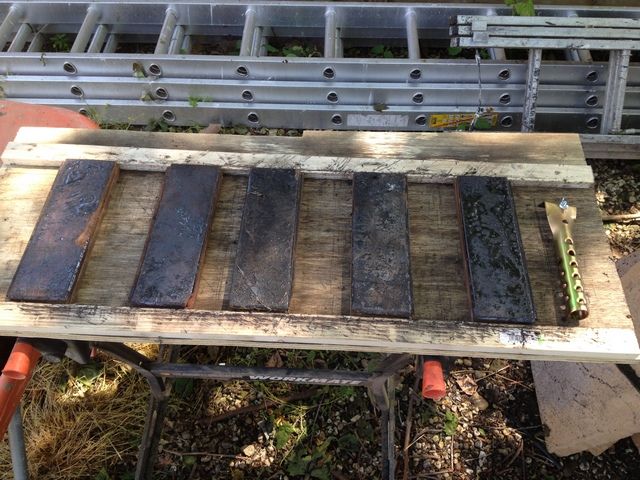
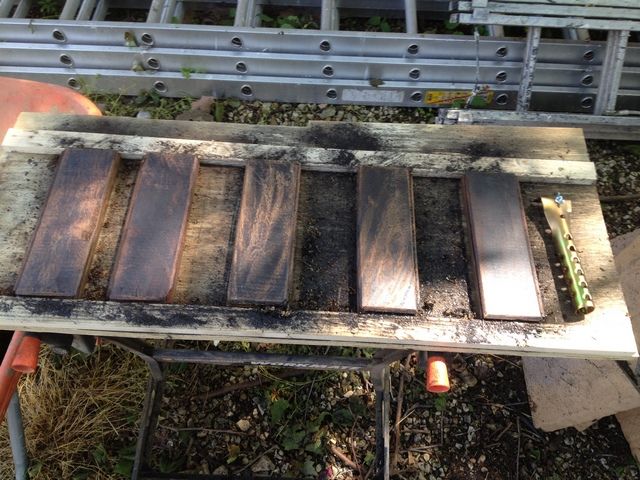
The battens gave me something to push against and had the added bonus of checking the size of each block. This was an unintended consequence, but it turns out about 1 in 20 are about 10mm shorter than the other 95%. Not quite sure why, possibly from an edge, but it did at least let me put these to one side rather than clean them up. I did 5 blocks at a time. Before....

parquet10_zpsviywfxne.jpg


After....

parquet11_zpscbv6c0pl.jpg


I reckon it takes about 7-8 minutes to sort out 5 blocks, scrape the sides (freehand, mostly grot that has fallen between blocks for years before they were lifted I suspect) then the bases. At that rate I am doing approx 40 an hour. Base comes up nice and flat but still leaves your fingers black and has an oily texture

parquet12_zpsbvfxwlpw.jpg


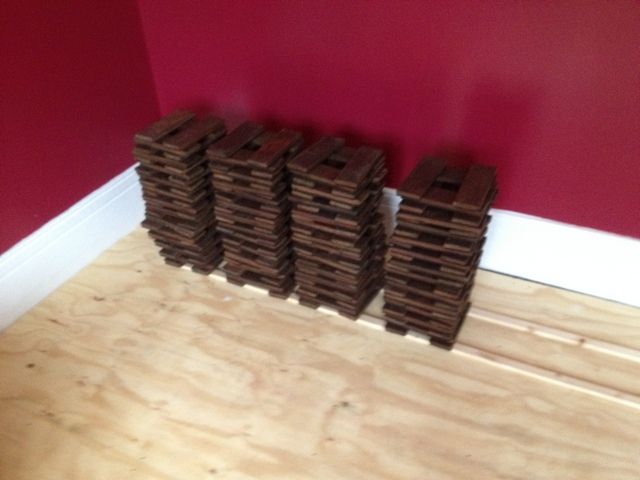
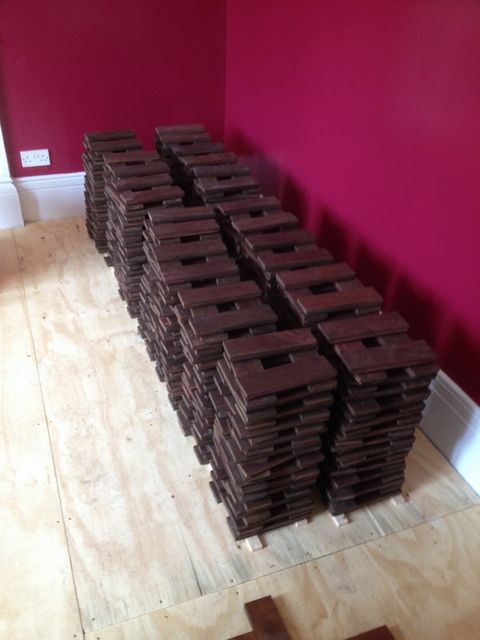
Stacked in piles of 50 blocks inside to allow them to fully acclimatise

parquet13_zpssdphmazw.jpg


I am averaging 200 blocks in a day, and need 1200 approx for the dining room, so 3 weekends of full on bitumen scraping - nice. Done 900 so far and am beginning to regret this decision!

parquet14_zps7imiaoqx.jpg


It turns out some of the blocks were particularly wet and I have had to put these to one side for a while. Many also have tape on the top surface, being lifted from a sports hall apparently. I have scraped the tape off the top of each block but the top surface is very dull and dirty. No mold or damage, just dirt, old varnish etc. I tried sanding a couple to get a feel for what they would come up like (and because SWMBO is decidedly not impressed by this point) but the sanding belt got clogged very quickly and I am worried that a floor sander is not going to cope very well either. In the end I took a few blocks and gave the top surface a skim through a thicknesser - just enough to remove the top surface...

parquet15_zpsgzol1fig.jpg


Much better (but do I really want to skim 1200 blocks through a thicknesser.....) and now SWMBO is looking happier. The stain on a few of these is where I gave them a wipe with sealer as it was all I had to hand, just to see how the grain would come out. These blocks were sold as teak but I am 99.9% sure they are iroko.

So there we are, 300 odd blocks still to go, but it looks as if it might not be a total disaster - fingers crossed!

Steve
 
That's quite a job you've taken on and I admire your determination and effort - I'd have given up before starting [emoji2]

Rod
 
Nice progress Steve - all the hard painstaking scraping and prep work will be worth it.

The blocks do look teak'ish to me, although it's difficult to see from the last photo.
 
That is a real labour of love there, Steve. Rather you than me !
 
How would the missus feel if you put some of the blocks in the freezer overnight? The bitumen may well become brittle enough to flake off more easily than just scraping.
Caveat:- I have not actually tried this.
 
I wonder if the blasting with dry ice that Mike is using to get the paint of the old beams would work for you?
 
I know its graft, but that will look phenomenal when done. :eusa-clap:
 
Thanks chaps. To be honest scraping is not the hard part, it is the mess that is the problem. The bitumen actually flakes off nice and easily. While intrigued by dry ice, scraping is free!

As to why I am persevering? Several reasons:

1) I am stubborn
2) I owe it to the house - it would have been down originally and there is currently none left
3) What else would I do with 3 cubic meters of iroko (or teak) blocks?!
4) I hate wasting timber
5) It was cheap - far cheaper than laminate

If it looks awful then I am happy to take it up and say I tried, but if I don't try and scrap it now then I will wish I had tried in the future.

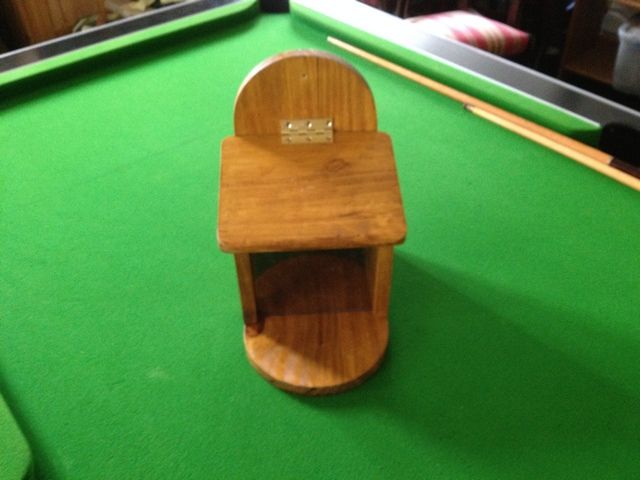
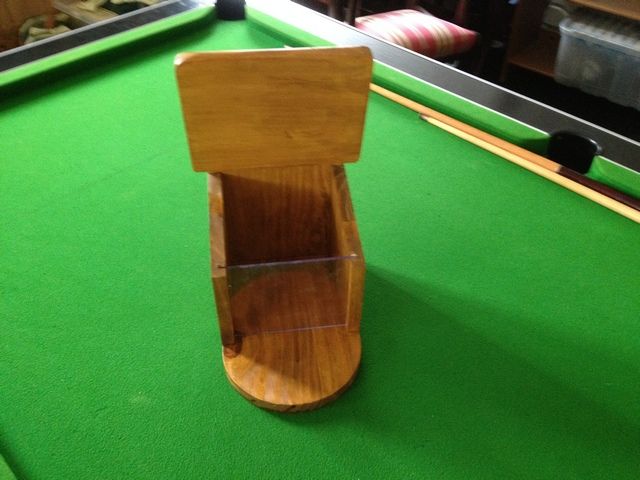
Small hiatus while I build a squirrel feeding box for a small furry visitor to our bird feeder (SWMBOs orders), then back to it!

Steve
 
Is this an anti squirrel feeder - the Grey ones should not be encouraged.
I feed the birds but use feeders that make life difficult for the long tailed rats!
If Red that's a different matter?

Rod
 
Nope, it is a feeder for a squirrel. Why should the grey ones not be encouraged? Currently the little fella pinches the bird nuts so SWMBO wanted a box he could access instead - £15 from amazon or free when made from old shelving off-cuts and a bit pf perspex

squirrel_1_zpspduqsmmy.jpg


squirrel_2_zpsp4rqnmzl.jpg


Steve
 
Great looking start!

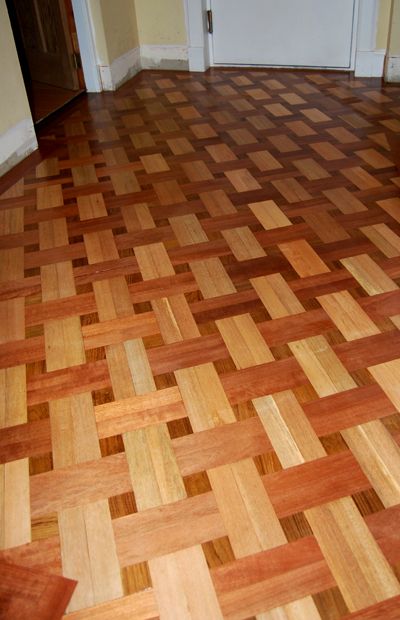
This was my effort a few years ago. All reclaimed flooring I got for free. All missmashed and odd widths so had to come up with a pattern for it hence what you see. It is still looking fine (could do with a revarnish) but it hasn't moved at all which is what I was worried about. This hall way is very irregular so fitting the bulk of the floor was straight forward then I spent a couple of weeks on the bandsaw with lots of very fiddly marking and cutting

DSC_1138_edited-1.jpg
[

Roll on 4 years and I now have 50 sqm of reclaimed flooring to lay which has been drying in our spare room for a year. Plus LOML wants our other hall way similar to the one above "You have managed it once so you can do it again" :eusa-doh:

Good luck with the rest of the job.
 
StevieB":3d39w6lx said:
Nope, it is a feeder for a squirrel. Why should the grey ones not be encouraged? .....
Steve

Because grey squirrels have been described as one of the ‘world’s worst invasive species’ and have caused a decline in indigenous red squirrel populations and damaged forestry in the UK. They have caused so much tree damage in the New Forest that there is now a project under way to eradicate them completely because the woodland is unable to regenerate

They carry the squirrel parapoxvirus that has decimated our red squirrels but does not affect grey squirrels.

Now the role of this invasive species in hosting the bacteria which causes Lyme disease in humans has come under the spotlight in a study by ecologists at the University of Glasgow.

They eat baby birds and eggs and I reckon are the culprits that destroyed the eggs in our swallows nest.

They are definitely right at the top of my 'What shall I use my .22 rifle for today'.

They are vermin.

You did ask :lol:
 
We still have plenty of reds around us so I cringe every time I see a grey. We have a duty to report greys so they can be trapped and gotten rid off.
 
Halo Jones":3ibtcejc said:
Great looking start!

This was my effort a few years ago. All reclaimed flooring I got for free. All missmashed and odd widths so had to come up with a pattern for it hence what you see. It is still looking fine (could do with a revarnish) but it hasn't moved at all which is what I was worried about. This hall way is very irregular so fitting the bulk of the floor was straight forward then I spent a couple of weeks on the bandsaw with lots of very fiddly marking and cutting

DSC_1138_edited-1.jpg
[

Roll on 4 years and I now have 50 sqm of reclaimed flooring to lay which has been drying in our spare room for a year. Plus LOML wants our other hall way similar to the one above "You have managed it once so you can do it again" :eusa-doh:

Good luck with the rest of the job.


That looks excellent !!!


although .. as with stevieb's .. it will be such a shame , when the carpet goes down :-(
 
Awesome looking floor Halo - lovely. I am going for traditional herringbone and double block border, but like you anticipate a lot of fiddling and cutting between the two... Good luck on a matching second floor!

Roger - fair points, but you haven't seen my SWMBO in a paddy so I made the box anyway as she only would have bought one from Amazon. Not so much a .22 as an elephant gun required to stop that ;) I doubt it will last long as water will seep down between the lid and the back and soon rot it out, but by then she may have gone off the idea.
Steve
 
You could add Warfarin to the Squirrel food - she'll never find out? [emoji6]

I don't shoot them (as my family have a soft spot for them) but most of my feeders are squirrel proof.
I do shoot rats though!

Rod
 
Steve - Forgive the ignorance; but how does one attach these to the floor? I was just considering how that might be achieved, and I was thinking you could use a sticky substance that allows flex and holds the individual pieces down, almost like bitumen! :shock:
 
Dan - one uses a very expensive adhesive that sticks to bitumen - Lecol 5500 in this case seems to be the recommended product, so I am going with this. Cannot find a local supplier so online order in due course!

Steve
 
I did my hallway last year with some pitch pine stuff obtained from my old school that got demolished. instead of scraping the bitumen off I sawed it off. Messy but easier, I then dimensioned each piece. Because every piece was the same thickness and square it was really easy to lay. I only had to use a ROS for the final sanding. I used the Leecol adhesive but ran out and used some stuff from b&q which I found to be just as good as the posh swag.
 
Wallace - the blocks are nicely T&G but this is close to the bottom surface, leaving plenty of depth to the top of the block. If I sliced off the base I would almost certainly lose the T&G mating of the blocks.

Tusses - bitumen is nasty stuff, carcinogenic and smelly.I will stick with glue thanks!

Steve
 
Been busy over the last couple of weeks so only limited progress on this project. Finally managed to clean up sufficient blocks for the whole room (I hope) and in the end decided that I had to run the blocks through the thicknesser rather than rely on a floor sander - the top surface was just too manky to rely on a sanding belt to clean them up. I have currently run through approx 900 blocks. Lost a few due to tearout and a few more due to edge 'chipping' but these are likely to be usable around the edge where part blocks are needed, so have put these to one side for now. I then got impatient and decided to begin laying blocks!

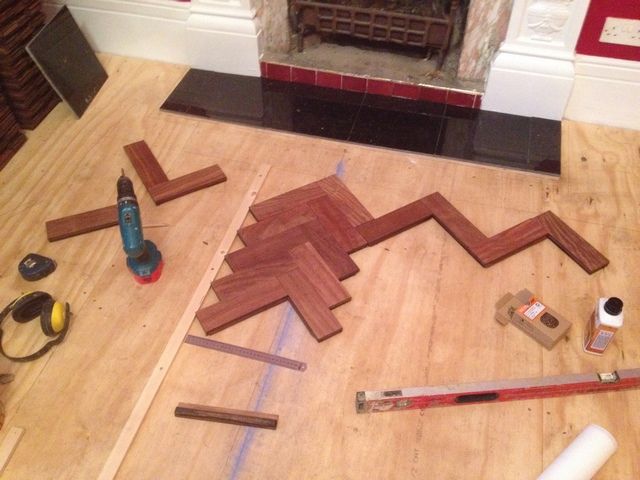
First of all I had to lay a fire hearth area. This revealed that not only was the fireplace not square to the wall, it was not square to the room either. Currently I have cut the hearth tiles but they are not stuck down yet until I know whether I have to tweak their position or not. I could have squared up the hearth to the room, but this looked odd when I laid it out, so had to have the tiles square to the fireplace. This gave me a major problem when starting to lay out the parquet - did I lay it to square to the room (which is almost certainly not square anyway) or square to the fireplace. In the end I laid out both options dry to see how much a discrepancy there was. The chalk line (blue) below is square to the room, the pencil line is square to the fireplace:

parquet_16_zpswsdhc6nw.jpg


parquet_17_zpsd58qtrii.jpg


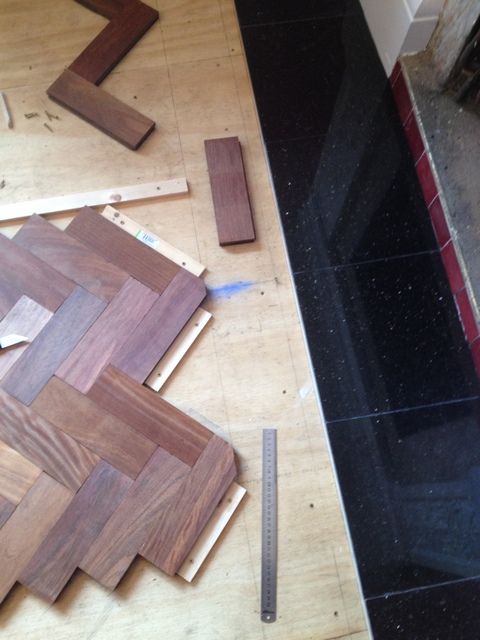
By the other side of the room furthest from the fireplace the discrepancy was approx 8 inches, big enough to be noticeable. The problem with laying out to the room was that the herringbone wouldn't be square to the fireplace. However if I ran it square to the fireplace it would then be out down both sides of the room. I laid it out dry to the fireplace and left it overnight to think about, but this morning decided to go to the room and moved it over to the chalk line. This means cutting the end of the pattern close to the fireplace, but hopefully this will be less noticeable than it being out at the edge of the room - especially as the room edge will be visible from the doorway. As a consequence, the fireplace edge now looks like this:

parquet_23_zpsgt2mqytf.jpg


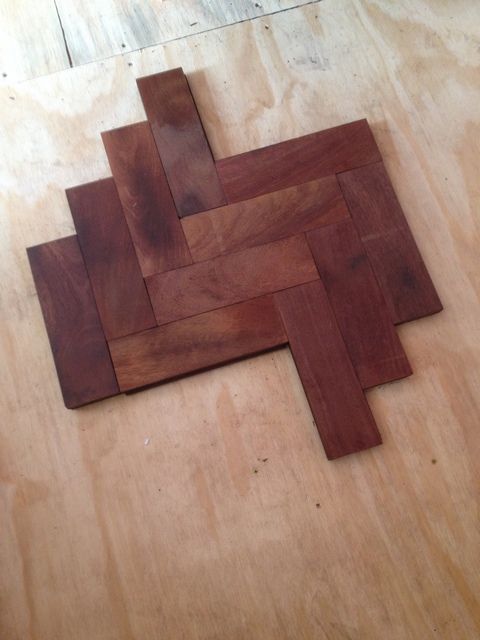
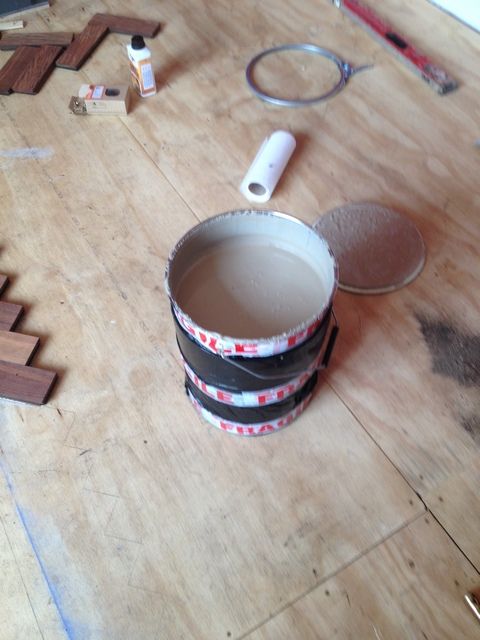
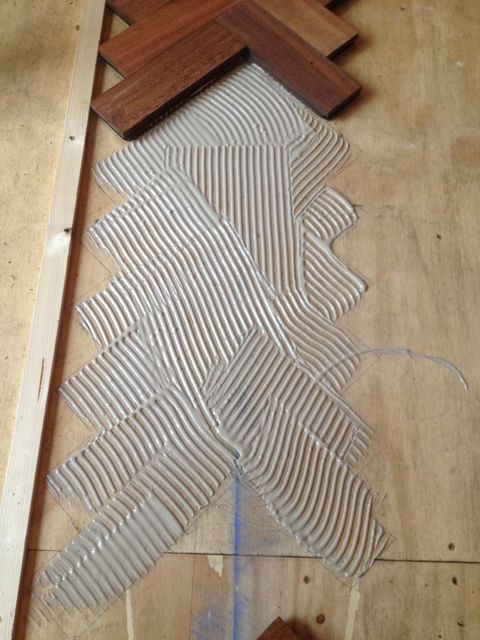
I really hope this was the right decision! Anyway, once that decision was made it was time to stick down the blocks. The Lecol 5500 comes in a metal drum weighting 25kg (approx 55lb) and is a pig to move around, but not as much of a pain as it is to work with - it's like treacle in consistency, and once it has dried for 30 minutes takes on the consistency of chewing gum. It is almost impossible to clean off excess from the floor or tools - it doesn't scrape terribly well at all. I did order a proper spreader with it however, which is a godsend - I was going to use a standard notched trowel I use for tiling but so glad I didn't

parquet_19_zpswbrxzehp.jpg


parquet_20_zps94ltfkqn.jpg


parquet_18_zpsgkmiz6sb.jpg


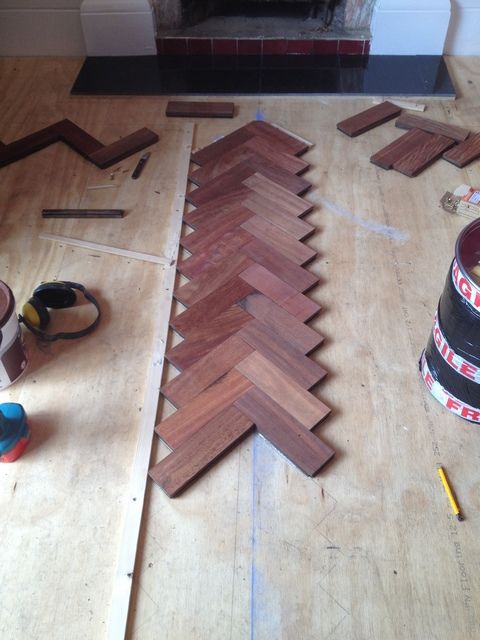
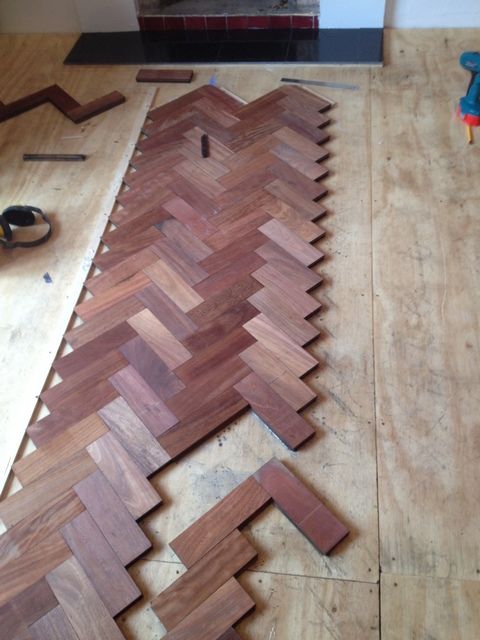
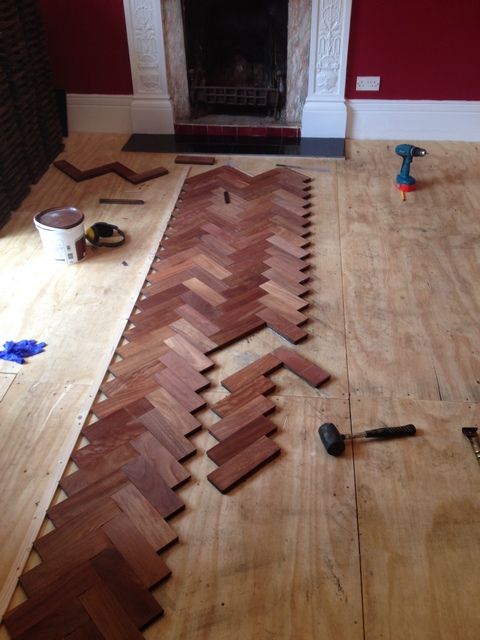
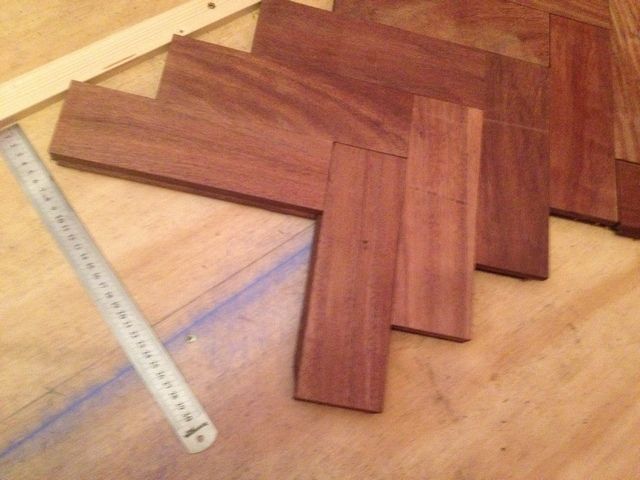
After that it is just a case of spreading and sticking! I found it best to dry fit 15 or so blocks to make sure they went together well (no bitumen left in the grooves to inhibit the tongues engaging properly etc) and then spread adhesive and line up the blocks. It is recommended to do a mid line first then work outwards. YouTube video's show people laying an entire floor in one hit, but I found this impossible - these blocks are not simply able to be placed into position but need a tap or push - doing so then affects the row and knocks previously placed blocks out of line. I tried to stop this with a batten, but in the end I had to lay approx 30 blocks then wait for the adhesive to go off - thus it has taken almost a day to lay a line and a half, but now the mid line is fully fixed it should be faster.

parquet_21_zpsb0p0pkia.jpg


parquet_22_zpsx4m3nexp.jpg


Slow progress, but getting there. Still not sure if these are teak or iroko, but my money is still on iroko.....

Steve
 
Thats looking really great, Steve. I think you made the right decision re the layout.
 
Back
Top